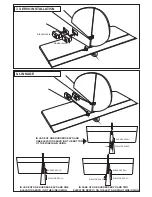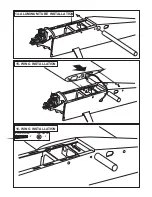
Cut away only the covering
both side.
A B
A B
A B
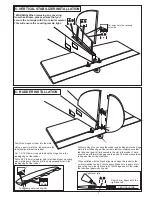
5- VERTICAL STABILIZER INSTALLATION
6- RUDDER INSTALLATION
2.5mm
Cut 1-3/16” (30mm) long slots along the hinge line in the
leading edge of the rudder.
Test-fit the hinges of ruder into the slots.
Using a pencil, mark the rudder where the
tail wheel gear meet the rudder.
Drill a 3/32”(2.5mm) diameter hole in tail wheel gear mounting
slot, marking sure that you drill the hole perpendicular to the
leading edge of the rudder.
Without using glue yet, push the rudder and its hinges into the hinge
slots in the trailing edge of the vertical stabilizer, marking sure that
the tail wheel gear is firmly seated in the slot in the rudder. There
should be a minimal hinge gap and the end of the rudder should not
rub against the vertical stabilizer.
When satisfied with the fit and alignment, hinge the rudder to the
vertical stabilizer, using 5 minute epoxy. Make sure to apply a thin
layer of epoxy to the right and left of both hinges and to the inside
the tail wheel gear mounting slot.
Tail wheel gear mounting slot
Petroleum jelly
A B
Apply 5 min. Epoxy both the
right and left.
VERTICAL STAB.
* WARNING: When removing any covering
from the airframe, please ensure that you
secure the cut edge with CA or similar cement.
This will ensure the covering remain tight.


