49
VOLUME
to a comfortable
level.
2. Turn
SQUELCH
fully
counterclockwise until the
indicator points to
MIN,
then
turn
SQUELCH
clockwise until
the rushing sound stops.
3. To turn off the scanner, turn
VOLUME
counterclockwise to
OFF
.
Ô
Scanning
To begin scanning channels or to
start scanning again after
monitoring a specific channel,
press
SCAN
.
Ô
The scanner scans through all
channels (except those you have
locked out) in the active channel
storage banks (see “Turning
Channel Storage Banks Off and
On” on Page 49 and “Locking Out
Channels or Frequencies” on
Page 67).
Turning Channel Storage
Banks Off and On
To turn off channel storage banks
while scanning, press the bank's
number key so the bank's number
disappears. For example, to turn
off bank 1, press
1
. The scanner
does not scan any of the channels
within the banks you turned off.
To turn on channel storage banks
while scanning, press the number
key until the bank’s number
appears. For example to turn bank
1 on again, press
1
.
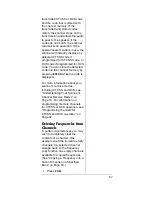
You cannot turn off all channel
storage banks. There must be at
Ô
NOTES
Ô
•
The scanner will not
enter scan mode if
there are no
frequencies stored in
channels, or if all
channels are locked
out in the channel
storage bank(s) that
you are attempting to
scan. In either of
these cases, the
scanner will display
All channels Locked
out!
See
“Programming Your
Scanner” on
Page 30.
•
If SQUELCH is
adjusted so you
always hear a
rushing sound, the
scanner will not scan
properly. Rotate the
squelch control until
the rushing sound
stops.
•
If SQUELCH is
adjusted precisely at
the threshold where
the rushing sound
stops, the radio will
be most sensitive to
very weak signals.
The radio may also
receive unwanted
noise or signals that
are too weak to
understand. Most
users prefer to
position the squelch
control a little bit past
the point of threshold
to avoid receiving
noise or signals that
are too weak to
understand.
•
You must store
frequencies into
channels before the
scanner can scan
them. The scanner
does not scan
through empty
channels.
•
To change the
scanning direction,
press
S
or
T
while
scanning.
Summary of Contents for 20-526
Page 122: ...122 NOTES ...
Page 123: ...123 NOTES ...

