Ø
PLL (Phase –Lock Loop) Controlled Circuitry
– provides accurate and stable channel
selection.
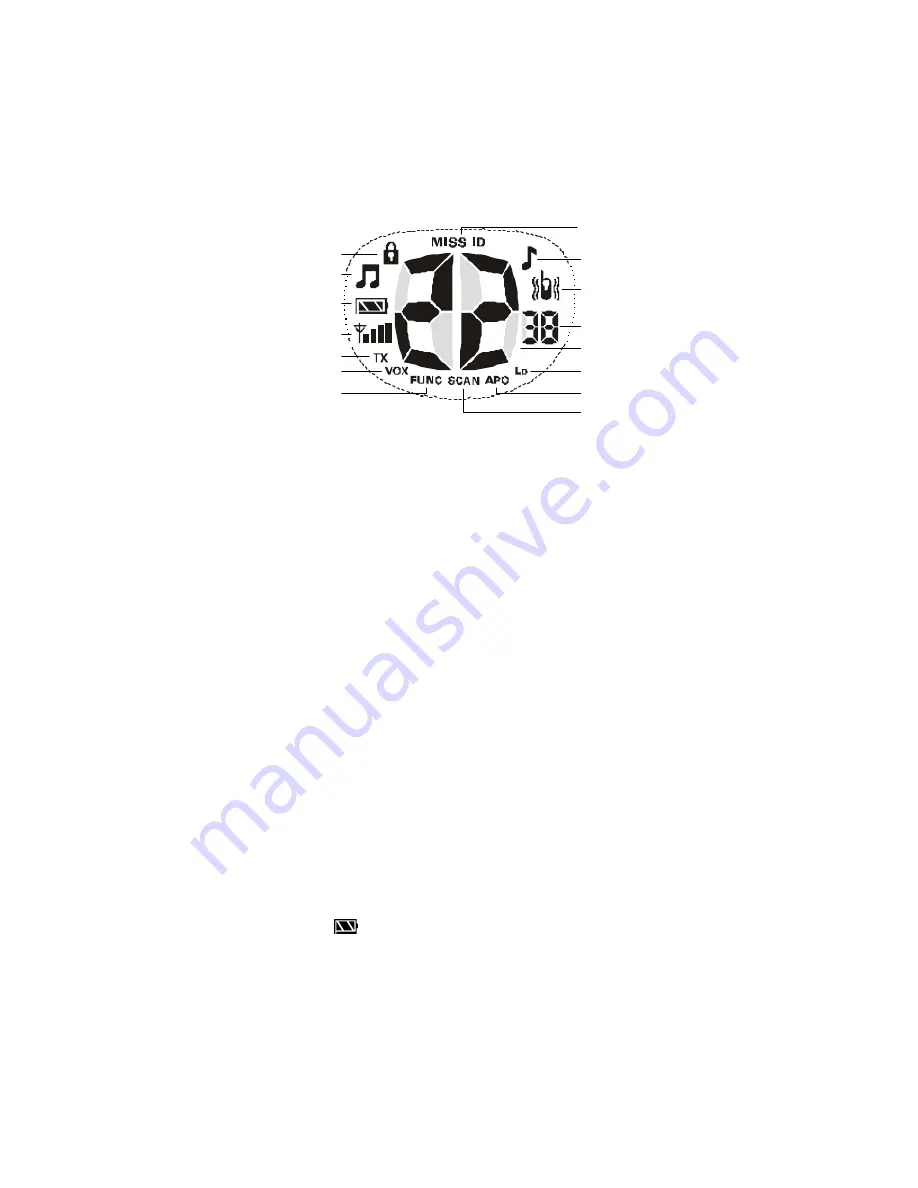
Description of 21-1905 LCD diagram
INSTALLING BATTERIES
Your radio requires four AA alkaline batteries or rechargeable nickel-cadmium (Ni-Cd) / nickel-
metal hydride (Ni-MH) batteries for power. For the best performance and longest life, we
recommend RadioShack batteries.
Cautions:
•
Use only fresh batteries of the required size and recommended type.
•
Do not mix old and new batteries, different types of batteries (alkaline or rechargeable), or
rechargeable batteries of different capacities.
1. Rotate
VOL/OFF
counterclockwise until it clicks to turn off the radio.
2. Pull down the latch on the battery compartment cover, then remove the cover.
3. Slide CHARGE
ON/OFF
inside the battery compartment to
OFF
(for alkaline batteries) or
ON
(for Ni-Cd or Ni-MH rechargeable batteries) when charging the battery through the 6V DC
jack on the button of the radio.
Warning: Never install non-rechargeable batteries when CHARGE ON/OFF is set to ON.
Non-rechargeable batteries can get hot or explode if you try to recharge them.
4. Install four AA batteries according to the polarity symbols (+ and -) marked inside.
5. Replace the cover and push the latch up until it clicks, then rotate VOL/OFF clockwise until it
clicks to turn on the radio.
The battery icon’s segments
display to show how much power remains. When the Battery
bracket flashes, replace alkaline batteries or recharge Ni-Cd or Ni-MH batteries.
Warning:
•
Dispose of old batteries promptly and properly. Do not burn or bury them.
Caution:
•
If you do not plan to use the radio for a month or longer, remove the batteries.
Batteries can leak chemicals that can destroy electronic parts.
Miss ID Indicator
500mW Low Power
Courtesy Tone
Vibrator
CTCSS code Indicator
Channel Indicator
Scan
Automatic Power Off
Transmit
Signal Strength Meter
Battery Level Meter
Key Beep
Keypad Lock
Voice Operated Transmission
Function


