3
PREPARATION
Pre-Tuning the Antenna
Your antenna is preset to use 27.205
MHz (the middle of the CB band) for the
lowest SWR.
If you are using your anten-
na with a CB radio, you do not have to
pre-tune it. See “Assembling and Mount-
ing the Antenna” on Page 3.
Before you assemble and mount the an-
tenna, you must determine the frequen-
cy range you will be using with it.
If you
are not using CB frequencies, you must
either trim the antenna’s top element to
match the range you are using or use an
antenna tuner (not supplied) to electri-
cally trim the antenna.
Caution: To avoid damaging the anten-
na, do not trim the antenna’s middle or
bottom elements.
If you are using your antenna with an
amateur radio and want to trim the an-
tenna’s top element to pre-tune it, follow
these steps.
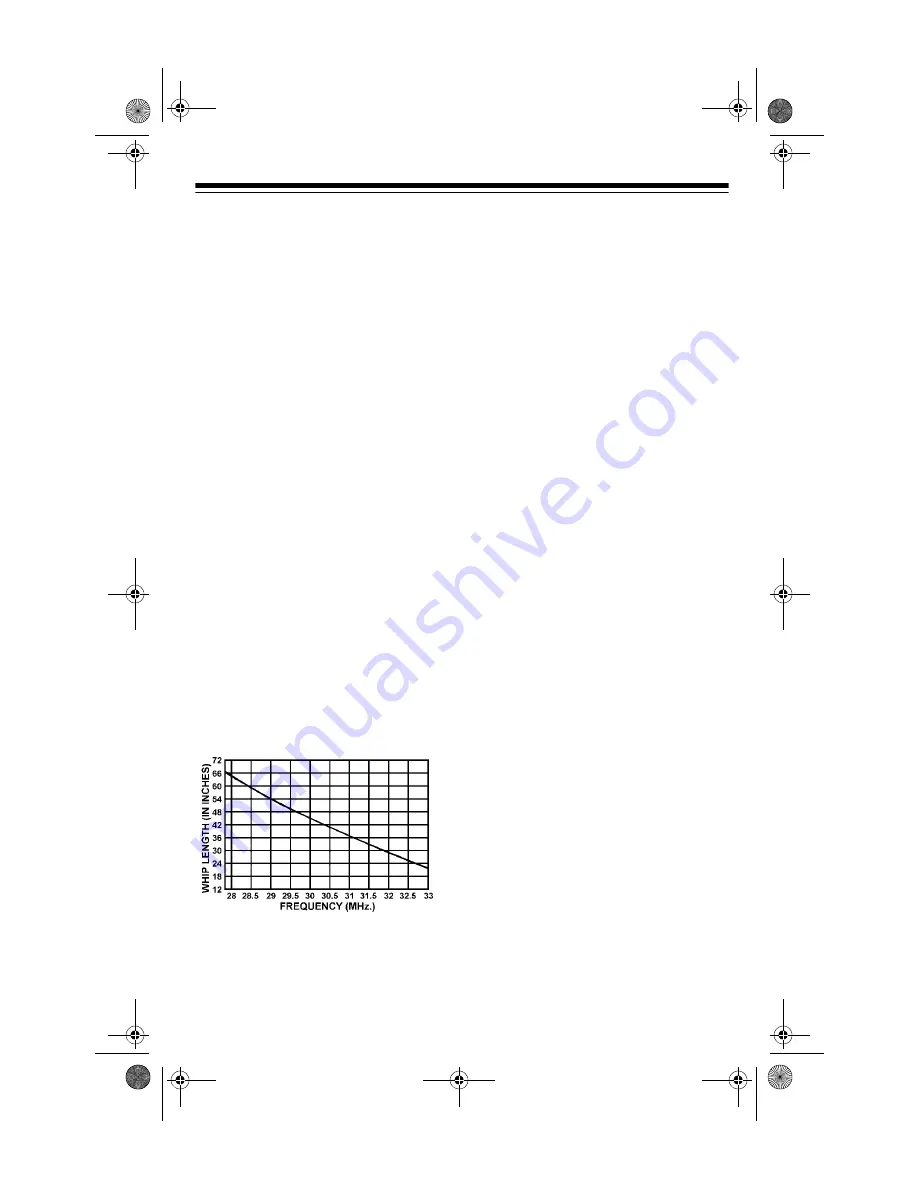
1. Use the following chart to determine
how much you need to trim off of the
top element (if any).
For example, to pre-tune the
antenna to use a frequency of
29.328 MHz, you must cut off
enough of the top element (about 21
inches) to leave it approximately 51
inches in length.
2. Remove the cap from the top of the
top element.
3. Use a tape measure to measure the
length you need to cut off of the top
element, then use a hacksaw to
carefully cut the top element.
4. Replace the cap on the top element.
5. Set the tuning rings on the bottom
element of the antenna to their low-
est position.
Note: If you trim too much off of the top
element or use the antenna for a differ-
ent frequency later, you can order a re-
placement top element from your local
RadioShack store.
If you need to pre-tune the antenna to a
frequency lower than 28 MHz, use an
antenna tuner (not supplied).
Assembling and Mounting
the Antenna
Before you can use the antenna, you
must assemble and mount it then con-
nect it to your radio. You can mount the
antenna outdoors on a vertical, solid ob-
ject such as a TV antenna mast. For the
best results, mount the antenna vertical-
ly as high as possible away from trees or
other obstructions. (Higher frequencies
are noticeably affected by obstructions.)
Important:
• Do not mount the antenna on a
metal surface such as aluminum
siding. This greatly reduces the
antenna’s ability to receive signals.
• Before you assemble the antenna,
prepare the structure that you will
mount it to. RadioShack stores carry
standard TV masts which you can
use to mount the antenna. Make
sure the supplied U-bolts will fit
around whichever mast you choose.
21-869.fm Page 3 Wednesday, October 13, 1999 11:50 AM


