19
M
a
king
M
easure
m
ent
s
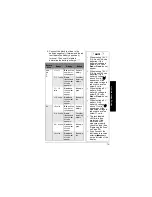
2. Connect the black test lead to the
battery’s negative (
–
) terminal and the red
test lead to the battery’s positive (+)
terminal. Then use this table to
determine the battery’s charge.
Ô
Battery
Size
Range
Display
Action
AAA
AA
C
D
< 1 volt
Bad and the
number of
volts appear.
Replace
battery.
1 – 1.1 volts Good
flashes and
the number
of volts
appears.
Consider
replacing
battery.
1.1 – 1.5
volts
Good and
the number
of volts
appear.
Battery is
good.
> 1.5 volts
Good and
the number
of volts
appear.
Battery is
full.
9V
< 6 volts
Bad and the
number of
volts appear.
Replace
battery.
6 – 6.6 volts Good
flashes and
the number
of volts
appears.
Consider
replacing
battery.
6.6 – 9 volts Good and
the number
of volts
appear.
Battery is
good.
> 9 volts
Good and
the number
of volts
appear.
Battery is
full.
Ô
NOTE
Ô
•
When testing 1.5V C,
D, AA and AAA size
batteries, if the
battery’s voltage is
below 0.010 volts,
Bad or Good do not
appear.
•
When testing 1.5V C,
D, AA and AAA size
batteries, if the
battery’s voltage is
above 2 volts, .
OF
appears until the
measured voltage is
reduced to a value
below 2 volts.
•
When testing a 9V
battery, if the
battery’s voltage is
below 0.10 volts,
Bad or Good do not
appear.
•
When testing a 9V
battery, if the
battery’s voltage is
above 11 volts, .
OF
appears until the
measured voltage is
reduced to a value
below 11 volts.
•
The jack labeled
+V.
Ω.
mA
is fuse-
protected. If the
meter does not
measure properly,
check the fuse (see
“Replacing the Fuse”
on Page 20).
•
If you connect the
test leads in reverse
polarity,
–
appears
on the left side of the
display.


