O
per
at
ion
8
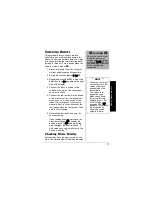
Your meter automatically enters the
auto range mode when you turn it on.
In the auto range mode,
appears and the meter automatically
selects the next higher or lower range
(if available) when the measurement
causes the display to overflow or
underflow.
Ô
1.
2. To select manual range mode, press
RANGE
while the meter is in auto-range
mode.
disappears.
3. Repeatedly press
RANGE
to select
different ranges. The decimal point
shifts each time you press
RANGE
.
4. Hold down
RANGE
for about 2 seconds
to exit manual range mode and return
to its auto-range mode.
5. Set the meter to the different
measurement ranges. The unit of
measure that appears on the display
shows the range that the meter is
currently set to.
For example,
mV
appears in the 400
mV range. Also, note the position of the
decimal. For example, if
0.000V
appears, the meter is set to measure
less than 4 volts. If
000 V
appears, the
meter is set to measure up to 600 volts.
AUTO
Ô
NOTE
Ô
•
Overflow is when the
meter tries to display
4001 or more units.
Underflow is when
the meter tries to
display 379 or fewer
units.
•
If nothing appears on
the display, press
any button to turn on
the meter.
•
The display might
show a “phantom”
reading in some DC
and AC voltage
ranges when the test
leads are not
connected to a
circuit. This is
normal. The high
input sensitivity
produces a
“wandering” effect.
When you connect
the test leads to a
circuit, a real
measurement
appears.
AUTO


