background image

Please read this Owner’s Manual before installing,
setting up and using your new phone.

www.radioshack.com

43-140

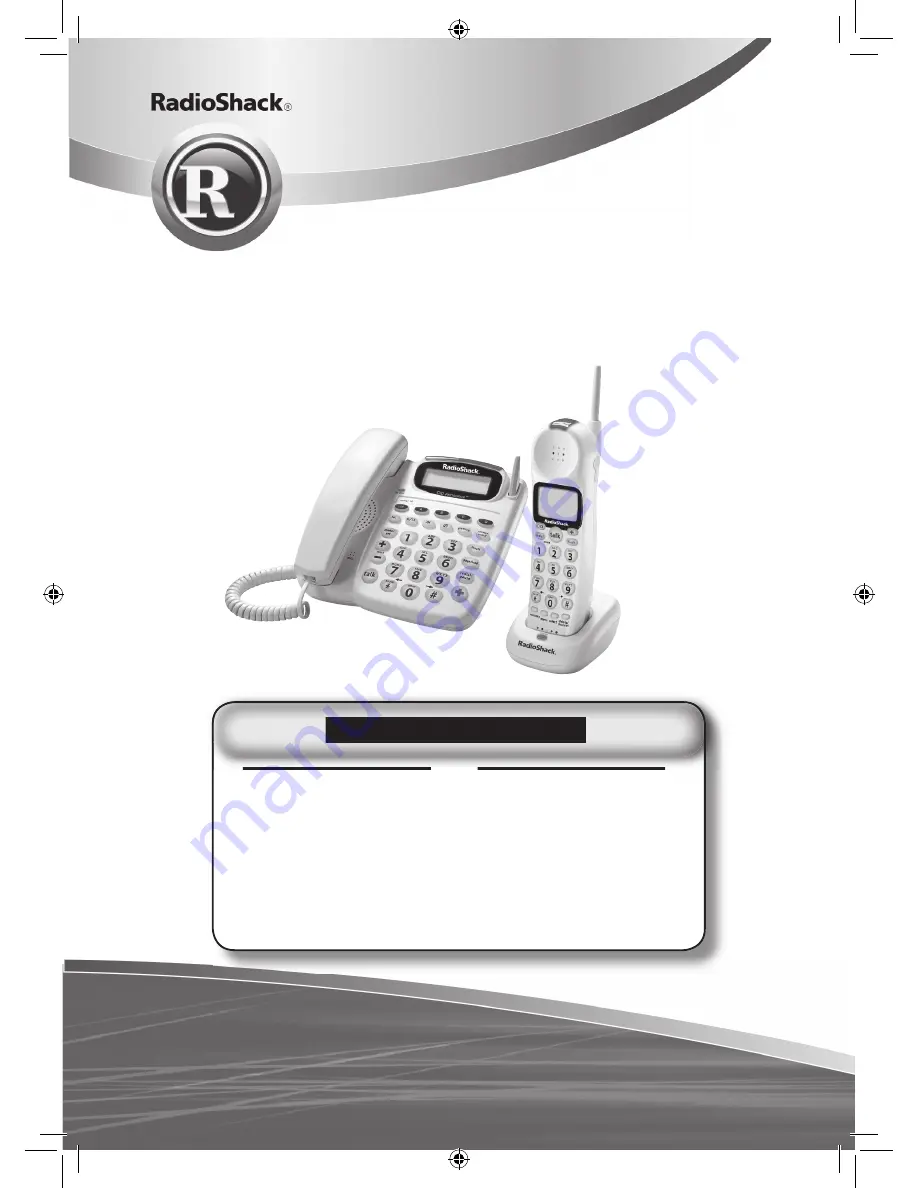
Big Button

Corded/5.8 GHz Cordless Phone 

with Answering System and Caller ID

Base (1) (Wall Mount 

Adapter is attached.)

Corded Handset (1)

Handset Cord (1)

Charger (1)

Cordless Handset (1)

AC Adapters (2)

Ni-Cd Battery Pack (1) 

(Pre-installed)

Modular Cord (1)

Belt Clip (1)

Owner’s Manual (1)

Quick Start Guide (1)

UC044ZH_43-140_OM5.indd   1

12/18/2006   3:33:47 PM

Summary of Contents for 43-140

Page 1: ...e with Answering System and Caller ID Base 1 Wall Mount Adapter is attached Corded Handset 1 Handset Cord 1 Charger 1 Cordless Handset 1 AC Adapters 2 Ni Cd Battery Pack 1 Pre installed Modular Cord 1 Belt Clip 1 Owner s Manual 1 Quick Start Guide 1 Base 1 Wall Mount Ni Cd Battery Pack 1 What s Included UC044ZH_43 140_OM5 indd 1 12 18 2006 3 33 47 PM ...

Page 2: ...n 16 Selecting a Location 16 On a Desk Top 17 On a Wall Plate or Wall 18 Adjusting the Visual Ringer Brightness 19 Turning Talking Caller ID On Off 20 Installing the Charger 20 Connecting Charging the Battery Pack 21 Using the Interface 23 Using the Base Menus 23 Using the Handset Menus 23 Base Setup 24 Changing the Dial Mode 24 UC044ZH_43 140_OM5 indd 2 12 18 2006 3 33 47 PM ...

Page 3: ...ing from the Handset 27 Emergency Dialing From the Base Cordless Handset 28 One touch Speed Dialing from the Base 29 Speed Dialing from the Cordless Handset 30 Storing Names and Numbers for Speed Dialing 30 Storing Caller ID Information to Speed Dial Locations 33 Using Your Phone 34 During a Power Failure 34 Making and Receiving Calls 35 Redialing the Last Number Dialed 39 Call Waiting 40 Adjustin...

Page 4: ...alking Caller ID Base Only 48 Viewing Caller ID Information 48 Deleting Information from the Caller ID List 49 Setting Up the Answering Machine 50 Features 50 Selecting a Language 50 Setting the Record Time or Announce Only 51 Activating Call Screening 51 Setting the Number of Rings 51 Activating the Message Alert 52 Setting Your Greeting 52 Selecting Your Greeting 53 Setting a Security Code or Pe...

Page 5: ...55 Screening Calls 57 Remotely Operating Your Answering Machine 57 Additional Information 59 Installing the Belt Clip 59 Installing the Optional Headset 59 Troubleshooting 60 Care 63 Service and Repair 63 Glossary 64 Index 65 Limited One Year Warranty 68 UC044ZH_43 140_OM5 indd 5 12 18 2006 3 33 48 PM ...

Page 6: ...e Call Waiting Caller ID lets you answer a call even when you are on the phone and see who s calling before you answer Talking Caller ID The Caller ID that Talks The base will announce the name of incoming callers if you subscribe to Caller ID service Ten Number Memory Dialing Stores up to ten numbers in memory for easy dialing Auto Talk Lets you answer a call by simply lifting the handset from th...

Page 7: ...le in your area and the date and time of the call as provided by your local phone company to Caller ID service subscribers If you subscribe to Call Waiting with Caller ID the phone shows you the incoming caller information even when you are already talking on the phone Corded handset does not need AC power to operate It allows you to make receive calls if there is an AC power failure Cordless phon...

Page 8: ...c key telephone systems The REN is used to determine the number of devices that may be connected to a telephone line Excessive RENs on a telephone line may result in the devices not ringing in response to an incoming call In most but not all areas the sum of RENs should not exceed five 5 0 To be certain of the number of devices that may be connected to a line as determined by the total RENs contac...

Page 9: ...1 This device may not cause harmful interference and 2 This device must accept any interference received including interference that may cause undesired operation Privacy of communications may not be ensured when using this phone Surge Protection Your telephone has built in protection circuits to reduce the risk of damage from surges in telephone line and power line current These protection circui...

Page 10: ...in a wet basement or near a swimming pool Avoid using a telephone other than a cordless type during an electrical storm There may be a remote risk of electric shock from lightning Do not use the telephone to report a gas leak in the vicinity of the leak Use only the power cord and batteries indicated in this manual Do not dispose of batteries in a fire They may explode Check with local codes for p...

Page 11: ...ices through your local phone company Where Caller ID is offered one or more options are generally available caller s number only caller s name only caller s name and number If you subscribe to Call Waiting ID and Caller ID the system can show you the incoming caller information even when you are already talking on the phone UC044ZH_43 140_OM5 indd 11 12 18 2006 3 33 49 PM ...

Page 12: ...touch speed dial D key 9 Corded base handset 10 Base speaker 11 key play stop 12 key repeat rewind 13 key skip forward 14 Curl cord 15 key delete 16 ON OFF key answer on off light 17 greet key 18 flash key 19 page hold key 20 redial pause key 21 Base Emergency key 22 menu set key 23 SELECT key SELECT key 24 TALK key speaker light 25 TONE key 26 key 27 Microphone UC044ZH_43 140_OM5 indd 12 12 18 20...

Page 13: ...nd Rear View 31 visual ringer hi lo off switch 32 TALKING CALLER ID on off switch 33 DC IN 9V jack 34 phone jack 35 Base antenna 36 Wall mount adapter 28 ringer tone button 29 ringer on off switch 30 Curl cord jack UC044ZH_43 140_OM5 indd 13 12 18 2006 3 33 50 PM ...

Page 14: ...er volume down 5 Handset battery compartment 6 Handset visual ringer 7 Handset earpiece 8 Handset display 9 CID key 10 redial pause key 11 TONE key 12 mem key memory 13 menu key 14 talk key 15 Handset Emergency key 16 flash key 17 key pound 18 del ch key delete channel 19 select int com key select intercom Cordless Handset UC044ZH_43 140_OM5 indd 14 12 18 2006 3 33 50 PM ...

Page 15: ...ng Contacts 2 CHARGE LED 3 DC IN 9V jack Charger 20 Handset microphone and ringer speaker 21 Handset charging contacts 22 Headset jack 23 Beltclip hole 22 23 14 16 15 17 18 21 19 20 UC044ZH_43 140_OM5 indd 15 12 18 2006 3 33 50 PM ...

Page 16: ...ors away from other cordless phones NOTES If your home has specially wired alarm equipment connected to the telephone line be sure that installing the system does not disable your alarm equipment If you have questions about what will disable alarm equipment contact your telephone company or a qualified installer The base s location affects the handset s range If you have a choice of several locati...

Page 17: ...apter cord and modular cord through the slot as shown 5 Plug the other end of the modular cord into a modular phone line jack 6 Plug the adapter into a standard AC outlet CAUTION You must use a Class 2 power source that supplies 9V DC and delivers at least 500 mA for the base 210 mA for the charger Its center tip must be set to positive and its plug must fit the phone s DC IN 9V jack The supplied ...

Page 18: ...he upper slots 3 Plug one end of the supplied modular cord into the PHONE jack on the back of the base 4 Plug the supplied AC adapter s barrel plug into the DC IN 9V jack on the back of the base 5 Route the adapter and modular cords through the grooves on the bracket 6 Plug the adapter into a standard AC outlet And plug the modular cord s other end into a modular phone line jack 7 For a wall plate...

Page 19: ...he top of the cordless handset These visual ringers will flash during incoming calls so if you are in a noisy work environment you will be able to see when the phone is ringing The phone comes with a switch for base visual ringer control so you can turn the visual ringers off when you do not want the base to flash brightly during incoming calls The VISUAL RINGER HI LO OFF switch allows you to set ...

Page 20: ...g caller names when that information is available for that call If a private caller rings you the announcement will say Private Caller Installing the Charger You can power the charger using the supplied 9V 210mA AC adapter 1 Insert the supplied AC adapter s barrel plug into the DC IN 9V jack on the bottom of the charger 2 Route the cord through the strain relief slot and plug the adapter into a st...

Page 21: ...legal in your area Please call 1 800 THE SHACK 1 800 843 7422 for information on Ni Cd battery recycling and disposal bans restrictions in your area RadioShack s involvement in this program is part of the company s commitment to preserving our environment and conserving our natural resources 2 Remove the existing battery and unplug the connector from the jack 3 Plug the battery pack s connector in...

Page 22: ...ppens you cannot make a call from the cordless handset until you recharge the battery pack The supplied battery pack should last about a year If the battery pack does not hold a charge for more than two hours after an overnight charge replace it with a new 3 6V 600 mAh battery pack with a connector that fits the socket in the battery compartment You can order a replacement battery pack through you...

Page 23: ...eturn to standby press play stop on the base If you do not press a key within 30 seconds the phone will time out and exit the menu When setting Day and Time the time out period is extended to two minutes Using the Handset Menus Press menu on the cordless handset to access the main menu Use RING VOL or RING VOL to scroll through the options Press select int com on the cordless handset to make a sel...

Page 24: ...n the base 2 Press SELECT to move the pointer to select DIAL MODE and then press MENU SET 3 Press SELECT or SELECT to select TONE or PULSE the initial setting is TONE 4 Press MENU SET You will hear a confirmation tone Selecting a Language for your Answering Machine and Base Display You can set the language of your base menu display and answering machine announcements to English French or Spanish 1...

Page 25: ...ECT or SELECT to choose AM or PM and then press MENU SET You will hear a confirmation tone NOTE If you make a mistake while entering the hour or minute use delete to erase the wrong number and then enter the correct number Adjusting the Base Display LCD Contrast You can adjust the contrast or brightness of the text that appears on your base display Choose one of ten levels for optimum viewing 1 Pr...

Page 26: ...s handset If the transfer is successful you will hear a confirmation tone from the base and cordless handset Otherwise AREA CODE SETTING FAILED appears on the display and an error tone sounds You will have to start over with the procedure you are performing NOTE If the area code has already been stored in memory the stored area code will be displayed To change it use delete and the number keys to ...

Page 27: ...r You do not have to press any keys to answer the call 1 Press MENU on the cordless handset 2 Press select int com to turn Auto Talk on 3 Press MENU to complete the setting The handset returns to standby Checking the Area Code Setting from the Handset If you have set a default area code in your base phone your cordless handset will default to the same area code setting You can only check the Area ...

Page 28: ...lect DELETE NUMBER to erase this entry or select GO BACK to return to the previous screen 2 Store the number by following step 6 under Storing Names and Numbers for Speed Dialing on page 32 3 Press MENU SET on the base or select int com on the handset You will hear a confirmation tone and NUMBER STORED appears Memory storage is complete NOTES When editing the Emergency Dial number you must press a...

Page 29: ...entry or select GO BACK to return to the previous screen 2 Store the number by following step 6 under Storing Names and Numbers for Speed Dialing on page 32 3 Press MENU SET on the base You will hear a confirmation tone and NUMBER STORED appears Memory storage is complete NOTES When editing these Speed Dial numbers you must press a key within 30 seconds or the phone will return to standby The One ...

Page 30: ...com Or you can save and store prescription drug information for fast and easy reordering with your pharmacy NOTE When editing a Speed Dial you must press a key within 30 seconds or the phone will return to standby Storing Names and Numbers for Speed Dialing 1 With the phone in standby press MEM 2 Enter 0 9 to select the speed dial number where you would like to store this entry You can also scroll...

Page 31: ... keys to select the desired characters Each time you press a numeric key the displayed character appears in the following order Upper case letters first lower case letters next and finally the number corresponding to the key For example to enter Movies 1 Press 6 once to enter M Then press to move the cursor to the right 2 Press 6 six times to enter o 3 Press 8 six times to enter v 4 Press 4 six ti...

Page 32: ...u need the phone to pause during the dialing sequence press redial pause to insert a two second pause between the numbers You can enter multiple pauses to increase the delay Each pause counts as a digit The display shows a P for every pause NOTE If the next character uses the same number key you must press to move the cursor over Otherwise the next time you press the number key it changes the char...

Page 33: ...one in standby press CID Select the phone number to be stored from the Caller ID list by pressing RING VOL or RING VOL 2 Press MEM 3 Enter a number 0 9 or press RING VOL or RING VOL to select the memory location to be stored 4 Press select int com You will hear a confirmation tone and the number is stored in memory The display returns to the Caller ID data NOTE If a message has already been stored...

Page 34: ...wer failure Making and receiving calls with the base corded handset Using your Emergency Dial key after picking up the base corded handset Using your one touch speed dial A D keys after picking up the base corded handset Adjusting the volume Base corded handset only Call Waiting Base corded handset only Redialing the last number dialed Base corded handset only All other features are disabled durin...

Page 35: ...r the dial tone 3 Dial the number OR 1 Dial the number 2 Press talk From the base corded handset 1 Pick up the corded handset 2 Listen for the dial tone 3 Dial the number OR 1 Dial the number 2 Pick up the corded handset The base microphone is located under the base Position yourself as close to the base as possible when you use the base speakerphone To insert a two second pause in the dialing seq...

Page 36: ...y key in the twelve number keypad From the base speakerphone Press talk From the base corded handset Pick up the corded handset The base microphone is located under the base Position yourself as close to the base as possible when you use the base speakerphone Hanging Up From the cordless handset Press talk or return the handset to the charger From the base speakerphone Press talk From the base cor...

Page 37: ...he Handset Emergency Dial or Speed Dial Locations Simply press the Emergency Dial key on the cordless handset and your phone will automatically dial the number To cancel press talk on the cordless handset To dial one of the speed dial numbers simply follow these steps 1 With the phone in standby press MEM The handset displays your programmed speed dial numbers 2 Enter the number 0 9 or press RING ...

Page 38: ...ID 2 Select the phone number that you want to dial by pressing SELECT or SELECT on the base or RING VOL or RING VOL on the handset 3 To have the phone dial a 1 before the displayed Caller ID number for placing a long distance call press 1 To have the phone dial the stored area code before the displayed Caller ID number press 3 4 Press talk on the base or handset or pick up the corded handset from ...

Page 39: ...Last Number Dialed From the cordless handset 1 Pick up the handset from the charger 2 Press talk 3 Listen for the dial tone 4 Press redial pause OR 1 Pick up the handset from the charger 2 Press redial pause 3 Press talk From the base speakerphone 1 Press talk 2 Listen for the dial tone 3 Press redial pause OR 1 Press redial pause 2 Press talk From the base corded handset 1 Pick up the corded hand...

Page 40: ...ompany to receive Call Waiting service Adjusting the Ringer Earpiece and Speaker Volume Adjusting the Base Ringer Ringer on off The ringer on off switch allows you to set the base ringer on or off If you set the switch to off the base ringer will be silent Ringer tone Press the ringer tone button in standby to select one of seven ring tones Ringer volume The base has ten settings for ringer volume...

Page 41: ...er the telephone call has ended Cordless Handset You can select the earpiece volume from among four volume levels To adjust the earpiece volume of cordless handset while on a call press RING VOL louder or RING VOL softer This setting will remain in effect after the telephone call has ended Temporarily Muting the Base Ringer To mute the ring tone temporarily for the base when the phone is ringing p...

Page 42: ... ringer on the cordless handset flashes and the cordless handset will beep for 60 seconds To cancel a find handset page press page hold on the base Paging is also canceled when the phone receives an incoming call Placing a Call on Hold from the Base 1 During a call from the base press page hold The call will be put on hold 2 To return to the call press page hold again pick up the corded handset or...

Page 43: ...ordless handset press talk on the base From the base corded handset During a call from the cordless handset pick up the corded base handset Exiting the conference call From the cordless handset Press talk on the handset or return the handset to the charger The base will still be connected to the call From the base speakerphone Press talk on the base The cordless handset will still be connected to ...

Page 44: ...by From the cordless handset 1 Press select int com 2 The base will be paged An intercom tone sounds To cancel the Page Press select int com or return the handset to the charger From the base speakerphone 1 Press page hold 2 The handset will be paged An intercom tone sounds To cancel the Page Press page hold or talk From the base corded handset 1 Press page hold 2 The handset will be paged An inte...

Page 45: ...s and hold page hold 2 The call will automatically be placed on hold and the paging tone sounds To cancel the Page Press page hold Answering an Intercom Page On the cordless handset 1 Pick up the handset from the charger If Auto Talk is on the phone answers automatically when you pick up the handset from the charger 2 Press select int com or talk OR If the handset is off the charger press select i...

Page 46: ...sation the station transferring the call may now hang up the other station returns to the call and the call is transferred Tone Dialing Switch Over If your telephone company requires pulse dialing you can switch to tone dialing after the call connects This feature is useful when you need tone dialing to use automated menu systems such as telephone bank tellers telephone prescription refills custom...

Page 47: ... dial locations Today US telephone carriers only support the transmission of 15 characters for the Caller ID name therefore if someone calls you with a name longer than 15 characters it will be common for it to be truncated to 15 characters only Also you may not receive your caller ID information if you answer the call before the second ring When you receive a call from a PBX Private Branch eXchan...

Page 48: ...ges 2 To view the Caller ID information in historical order from new to old or from old to new use RING VOL on the cordless handset SELECT on the base to scroll through the data from the latest to the earliest or RING VOL on the cordless handset SELECT on the base to scroll back through the messages 3 To finish viewing the CID information press CID While viewing Caller ID information from your CID...

Page 49: ...CT on the base 3 Press del ch on the cordless handset delete on the base 4 Press RING VOL on the cordless handset SELECT on the base to select YES and then press select int com on the cordless handset menu set on the base You will hear a confirmation tone To Delete the entire Caller ID List 1 With the phone in standby press CID 2 Press del ch on the cordless handset delete on the base 3 Press RING...

Page 50: ...panish or French Time and Day Announcement Remote Message Retrieval Toll Saver Message Alert NOTES For your convenience voice prompts will guide you through the menus Press play stop on the base to return to standby If you do not press a key within 30 seconds the phone will time out and exit the menu Selecting a Language You can set the language of your base menu display and answering machine anno...

Page 51: ...confirmation tone Activating Call Screening Your phone allows you to listen to callers leaving you a message This feature can be turned on or off with the following steps 1 Press menu set on the base 2 Press SELECT to move the pointer to select CALL SCREENING and then press menu set 3 Press SELECT or SELECT to select ON or OFF 4 Press menu set You will hear a confirmation tone Setting the Number o...

Page 52: ...SELECT to select ON or OFF 4 Press menu set You will hear a confirmation tone To quickly turn off the Message Alert tone press any key on the base unit the tone will automatically quiet until you receive another new message Setting Your Greeting When you receive a call the answering machine automatically plays either the pre recorded message or your own greeting Your answering machine comes with t...

Page 53: ...ack for you NOTES Position yourself as close to the base as possible and speak clearly when recording your greeting If you make an outside call or a call is received during the new greeting recording the operation is canceled The greeting must be more than two seconds long or it will not be recorded To delete the personal greeting press delete while the message is playing The system announces Gree...

Page 54: ...t Security or PIN code 01 99 using the number keypad To change the number use delete to backspace 4 Press menu set You will hear a confirmation tone Using Your Answering Machine The message counter on the base display will show the number of messages you have waiting If NEW appears in the base display and flashes you have new messages waiting that you have not yet listened to The answering machine...

Page 55: ...ing System is off 3 The answer on off light will no longer be illuminated NOTE When the answering machine is full FL appears on the base display You should delete some messages so that the system can record new messages Reviewing Messages The base display indicates the number of messages you have waiting When you have new messages the answer on off light on the base will flash and NEW will appear ...

Page 56: ...t message Press and hold skip forward to fast forward through the current message Deleting a message While a message is playing press delete The message is permanently deleted Deleting all messages While the phone is in standby press delete When the system asks you to confirm press delete again All messages are permanently deleted Ending the message review Press play stop at any time to stop the m...

Page 57: ...ting Your Answering Machine You can access your answering machine while you are away from home to check play delete messages or even record a new greeting or turn your answering machine on and off Once you enter the remote access menu you must enter a command within 15 seconds or the system automatically hangs up and returns to standby To remotely operate your answering machine from any touch tone...

Page 58: ...ommand it starts the recording automatically If you want to stop the recording enter the command again 5 After all of the voice prompts have been played you will hear intermittent beeps indicating that the system is in the command waiting mode You may enter another command at this time from the chart 6 When you are finished hang up to exit The system automatically returns to standby NOTES If you e...

Page 59: ...RadioShack store for a suitable headset To connect the headset open the rubber cover on the side of the handset Then insert the headset s plug into the jack When you finish using the headset disconnect it from the handset and close the rubber cover to protect the jack NOTES If you place the handset on the charger to recharge it while the headset is connected be sure the handset seats properly You ...

Page 60: ... away from metal objects or appliances and try again Press DEL CH during a call to help eliminate background noise Make sure that the cordless handset is not too far from the base Can t make or receive calls Check both ends of the telephone line cord Make sure the AC adapter is plugged into the base and wall outlet Disconnect the AC adapter for a few minutes Then reconnect it Make sure that the co...

Page 61: ...se to another location or turn off the source of interference The Caller ID does not display The call was answered before the second ring The call was placed through a switchboard Your Caller ID service may not be active contact your local telephone service provider The answering machine does not work Make sure the AC adapter is plugged into a wall outlet Make sure the answering machine is turned ...

Page 62: ...ne phone you re using can transmit the tone for at least two seconds If it cannot you may have to use another phone to access your phone Talking Caller ID feature is not announcing new incoming calls Check to make sure the TALKING CALLER ID ON OFF switch on the back of the base is set to ON Check your base speaker volume to ensure it is loud enough to hear the Talking Caller ID feature If you stil...

Page 63: ...ce and Repair If your phone is not performing as it should take it to your local RadioShack store for assistance To locate your nearest RadioShack store use the store locator feature on RadioShack s website www radioshack com or call 1 800 The Shack 843 7422 and follow the menu options Modifying or tampering with the phone s internal components can cause a malfunction and might invalidate its warr...

Page 64: ...ncoming caller information while on another call Corded Handset on the Base A handset connected to the base It can make and receive calls during a power failure Emergency Dial One touch speed dial key for your most important or most frequently called number Handset A cordless handset that can be placed anywhere in your home or office where AC power is available Standby The handset or the base is n...

Page 65: ...aking a call 38 Storing a record in the memory dialing 33 Viewing records 48 Call waiting 40 Channel 42 Conferencing 43 Controls Functions 12 D Day and time 25 Dial mode 24 E Earpiece volume 41 Emergency dial 28 37 F FCC statement 8 Finding the lost handset 42 G Greeting 52 Choosing 53 Recording 53 H Hanging up 36 Headset Optional 59 Hold Base 42 I Installation 16 Intercom 44 L Language 24 Answeri...

Page 66: ... 51 57 Service and repair 63 Setting menu Answering machine 50 Base 24 Handset 27 Speaker volume Base 41 Speed dial memory Making a call 37 One touch speed dial Base 29 Storing a caller ID record 33 Storing new entry 30 T Talking Caller ID 20 48 Tone dialing switch over 46 Transferring a call 46 Traveling out of range 42 Troubleshooting 60 V Visual ringer 19 Volume control Base 40 41 Handset 40 41...

Page 67: ...Memo 67 UC044ZH_43 140_OM5 indd 67 12 18 2006 3 34 08 PM ...

Page 68: ...event of a product defect during the warranty period take the product and the RadioShack sales receipt as proof of purchase date to any RadioShack store RadioShack will at its option unless otherwise provided by law a correct the defect by product repair without charge for parts and labor b replace the product with one of the same or similar design or c refund the purchase price All replaced parts...

Reviews: