6
Preparation
Cautions:
You must use a Class 2
power source that supplies
9V DC and delivers at least
200 mA. Its center tip must be set to
positive and its plug must fit the tele-
phone's
DC 9V
jack. The supplied
adapter meets these specifications.
Using an adapter that does not meet
these specifications could damage
the telephone or the adapter.
• Always connect the AC adapter to
the telephone before you connect it
to AC power. When you finish, dis-
connect the adapter from AC power
before you disconnect it from the
telephone.
Plug the barrel plug of the supplied
adapter into the
DC 9V
jack on the back
of the telephone. Plug the other end into
the AC outlet.
SETTING THE RINGER
If you do not want to hear the phone
ring, set
RINGER
to
OFF
. You can still
make calls with the ringer off, and you
can answer calls if you hear another
phone on the same phone line ring.
If you want to hear the phone ring, set
RINGER
to the desired volume (
HI
or
LO
).
SETTING THE DIALING
MODE
Set
T/P
(Tone/Pulse) for the type of ser-
vice you have. If you are not sure which
type you have, do this simple test.
1. Set
T/P
to
T
. Lift the handset and lis-
ten for a dial tone.
2. Press any number except
0
. If your
phone requires that you dial an
access code (9, for example) before
you dial an outside number, do not
press the access code number
either.
3. If the dial tone stops, you have
touch-tone service. Leave
T/P
set to
T
.
If the dial tone continues, you have
pulse service. Set
T/P
to
P
.
SETTING THE VOLUME
Slide
RECEIVER VOL
to
LO
(low),
MED
(medium), or
HI
(high) as desired.
Slide
SPEAKER VOL
to set the volume
as desired.
!
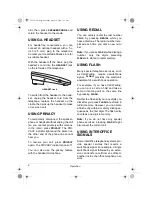
DC 9V Jack
SPEAKER VOL
RECEIVER VOL
T/P
RINGER
43-3601.fm Page 6 Monday, April 10, 2000 5:53 PM


