background image

6

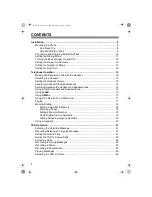
CONTENTS

Installation ...............................................................................................................  8

Mounting the Phone  ...........................................................................................  8

On a Desk Top  .............................................................................................  8
On a Wall Plate or Wall  ................................................................................  9

Connecting and Charging the Battery Pack  .....................................................  10
Setting the Dialing Mode  ..................................................................................  11
Turning the Base’s Ringer On and Off ..............................................................  12
Setting the Ringer Tone/Volume  .......................................................................  12
Setting the Number of Rings  ............................................................................  13
Setting the Day/Time  ........................................................................................  13

Telephone Operation  ............................................................................................  15

Making and Receiving Calls with the Handset  .................................................  15
Selecting the Channel  ...................................................................................... 15
Setting the Handset Volume  .............................................................................  15
Answering Calls with the Speakerphone  ..........................................................  15
Switching Between the Handset and Speakerphone  .......................................  16
Using Both the Handset and Speakerphone  ....................................................  16
Using 

FLASH

 .....................................................................................................  16

Using 

REDIAL

 ................................................................................................... 17

Using Tone Services on a Pulse Line  ...............................................................  17
Paging ..............................................................................................................  17
Memory Dialing .................................................................................................  18

Storing a Number in Memory  .....................................................................  18
Entering a Pause  ....................................................................................... 19
Dialing a Memory Number  .........................................................................  19
Chain-Dialing Service Numbers  .................................................................  19
Testing Stored Emergency Numbers  .........................................................  19

Using a Headset  ...............................................................................................  19

TAD Operation  .......................................................................................................  21

Selecting the Outgoing Message ......................................................................  21
Recording/Deleting an Outgoing Message .......................................................  21
Setting the Record Time  ...................................................................................  21
Setting the TAD to Answer Calls  ......................................................................  22
Screening Calls  ................................................................................................  22
Recording Incoming Messages  ........................................................................  22
Recording a Memo  ...........................................................................................  22
Recording a Conversation  ................................................................................ 23
Playing Messages  ............................................................................................  23
Adjusting the TAD’s Volume  .............................................................................  24

43-725.fm  Page 6  Tuesday, February 23, 1999  2:47 PM

Summary of Contents for 43-725

Page 1: ...Cat No 43 725 OWNER S MANUAL Please read before using this equipment TAD 725 Digital Answering System 900MHz Cordless Speakerphone 43 725 fm Page 1 Tuesday February 23 1999 2 47 PM ...

Page 2: ...CE THE RISK OF ELECTRIC SHOCK DO NOT REMOVE COVER OR BACK NO USER SERVICE ABLE PARTS INSIDE REFER SERVIC ING TO QUALIFIED PERSONNEL WARNING To reduce the risk of fire or shock hazard do not ex pose this product to rain or mois ture Important Cordless phones such as this one require AC power to operate When the AC power is off you cannot make or receive calls using your TAD 725 To be safe you shoul...

Page 3: ...page someone or locate the handset if you misplace it 40 Channels automatically selects a clear channel when you make or answer a call You can also manually change channels during a call Super CCT Noise Reduction Circuitry provides clear telephone conversa tions giving you sound clarity compara ble to that of a corded phone Ringer Volume Control lets you se lect from four ringer tone volume set ti...

Page 4: ...eening lets you listen as a caller leaves a message so you can de cide whether or not to answer the call Memo Recording lets you leave messages for yourself or others in your home or office You can also record your phone conversation Phone Pick Up Detection stops re cording when you pick up any phone on the same line as the TAD and resets to answer the next call Adjustable Ring Number lets you set...

Page 5: ... STATEMENT Your TAD 725 complies with Part 68 of FCC Rules You must upon request provide the FCC registration number and the REN to your phone company These numbers are on the bottom of the base You must not connect your phone to any of the following coin operated systems party line systems most electronic key phone systems Note Your telephone operates on stan dard radio frequencies as allocated b...

Page 6: ...dset and Speakerphone 16 Using Both the Handset and Speakerphone 16 Using FLASH 16 Using REDIAL 17 Using Tone Services on a Pulse Line 17 Paging 17 Memory Dialing 18 Storing a Number in Memory 18 Entering a Pause 19 Dialing a Memory Number 19 Chain Dialing Service Numbers 19 Testing Stored Emergency Numbers 19 Using a Headset 19 TAD Operation 21 Selecting the Outgoing Message 21 Recording Deleting...

Page 7: ...ration PIN 24 Remote Operation 25 Using the Toll Saver 25 Using Remote Commands 25 Troubleshooting 27 Care and Maintenance 29 Replacing the Battery Pack 30 The FCC Wants You to Know 31 Lightning 31 43 725 fm Page 7 Tuesday February 23 1999 2 47 PM ...

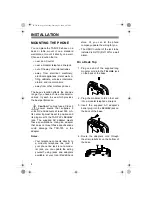
Page 8: ...D 725 s DC IN 9V jack The supplied AC adapter meets these specifications Using an adapter that does not meet these specifications could damage the TAD 725 or the adapter Notes Your telephone connects directly to a modular telephone line jack If your phone line jack is not a modu lar jack you can update the wiring yourself using jacks and adapters available at your local RadioShack store Or you can...

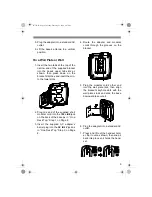
Page 9: ...the base as in On a Desk Top Step 1 on Page 8 3 Insert the supplied AC adapter s barrel plug into the DC IN 9V jack as in On a Desk Top Step 3 on Page 8 4 Route the adapter and modular cords through the grooves on the bracket 5 Plug the modular cord s other end into the wall plate jack then align the bracket s keyhole slots with the wall plate studs and slide the base downward to secure it 6 Plug ...

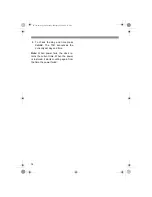
Page 10: ...base 3 Align the bracket s keyhole slots with the mounting screws and slide the base downward to secure it 100 8 CONNECTING AND CHARGING THE BATTERY PACK The TAD 725 comes with a recharge able nickel cadmium battery pack in stalled in the handset but not connected Before using your phone you must connect the battery pack then charge it for about 24 hours 1 Press down and slide off the battery pack...

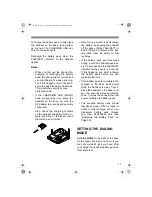
Page 11: ...f the base until the TALK BATT in dicator flashes Otherwise the bat tery pack loses its ability to fully recharge If the battery pack becomes weak during a call the handset beeps ev ery 30 seconds and the TALK BATT indicator flashes every 3 seconds If this happens you must recharge the battery pack before you can make another call If the battery pack is completely dis charged or the base loses pow...

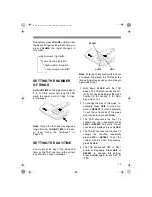
Page 12: ... S RINGER ON AND OFF To turn off the base s ringer set RINGER on the back of the base to OFF You can still make or receive calls using this phone Telephones on the same line and the TAD s handset still ring when there is an incoming call Note When the base s ringer is turned off and the handset is in its cradle the phone does not ring If the handset is not in the cradle the phone rings To turn on ...

Page 13: ... 1 Hold down CLOCK until the TAD beeps The TAD announces the cur rently set day and displays the day s number 0 for Sunday 1 for Mon day and so on 2 To change the day of the week re peatedly press SKIP to move for ward or REPEAT to move backward To set the correct day of the week when it displays press CLOCK 3 The TAD announces the hour To change the hour repeatedly press SKIP or REPEAT To set the...

Page 14: ...K The TAD announces the currently set day and time Note When power fails the clock re tains the current time When the power is restored it starts counting again from the time the power failed 43 725 fm Page 14 Tuesday February 23 1999 2 47 PM ...

Page 15: ...hannel each time you make or re ceive a call If you hear other conversations or exces sive noise during a call press CH to se lect a different channel The TALK BATT indicator blinks and the handset beeps TALK followed by a brief pause as your phone searches for a clear channel Note If the handset is too far from the base the channel might not change Move closer to the base and try again SETTING TH...

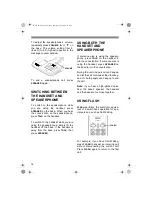
Page 16: ...H THE HANDSET AND SPEAKERPHONE If someone else is using the speaker phone press TALK on the handset to join the conversation If someone else is using the handset press SPEAKER on the base to join the conversation During the call one person can hang up and let the call continue at the other key pad Or both people can hang up to end the call Note If you hear a high pitched noise from the base s spea...

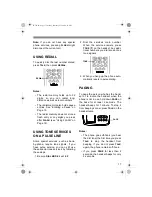
Page 17: ...rvices by following these steps 1 Be sure DIAL MODE is set to P 2 Dial the service s main number When the service answers press TONE on the handset Any addi tional numbers you dial are sent as tone signals 3 When you hang up the phone auto matically resets to pulse dialing PAGING To page the person who has the hand set or to locate the handset when the phone is not in use hold down PAGE on the bas...

Page 18: ...ee Chain Dialing Service Numbers and Entering a Pause on Page 19 Notes An error tone sounds and the phone exits the programming mode if you wait more than 20 seconds between each key press Each TONE or PAUSE entry uses one digit of memory If you try to enter more than 16 dig its the phone beeps 5 times and ex its the programming mode Start over at Step 2 and enter no more than 16 digits in Step 3 ...

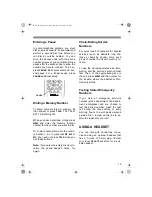
Page 19: ...empty memory lo cation the phone beeps 5 times Try again Chain Dialing Service Numbers For quick recall of numbers for special services such as alternate long dis tance or bank by phone store each group of numbers in its own memory lo cation To use the stored special service infor mation dial the service s main number first Then at the appropriate place in the call press MEM and the number for the...

Page 20: ...t while the headset is connected be sure the handset seats properly With a headset connected you make or answer calls as usual using the keys on the handset You can also answer calls by pressing the SPEAKER button located on the base You can use a handset holder available from your local RadioShack store to hang the handset on your belt for great er convenience When you finish using the headset di...

Page 21: ...e press OGM When the cur rent message begins to play press OGM again The TAD switches to the other message and plays it RECORDING DELETING AN OUTGOING MESSAGE To record your outgoing message up to 30 seconds long hold down OGM until the TAD beeps and appears When you finish your message press PLAY STOP The TAD plays back your message To delete your outgoing message and use the TAD s prerecorded me...

Page 22: ...s recording and resets to answer the next call RECORDING INCOMING MESSAGES After the TAD answers a call it plays the outgoing message beeps and records the caller s message Each incoming message can be up to 1 or 4 minutes long depending on how you set REC TIME see Setting the Record Time on Page 21 The TAD 725 s maximum recording capacity is 14 minutes The TAD stops recording and resets to answer...

Page 23: ...n the TAD beeps every 15 seconds to let the caller know that the conversation is being re corded To stop recording press PLAY STOP or MEMO The TAD 725 stores a recorded conver sation as a message see Playing Mes sages Note The TAD 725 cannot record a conversation less than two seconds long or a call using the speakerphone PLAYING MESSAGES After the TAD 725 has recorded a mes sage its message count...

Page 24: ...ve quick beeps and does not delete any messages SETTING THE REMOTE OPERATION PIN The TAD 725 s two digit remote opera tion PIN personal identification number prevents unauthorized remote access to your messages The PIN is preset to 80 Follow these steps to change the PIN to any number from 00 to 99 Note If you wait more than 2 minutes between each keypress the TAD exits the PIN setting process Sta...

Page 25: ...low these steps to operate the TAD from a remote location Note If you wait more than 15 seconds between each keypress the TAD sounds a long beep and hangs up 1 Dial your phone number and wait for the TAD to answer If the TAD is not set to answer calls it will answer after about 10 rings and sound a series of beeps 2 When the outgoing message begins or the TAD sounds a series of beeps press then en...

Page 26: ...s when someone picks up the handset or any phone on the same phone line Press then To 1 Repeat current message during playback 2 Play messages 3 Skip current message dur ing playback 4 Delete current message during playback 5 Stop playback recording and room monitoring 6 Set the TAD to answer calls 7 Record a memo or stop recording a memo 8 Record or stop recording a new outgoing message 9 Set the...

Page 27: ...to a vertical position Be sure neither antenna is touching a metal sur face Return the handset to the cradle and recharge the battery pack Replace the battery pack if nec essary see Replacing the Battery Pack on Page 30 The phone does not work or works poorly Be sure the base s phone line cord and AC adapter are correctly and securely connected and the battery pack is charged The handset battery p...

Page 28: ...wer while the handset is away the security access protection code might change Restore power to the base then place the handset back on the base The CHARGE IN USE indicator lights indicating that the code is set again Check the charging contacts on the handset and base If they are dirty clean them with a pencil eraser The TAD does not answer calls Make sure the TAD is turned on Make sure the AC ad...

Page 29: ...Dropping it can damage cir cuit boards and cases and can cause the TAD 725 to work improperly Use only fresh batteries of the required size and recommended type Batteries can leak chemicals that damage your TAD 725 s electronic parts Wipe the TAD 725 with a damp cloth occasionally to keep it looking new Do not use harsh chemicals cleaning solvents or strong deter gents to clean the TAD 725 Modifyi...

Page 30: ... nector into the socket in the com partment place the battery pack into the compartment and fasten the re tainer strap 4 Replace the cover If you have trouble replacing the battery take the TAD to your local RadioShack store for assistance Cautions You must use a replacement battery of the same size and type Do not dispose of the battery in a fire because it might explode Do not open or mutilate t...

Page 31: ...ausing it Try to eliminate the interference by moving your phone away from the receiver connecting your phone to an AC outlet that is on a different electrical circuit from the receiver contacting your local RadioShack store for help If you cannot eliminate the interference the FCC requires that you stop using your phone Some cordless telephones operate on frequencies that might cause interfer enc...

Page 32: ...during the warranty period take the product and the RadioShack sales receipt as proof of purchase date to any RadioShack store RadioShack will at its option un less otherwise provided by law a correct the defect by product repair without charge for parts and labor b replace the product with one of the same or similar design or c refund the purchase price All replaced parts and products and product...

Reviews: