background image

9

R

eplacing the F

u

se

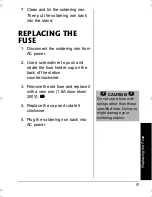
7. Clean and tin the soldering iron. 

Then put the soldering iron back 
into the stand.

4'2.#%+0)

"

6*'

"

(75'

1. Disconnect the soldering iron from 

AC power.

2. Use a screwdriver to push and 

rotate the fuse holder cap on the 
back of the station 
counterclockwise.

3. Remove the old fuse and replace it 

with a new one (1.6A slow-blow/
250V). 

.

.

.

.

4. Replace the cap and rotate it 

clockwise.

5. Plug the soldering iron back into 

AC power.

.

"

%#76+10

"

.

Do not use a fuse with 
ratings other than those 
specified here. Doing so 
might damage your 
soldering station.

64-2185rc.fm  Page 9  Monday, August 26, 2002  8:28 AM

Summary of Contents for 64-2185

Page 1: ...ering station displays the soldering tip s current temperature so you can avoid overheating sensitive PCBs printed circuit boards This soldering station is not intended for commercial use Built in Temperature Sensor lets you set the temperature from 350 F 200 C to a maximum of 840 F 450 C Detachable Stand Removable Sponge 2146 06 If an icon appears at the end of a paragraph go to the box on that p...

Page 2: ...cles from flux in the solder is detrimental to health The lightning symbol is intended to alert you to the presence of uninsulated dangerous voltage within this product s enclosure that might be of sufficient magnitude to constitute a risk of electric shock Do not open the product s case The exclamation symbol is intended to inform you that important operating and maintenance instructions are incl...

Page 3: ...t alter the plug in any way Capacitors in the station can still carry voltage even if the station has been disconnected from all voltage sources Use only new fuses of the proper rating Do not use repaired fuses and do not bridge the fuse holders Before you replace the fuses disconnect the soldering station from power Do not turn on the station immediately after moving it from a cold place to a war...

Page 4: ...e plug only fits one way Do not force it C F Bottom View 1 Use a small pointed object such as a straightened paper clip to set C F at the bottom of the station to Celsius or Fahrenheit Sponge 5 Pole Socket 76 10 Never operate the soldering iron without the soldering tip This can damage the heating element and temperature sensor 016 The smaller screw is used to fasten the heating element to the iro...

Page 5: ...tation to O before plugging it into an AC outlet 6 0 6 56 0 1 Gently pull the bottom of the stand away from the station until the tab on the bottom of the stand clears the station 2 Slide the stand up and off the station GROUND To prevent ESD electrostatic discharge damage to static sensitive devices connect a ground wire not supplied to the GROUND jack on the back of the station using a banana pl...

Page 6: ...r 1 C each time you press TEMPERATURE H and decreases by 1 F or 1 C each time you press TEMPERATURE G For faster setting hold down either TEMPERATURE H or TEMPERATURE G until you reach the desired temperature 016 The soldering station has two modes setting and reading Press MODE to toggle between modes I J I J I J I J appears on the right of the display when the soldering station is in setting mod...

Page 7: ...0 C HHý HHý HHý HHýappears This means the station has reached the maximum temperature Reset the station 6 Set O to O to turn off the station E E E E appears on the display for about two minutes 016 HH HH HH HH appears and the soldering station beeps if the temperature sensor is defective If HHý HHý HHý HHýstill appears take it to your local RadioShack store for assistance The soldering tip s tempe...

Page 8: ... diode resistors at the same time so the solder flows well to make a good electrically conductive connection and apply the solder 6 After soldering remove the soldering iron tip from the point and let the point cool To tin the tip coat the tip with solder and immediately brush off the excess with a soft cloth to form a smooth silvery soldering surface 76 10 Never hold the soldering tip to the sold...

Page 9: ...a screwdriver to push and rotate the fuse holder cap on the back of the station counterclockwise 3 Remove the old fuse and replace it with a new one 1 6A slow blow 250V 4 Replace the cap and rotate it clockwise 5 Plug the soldering iron back into AC power 76 10 Do not use a fuse with ratings other than those specified here Doing so might damage your soldering station ...

Page 10: ...and store the soldering station only in normal temperature environments Handle the soldering station carefully do not drop it Keep the soldering station away from dust and dirt and wipe it with a damp cloth occasionally to keep it looking new If your soldering station is not performing as it should take it to your local RadioShack store for assistance Modifying or tampering with the soldering stat...

Page 11: ...POSSIBILITY OF SUCH DAMAGES Some states do not allow limitations on how long an implied warranty lasts or the exclusion or limitation of incidental or consequential dam ages so the above limitations or exclusions may not apply to you In the event of a product defect during the warranty period take the product and the RadioShack sales receipt as proof of purchase date to any RadioShack store RadioS...

Page 12: ...ore or www radioshack com Tip Tinner Cleaner Compound Keeps your soldering iron ready to make quick and efficient connections and protects against tip oxidation Desoldering Bulb Makes desoldering a snap Just heat solder to a molten state then use the bulb to vacuum it up Rosin Soldering Flux RadioShack flux is non flammable and wipes clean with cloth or solvent Desoldering Braid Just press onto so...

Reviews: