background image

Need help? Call 1-800-763-9232

47

After you have set up the 7-in-One to control your devic-
es (see “Quick Setup” on Page 6 or “Setting Up the Re-
mote” on Page 12), follow these steps to set up the
Command Center:

1. Choose a location about 8 feet in front of the com-

ponents you want to control. The location should
be near an easily accessible standard AC outlet,
with line-of-sight access to your components.

2. Plug the Command Center’s power cord into the

AC outlet and raise its telescoping antenna.

3. Position the Command Center so its black IR lens

is facing your components.

4. Be sure the remote is not pointing toward your

equipment, then test the Command Center by
pressing 

POWER

. You should be able to control

components from any room.

Using the IR Signal Extension Cord

You can use the supplied IR signal extension cord to
control a device that is within 4 feet of the Command
Center but out of its direct line of sight.

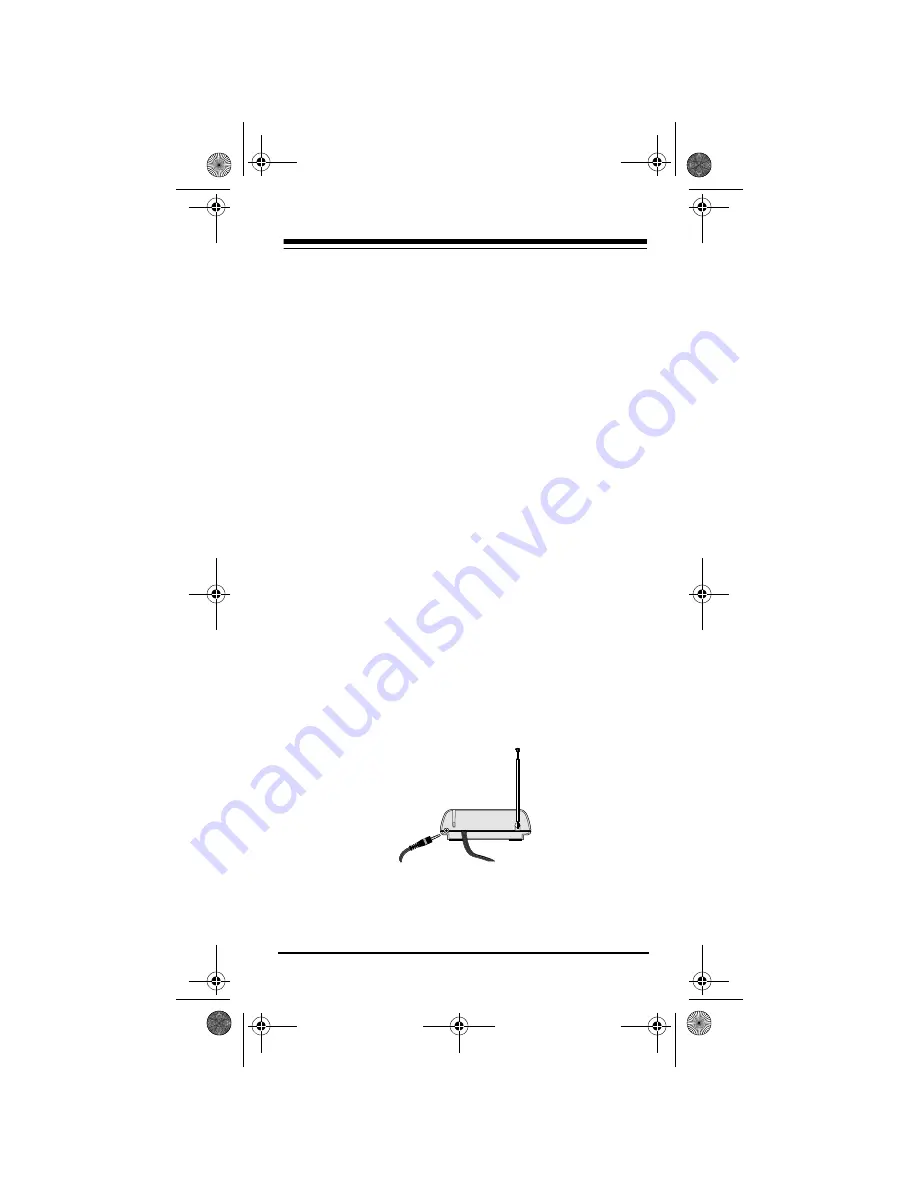
1. Plug the IR signal extension cord into the jack

(shown here) on the back of the Command Center.

2. Route the IR signal extension cord to the device.

15-1935.fm  Page 47  Thursday, December 31, 1998  11:37 AM

Summary of Contents for 7-in-One Home Theater

Page 1: ...Cat No 15 1935 OWNER S MANUAL 7 in One Home Theater Remote Control Please read before using this equipment 15 1935 fm Page 1 Thursday December 31 1998 11 37 AM...

Page 2: ...do is tell it which device s remote controls you want to replace by entering 3 digit codes This manual includes a list of many manufacturers 3 digit codes for your devices Or you can call the toll fre...

Page 3: ...te Your Satellite Receiver 24 To Operate Your CD Player 26 To Operate Your Tuner Receiver 29 To Operate Your Amplifier 31 To Operate Other Devices 33 Special Features 37 Searching for a Code 37 Using...

Page 4: ...on the battery compartment cover and slide the cover off 2 Place the batteries in the compartment matching the polarity marks and inside 3 Replace the cover If the batteries are installed correctly a...

Page 5: ...play 1 Hold down SETUP until TIMED SEQ appears 2 Press MENU twice CONFIGURE appears 3 Press SELECT THEATR SEL appears 4 Press MENU again 5 Press SELECT TIME appears and the first digit in the time fla...

Page 6: ...Hold down SETUP until TIMED SEQ appears 4 Press MENU CODE SETUP appears 5 Press SELECT DEV SET UP appears 6 Press SELECT again TV appears 7 Enter the first three digit TV code listed for your TV s bra...

Page 7: ...ice key entering your device s code and pressing SELECT Refer to the code list for the type of device you want to set up 12 Once the 7 in One is operating all of your devices press ESC to stop program...

Page 8: ...exit clear menus See your device s original owner s manual for more detailed in structions on using menus Notes and also control the Rear Level and Balance Right Left functions in AMP or TUN mode and...

Page 9: ...system remote VOL Volume Up VOL Volume Down and MUTE control the volume like the Volume Up and Down and Mute keys on your original remote In Plug n Power mode VOL VOL operates Bright and Dim and MUTE...

Page 10: ...te for example to change channels TV VCR works like the TV SAT key on your original satellite remote TV VCR also controls TV Video in TV mode TV VCR in VCR mode A B in cable and CD modes and Input Sel...

Page 11: ...the VIEW key on your satellite receiv er s remote FREEZE SHIFT PIP freezes your Picture in Picture window SWAP swaps the Picture in Picture window and the main picture MOVE PIP moves the Picture in Pi...

Page 12: ...1 Turn on your TV 2 Press TV then hold down SETUP until TIMED SEQ appears 3 Press MENU CODE SETUP appears 4 Repeatedly press SELECT until TV appears 5 Enter the first three digit code listed for your...

Page 13: ...180 Daewoo 451 092 019 091 039 Daytron 019 Denon 145 Brand Codes Dumont 017 019 Electroband 000 185 Electrohome 381 389 409 Emerson 236 463 019 180 280 179 154 177 178 181 182 183 185 270 282 038 158...

Page 14: ...tech 180 217 NAD 156 178 166 NEC 030 019 056 036 Brand Codes Nikko 092 030 178 Noblex 430 Noshi 018 NTC 092 Onwa 180 Optimus 154 250 166 Optonica 093 165 Orion 236 463 179 Panasonic 250 051 055 JC Pen...

Page 15: ...71 SSS 019 180 Starlite 180 Supre Macy 046 Supreme 000 Sylvania 054 096 030 020 028 381 Symphonic 171 Tandy 093 Brand Codes Tatung 055 003 Technics 250 051 Technol Ace 179 Techwood 051 056 003 Teknika...

Page 16: ...VCR combination and insert a tape 2 Press VCR 3 Hold down SETUP until TIMED SEQ appears 4 Press MENU CODE SETUP appears 5 Repeatedly press SELECT until VCR appears 6 Enter the first three digit VCR co...

Page 17: ...212 294 295 361 Fisher 104 047 066 054 Fuji 035 033 Funai 000 Garrard 000 Brand Codes GE 060 202 035 240 048 065 Go Video 232 279 432 Goldstar 037 038 Gradiente 008 000 Harley Davidson 000 Harman Kar...

Page 18: ...240 Proscan 060 202 Protec 072 Pulsar 039 051 Quarter 046 Quartz 046 Quasar 035 162 454 Brand Codes RadioShack 037 000 Radix 037 Randex 037 RCA 060 202 035 042 240 048 065 105 106 149 Realistic 035 03...

Page 19: ...e Westing house 278 XR 1000 035 000 072 Yamaha 038 Zenith 039 000 034 033 Brand Codes Brand Codes American High 035 Broksonic 002 479 Colt 072 Curtis Mathes 035 Daewoo 278 Emerson 002 294 479 Funai 00...

Page 20: ...ight need to program a separate TV code to control the volume Check the list below and follow the instructions in To Operate Your TV on Page 12 to program the supplied TV code VCR Code Code for TV Vol...

Page 21: ...Hold down SETUP until TIMED SEQ appears 4 Press MENU CODE SETUP appears 5 Repeatedly press SELECT until CABLE appears 6 Enter the first three digit code listed for your con verter s brand then press...

Page 22: ...3 011 476 GMI 057 Goldstar 144 040 Goodmind 797 Hamlin 020 009 259 034 273 Hitachi 011 Hytex 007 Jasco 153 315 Jerrold 003 276 014 476 012 011 015 024 Macom 033 Magnavox 027 334 Memorex 000 Movie Time...

Page 23: ...Tandy 258 TeleCaption 221 Teleview 040 Texscan 001 Timeless 418 Tocom 012 013 Toshiba 000 Tusa 015 TV86 063 Unika 022 153 207 United Artists 007 United Cable 003 Universal 191 077 022 153 207 Videoway...

Page 24: ...ETUP until TIMED SEQ appears 4 Press MENU CODE SETUP appears 5 Repeatedly press SELECT until SAT appears 6 Enter the first code listed for your receiver s brand then press SELECT 7 Point the 7 in One...

Page 25: ...95 IQ 210 IQ Prism 210 Intersat 043 JVC 775 Janeil 152 Jerrold 361 627 Legend 269 Macom 018 050 061 Magnavox 724 Memorex 269 724 Norsat 004 Panasonic 152 701 Pansat 647 Philips 200 724 Pico 075 Primes...

Page 26: ...Press MENU CODE SETUP appears 5 Repeatedly press SELECT until CD appears 6 Enter the first code listed for your CD player s brand then press SELECT 7 Point the 7 in One at the CD player and press PL Y...

Page 27: ...z 005 029 038 157 180 McIntosh 287 Mission 157 Mitsubishi 098 Brand Codes NAD 019 299 NEC 043 130 234 Nakamichi 147 Nikko 164 169 170 174 Onkyo 101 102 138 Optimus 000 032 037 048 087 145 175 179 194...

Page 28: ...Soundesign 145 425 Symphonic 183 Tascam 420 Teac 016 045 153 174 180 183 378 393 420 Technics 029 207 303 Toshiba 019 299 Vector Research 033 194 417 Victor 072 Wards 053 108 157 Yamaha 036 170 187 Yo...

Page 29: ...UP until TIMED SEQ appears 4 Press MENU CODE SETUP appears 5 Repeatedly press SELECT until TUNER appears 6 Enter the first code listed for your device s brand then press SELECT 7 Point the 7 in One at...

Page 30: ...Onkyo 100 119 135 380 Optimus 042 080 177 181 186 219 286 440 531 622 670 738 744 754 801 Orient Power 744 Brand Codes Panasonic 039 309 JC Penney 195 201 Philips 189 412 Pioneer 014 080 150 289 531 6...

Page 31: ...One to op erate your amplifier 1 Turn on your amplifier 2 Press AMP 3 Hold down SETUP until TIMED SEQ appears 4 Press MENU CODE SETUP appears 5 Repeatedly press SELECT until AMP appears 6 Enter the fi...

Page 32: ...8 GoldStar 031 Harman Kardon 106 Kenwood 356 Linn 269 Luxman 165 Magnavox 269 Marantz 269 321 McIntosh 251 NEC 264 Nakamichi 321 Optimus 013 300 395 Panasonic 308 Philips 269 Pioneer 013 300 Realistic...

Page 33: ...SELECT until VCR appears 6 Press MENU or to toggle between VCR LDP TAPE and DAT 7 When LDP appears enter the first code listed for your laser disc player s brand in Setup Codes for Laser Disc Players...

Page 34: ...83 313 Nakamichi 147 151 218 247 248 Onkyo 136 282 Optimus 027 220 300 337 439 Panasonic 229 Philips 029 Pioneer 027 099 220 RCA 261 Sansui 029 Sanyo 261 Sharp 231 Sherwood 337 Sony 170 243 291 Teac 2...

Page 35: ...agnavox 194 217 241 503 Marantz 064 194 Mitsubishi 059 521 NAD 059 NEC 286 Onkyo 503 Panasonic 204 490 Philips 064 194 503 539 Pioneer 023 059 525 Proscan 522 Quasar 204 RCA 128 522 Realistic 203 Sams...

Page 36: ...525 Proscan 522 Quasar 204 RCA 128 522 Realistic 203 Samsung 323 Sega 023 Sony 193 201 270 533 Technics 204 490 Theta Digital 194 Toshiba 503 Yamaha 217 Zenith 503 Brand Codes Aiwa 188 Carver 188 Mag...

Page 37: ...SET UP appears 5 Press MENU DEV SEARCH appears 6 Press SELECT TV and the last entered three digit code appear 7 Press POWER If your TV does not turn off press MENU The next most recently entered code...

Page 38: ...y for the device you want to view in Step 1 7 Write down the three digit code then press ESC to stop programming USING THE SLEEP FUNCTION To use the sleep timer built into your TV cable convert er sat...

Page 39: ...n One activates its own Sleep Timer To use another device s sleep timer or to simply disable Sleep Lock repeat the above steps pressing MENU to select DISABLE in Step 6 CONVERTING DEVICE KEYS You can...

Page 40: ...ter which device the 7 in One is operating For example to set up the 7 in One so your receiver al ways controls the volume 1 Hold down SETUP until TIMED SEQ appears 2 Press MENU twice CONFIGURE appear...

Page 41: ...now controls its own volume when you use the volume keys on your 7 in One USING THE MACRO KEYS The 7 in One has two macro keys AUD and VID Each key lets you play back a series of up to 15 keystrokes...

Page 42: ...l keystrokes that you would enter during regular usage such as pressing ENTER after a channel number when changing channels if your TV requires it Repeat these steps to set up a macro on the other mac...

Page 43: ...SELECT ENTER SEQ appears 7 Enter the sequence of keystrokes you want the 7 in One to play at the selected time then press ESC For example to set up a sequence that turns on the satellite tunes to chan...

Page 44: ...ate device key TV CBL SAT VCR or AUX to select the device that you want to control audio features in Home Theater mode then press SELECT CHANNEL appears 6 Press SELECT then the appropriate device key...

Page 45: ...pears 3 Press SELECT THEATR SEL appears 4 Repeatedly press MENU until KEY MACRO appears 5 Press SELECT SEL MACKEY appears 6 Press POWER then the key for each device in your home theater system Note Yo...

Page 46: ...s with an IR RF Command Center which receives radio frequency RF signals from the 7 in One and converts them into infrared IR signals to control your components Note The 7 in One s actual range depend...

Page 47: ...and raise its telescoping antenna 3 Position the Command Center so its black IR lens is facing your components 4 Be sure the remote is not pointing toward your equipment then test the Command Center b...

Page 48: ...s LED on or next to the device s IR sensor 4 Be sure the remote is not pointing toward your equipment then test the Command Center by pressing POWER The Command Center converts the 7 in One s RF signa...

Page 49: ...r brand of device in the Setup Codes section Many set up codes may allow some degree of operation However only one set up code will work correctly with your device You make a mistake when setting up y...

Page 50: ...d control its volume but you cannot change preset channels Some audio components might need both a Tuner Receiver code see Page 29 and an Audio Amplifier code see Page 32 to control all the features o...

Page 51: ...Need help Call 1 800 763 9232 51 NOTES 15 1935 fm Page 51 Thursday December 31 1998 11 37 AM...

Page 52: ...and the RadioShack sales receipt as proof of purchase date to any RadioShack store RadioShack will at its option unless otherwise provided by law a correct the defect by product repair without charge...

Reviews: