background image

8

Software Operation

picture. The still images you selected
appear, one by one, on the left side of
the screen at the time interval you
selected.

6. To adjust a photo’s quality to your pref-

erence, click 

Setting

 on the TWAIN win-

dow, then adjust the video setting or the
video processor/amplifier (shown under
“Adjusting Video Setting” on Page 8 and
“Adjusting Video Proc Amp (Processor/
Amplifier)” on Page 8). Or, click 

Size

 to

adjust the photo’s image size.

7. To transfer a photo to your application

software for future editing or posting,
click the photo on the left side of the
screen, then click 

Transfer To Applica-

tion

. The photo you selected is trans-

ferred to your application software.

8. To delete an unwanted photo, click the

photo then click 

Delete

.

9. To return to the TWAIN-compliant appli-

cation software, click 

Exit

ADJUSTING VIDEO SETTING

To adjust your camera’s video settings, click
on 

Setting

 on the TWAIN window. The 

Prop-

erties screen appears.

For the best results, follow these hints:

Brightness and Contrast — Your camera
comes with an intelligent light detector that
automatically adjusts the light source’s
brightness according to your environment’s
ambient light. You can also slide 

Brightness

and 

Contrast

 (also known as tone correction)

according to the way your environment is lit.

Hue — Slide 

Hue

 to adjust the hue of the col-

or you see to your preferences. 

Saturation — Slide 

Saturation

 to adjust the

image’s color intensity. The higher the satu-
ration level (up to 20), the greater the color
intensity. If you adjust the saturation level to
0 (zero), the image appears in gray scale. 

Sharpness — Slide 

Sharpness

 to adjust the

image’s sharpness to your preferences. In-
creasing the sharpness sharpens the image,
decreasing it blurs the image.

White Balance — Your camera automatical-
ly adjusts the color you see (called white bal-
ance) according to the ambient light in your
environment. You can also slide 

White Bal-

ance

 to adjust the white balance you see

through the camera. 

Default — Return all settings to their default
values.

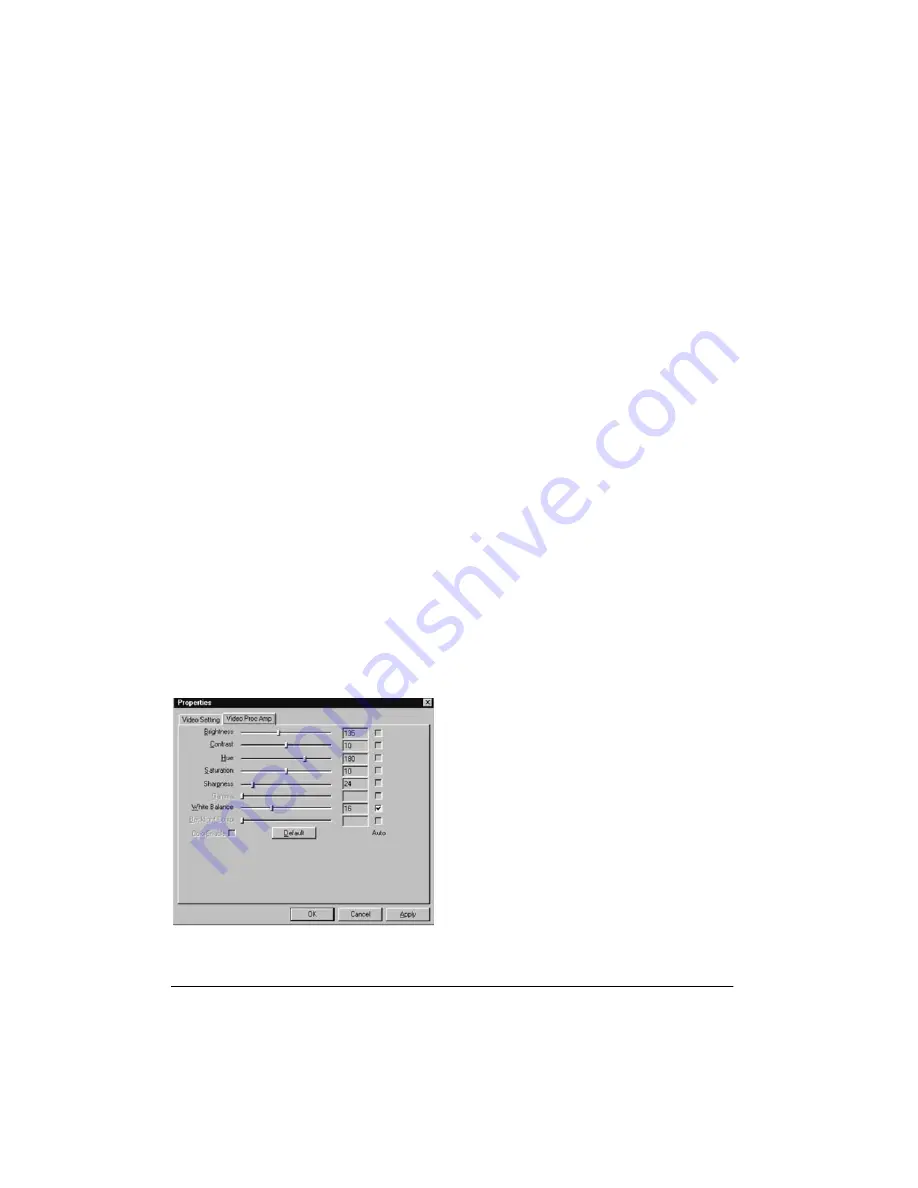
ADJUSTING VIDEO PROC 
AMP (PROCESSOR/
AMPLIFIER)

Your camera’s video processor/amplifier lets
you adjust more of the camera’s video set-
tings. To adjust the camera’s video proces-
sor/amplifier settings, click on 

Setting

 on the

TWAIN window. The 

Properties screen ap-

pears. Then click on 

Video Setting

 on the

Properties screen.

Summary of Contents for PC Camera

Page 1: ...Owner s Manual Please read before using this equipment PC Camera...

Page 2: ...Foot USB Cord lets you use the camera almost anywhere Supplied Software WDM Windows Device Model TWAIN Technology Without An Important Name for Windows 98 2000 lets you capture and transfer images fro...

Page 3: ...SE Windows 2000 or Win dows Me installed on your computer to use the camera Some software features might not work correctly on computers running Win dows 98 First Release For best compat ibility upgra...

Page 4: ...opular PDF format Notes For information about Presto applica tions refer to their user s manuals included in the supplied CD ROM at Start Programs Presto application name application name UserManual F...

Page 5: ...them Note Some subsequent steps in this section assume that you installed the Presto Mr Photo 1 5 application soft ware in Step 4 If you did not install this application software the screens you see...

Page 6: ...s USING TWAIN TO ACQUIRE IMAGES Use the camera with the supplied TWAIN ap plication software to acquire pictures using the supplied image editing program other image editing programs or other programs...

Page 7: ...h characteristics called color space and compression Your camera s de fault color space compression setting is I420 Advanced users can adjust this value to I420 SP62 IYUV or RGB24 Capturing and Transf...

Page 8: ...automatically adjusts the light source s brightness according to your environment s ambient light You can also slide Brightness and Contrast also known as tone correction according to the way your env...

Page 9: ...used by the camera Auto Exposure Adjust these values in any of the following circumstances Type Select Band 50Hz if your AC power source s frequency is 50 Hz Select Band 60Hz if your AC power source...

Page 10: ...ices then select Video Capture De vices If the camera is not listed unplug the camera plug it in again then reinstall the driver see Installing Testing the Software Hardware on Page 4 If the camera is...

Page 11: ...your local RadioShack store for assis tance After installing the camera software the software does not detect the camera Some computers are shipped without the USB port mode enabled To enable the USB...

Page 12: ...f a product defect during the warranty period take the product and the RadioShack sales receipt as proof of purchase date to any RadioShack store RadioShack will at its option un less otherwise provid...

Reviews: