8
Locating pipes with a sonde
For more detailed descriptions of using
the locator, and for detailed sonde
locate techniques, refer to the RD5100S
Operation Manual.
Make sure the sonde frequency matches
the selected locator sonde frequency.
Note: The 'blade' of the locator must
be in-line with the central axis of the
sonde.
A new battery or a freshly recharged battery should be used at the beginning of each
day and preferably at the start of a job. Check that the locator and sonde are working
correctly.
A quick test for both sonde and locator is to position the sonde at ground level at a
distance equal to its rated depth range from the locator. Point the locator at the sonde
with its blade in-line with the sonde, and check that the bar graph on the locator
displays more than 50% with the sensitivity of the locator set to maximum.
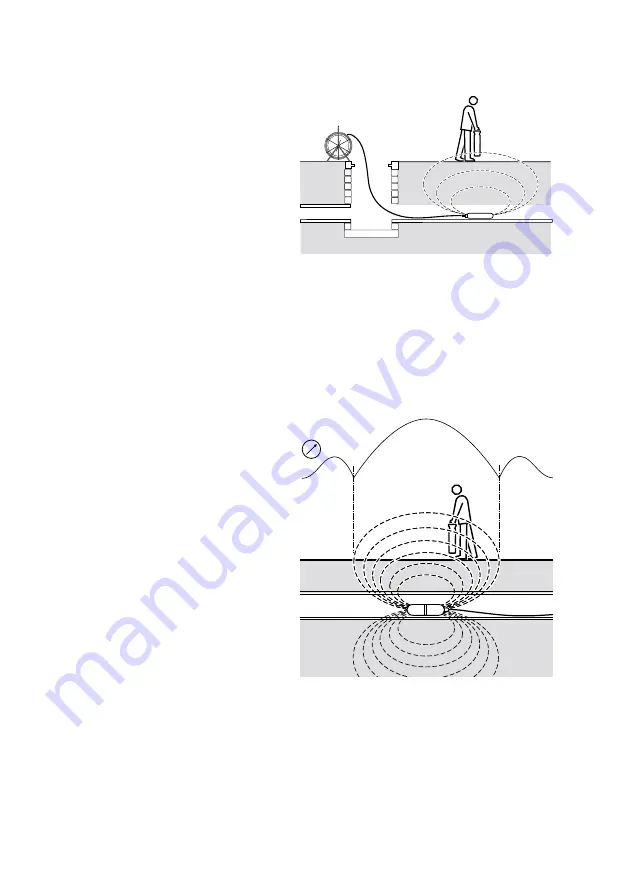
With the sonde in place at the survey
location, hold the locator vertically and
directly over the sonde's estimated
position. Make sure the blade is in-line
with the sonde. Adjust the sensitivity
(gain) of the locator to give a bar graph
display reading between 60% and 80%.
A sonde radiates a peak radio frequency
field from the center of its axis with
weaker signal (ghost) lobes at each
side. Ghost lobe identification helps to
confirm the accuracy of the peak (center)
position. Move the locator a little way to
one side and then along the axis of the
sonde iteratively forwards and backwards
to detect the ghost lobes. Reduce the
sensitivity of the locator until the ghost lobes are no longer detected.
With the locator sensitivity set as desired, propel the sonde along three to four paces
and stop.


