background image

RADIOLINK ELETRONIC LIMITED

www.radiolink.com

20

Initial value: 0%

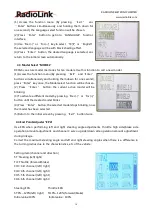
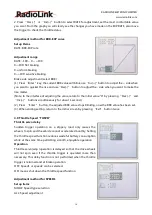
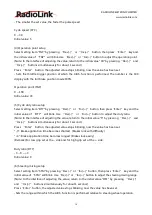
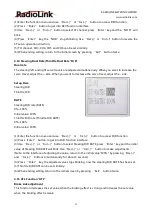
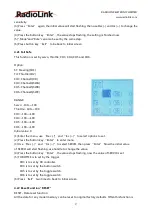
(2) Brake side acceleration amount adjustment
Press “Dec(-)” or “Inc(+)” button to select “ BRAK ”, press“Enter”key to confirm and
the initial value of “BRAK” will blink, then use“Dec(-)”or“Inc(+)”button adjust the acceleration
amount.
(Note: In the interface of adjusting the value, return to the initial value"0%" by pressing
“Dec(-)” and “Inc(+)” buttons simultaneously for about 1 second.)
Press “Enter” button, the adjusted value stops blinking, now the value has been set.
"0%": No acceleration
"100%": Maximum acceleration (Brake side maximum steering angle)
Brake side acceleration amount(BRAK)
0%~100%
Initial value: 0%
When ending setting, return to the initial screen by pressing “Exit” button twice.

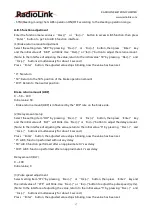
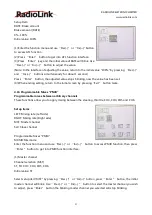
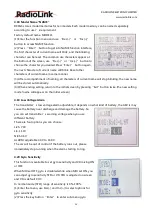
4.11 Idle-Up "IDLUP"
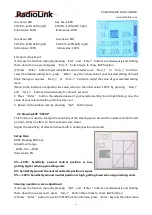
Idle up at engine start

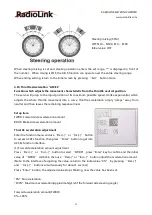
Use this function to improve the starting characteristics of the engine by raising the idling speed
when starting the engine of a gas powered car.
Idle-Up rate (RATE)
-50% ~ -1%, 0%, +1% ~ +50%
Initial value: 0%
"-": Brake side
"+": Forward side
Idle-Up "IDLUP"

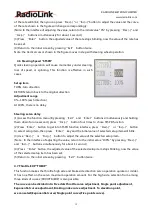
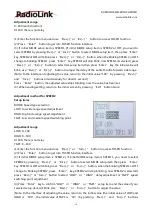
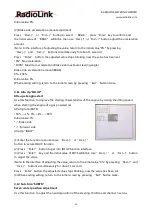
(1) Enter the function menu and use “Dec(-)” or“Inc(+) ”
button to access IDLUP function.
(2) Press “Enter” button to get into IDLUP function interface.
(3) Press “Enter” key, and the initial value of RATE will blink. Use“ Dec(-) ” or “Inc(+)” button
to adjust the value.
(Note: In the interface of adjusting the value, return to the initial value "0%" by pressing “Dec(-)”and
“Inc(+)” buttons simultaneously for about 1 second.)
Press “Enter”button, the adjusted value stops blinking, now the value has been set.
(4) When ending setting, return to the initial screen by pressing “Exit”button twice.

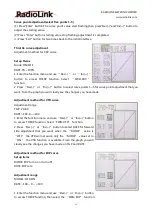
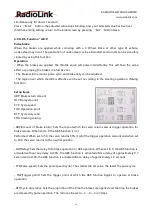
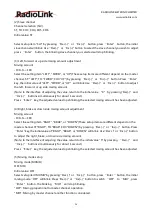
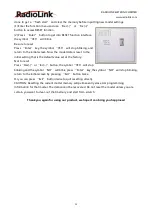
4.12 Sub-trim "SUBTR"
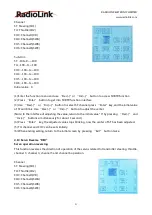
Servo center position adjustment

Use this function to adjust the neutral position of the steering, throttle and channel 3 servos.

Summary of Contents for RC6GS

Page 1: ...IOLINK ELETRONIC LIMITED www radiolink com Digital 6 Channel Proportional RC System Instruction Manual CE FCC ROHS Technical updates and additional programming examples available at http www radiolink com ...

Page 2: ...55452961436694 www rcgroups com or call our after sales 86 0755 88361717 to check the issues related answer Due to unforeseen changes in production procedures the information contained in this manual is subject to change without notice More information please check our website as below http www radiolink com Support and Service It is recommended to have your Radiolink equipment serviced annually d...

Page 3: ...ncontrolled situation and accidents when the voltage is lacked So you must change the battery or recharge them in time Warning This product is not a toy and is not suitable for children under the age of 18 Adults should keep the product out of the reach of children and exercise caution when operating this product in the presence of children Please don t run in the rain Rain or moisture may enter t...

Page 4: ...GUAGE 9 4 3 Model Select MODEL 10 4 4 End Point Adjuster EPA 10 4 5 Steering EXP STEXP 11 4 6 Steering Speed STSPD 12 4 7 Throttle EXP THEXP 12 4 8 Throttle Speed THSPD 14 4 9 A B S Function A B S 16 4 10 Throttle Acceleration ACCEL 19 4 11 Idle Up IDLUP 20 4 12 Sub trim SUBTR 20 4 13 Servo Reverse REV 21 4 14 Steering Dual Rate Throttle Dual Rate D R 22 4 15 ATL Function ATL 22 4 16 Programmable ...

Page 5: ...p 12ms only from transmitter to the receiver thus provide control synchronous and performance perfect The same FHSS spread spectrum and 67 channels pseudo random frequency sequence hopping of AT9S makes RC6GS have superior anti interference ability both at the same frequency band and different frequency bands Control distance is up to 400 meters 3 1 Transmitter ...

Page 6: ...z Channel 6 CH Channel resolution 4096 the regular jitter is 0 5us Model Cars Boats Modulation Mode GFSK Spread Spectrum FHSS 67 Channels Pseudo Random Frequency Sequence Hopping 10 Modes Memory Storage Antenna Length 106mm Control Distance More than 400 meters ground LCD Screen 128 64 Resolution LCD Back Light ...

Page 7: ...iPo battery Receiver R6FG R6F R8EF R8FM 3 2 Receiver RC6GS sells with R6FG 2 4GHz 6 channels receiver gyro integrated and HV servo supported Specification 1 Frequency 2 4GHz ISM band 2400MHz 2483 5MHz 2 Size 35 20 13mm 3 Channel 6 4 Model cars boats 5 Modulation mode GFSK 6 Spread spectrum FHSS 7 Antenna length 210mm 8 Control distance more than 400 meters 9 Power supply 4 8 10 0V DC 10 Channel re...

Page 8: ...integrated to hold the vehicle in a straight line during aggressive acceleration and braking or get bumped around by rough terrain Receiver with gyro integrated to keep the uni direction and anti slip 3 2 3 How to Turn On Gyro Function Quick press the ID SET switch two times within 1 second the LED change from green to red means gyro function has turn on Gyro Function Setup Integrated Gyro is used...

Page 9: ...he binding switch two time the LED flashes two time red the gyro reverse is corrected Installment of receiver antenna 1 The antenna must be kept as straight as possible Otherwise it will reduce the effective range 2 Large model aircraft may of some metal part interfering signal in this case the antennas should be placed at both sides of the model Then the best RF signal condition is obtained at an...

Page 10: ...you have no more than 4 minutes for controlling your model please safely stop your model before the uncontrolled situation Please make sure the battery voltage is higher than this voltage data while radio controlling Transmitter function menu setting When you want to browse or change a setting of transmitter you should go into function menu setting mode Under function menu setting mode you can set...

Page 11: ...the current active model will be blinking 3 To activate a different model by pressing Dec or Inc button until the desired model blinks 4 Press Enter button the selected model stops blinking now the model has been selected 5 Return to the initial screen by pressing Exit button twice 4 4 End Point Adjuster EPA Use EPA when performing left and right steering angle adjustments throttle high side brake...

Page 12: ...Press Enter button the adjusted value of your selected setting item stops blinking now the value of your selected setting item has been set 4 Return to the initial screen by pressing Exit button twice 4 5 Steering EXP STEXP This function is used to change the sensitivity of the steering servo around the neutral and both ends position It has no effect on the maximum servo travel Adjust the sensitiv...

Page 13: ...y and holding them down for one second press Inc button four times to chose STSPD function 2 Press Enter button to get into STSPD function interface press Dec or Inc button to select setup item then press Enter key and the initial value of selected setup item will blink 3 Use Dec or Inc button to adjust the value of the selected setup item Note In the interface of adjusting the value return to the...

Page 14: ...1 5 for curve point adjustment that you want from the graph you will clearly see the changes you have made Adjustment method for VTR curve Adjustment range TG P 20 80 RATE 100 0 100 1 Enter the function menu and use Dec or Inc button to access THEXP function Select FWD VTR function 2 Press Dec or Inc button to select RATE for forward side adjustment that you want when the MODE value is OFF the VTR...

Page 15: ...ng Dec and Inc buttons simultaneously for about 1 second 2 Press Enter button the adjusted BRK value stops blinking now the BRK value has been set 3 When ending setting return to the initial screen by pressing Exit button twice 4 8 Throttle Speed THSPD Throttle servo delay Sudden trigger operation on a slippery road only causes the wheels to spin and the vehicle cannot accelerate smoothly Setting ...

Page 16: ...urn to the initial screen by pressing Exit button twice Adjustment method for SPEED2 Setup items MODE Speed type selection LOW Low side range speed adjustment HIGH High side range speed adjustment TGP1 Low and medium speed switching point Adjustment range LOW 0 100 HIGH 0 100 At 100 there is no delay TGP1 0 100 1 Enter the function menu and use Dec or Inc button to access THSPD function 2 Press En...

Page 17: ...e return amount DLY Delay amount CYC Cycle speed TGP Operation point DTY Cycle duty ratio STM Steering mixing ABP Amount of brake return Sets the rate at which the servo returns versus trigger operation for brake release When set to 0 the ABS function is not Performed When set to 50 the servo returns 50 1 2 of the trigger operation amount and when set to 100 the servo returns to the neutral positi...

Page 18: ...mount ABP is influenced by the EXP rate on the brake side 2 Delay amount setup Select the setting item DLY by pressing Dec or Inc button then press Enter key and the initial value of DLY will blink Use Dec or Inc button to adjust the delay amount Note In the interface of adjusting the value return to the initial value 0 by pressing Dec and Inc buttons simultaneously for about 1 second Press Enter ...

Page 19: ...itial value of DTY will blink Use Dec or Inc button to adjust the duty ratio Note In the interface of adjusting the value return to the initial value 0 by pressing Dec and Inc buttons simultaneously for about 1 second Press Enter button the adjusted value stops blinking now the value has been set 3 Brake application time becomes shortest Brakes lock with difficulty 3 Brake application time becomes...

Page 20: ... away from neutral and then leaves the remaining response linear Setup item FWRD Forward side acceleration amount BRAK Brake side acceleration amount Throttle acceleration adjustment Enter the function menu and use Dec or Inc button to access ACCEL function then press Enter button to get into ACCEL function interface 1 Forward acceleration amount adjustment Press Dec or Inc button to select FWRD p...

Page 21: ...up at engine start Use this function to improve the starting characteristics of the engine by raising the idling speed when starting the engine of a gas powered car Idle Up rate RATE 50 1 0 1 50 Initial value 0 Brake side Forward side Idle Up IDLUP 1 Enter the function menu and use Dec or Inc button to access IDLUP function 2 Press Enter button to get into IDLUP function interface 3 Press Enter ke...

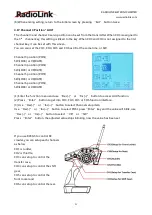
Page 22: ...c or Inc button to adjust the center Note In the interface of adjusting the value return to the initial value 0 by pressing Dec and Inc buttons simultaneously for about 1 second 4 Press Enter key the adjusted value stops blinking now the center of ST has been adjusted 5 TH channel and CH3 can be set similarly 6 When ending setting return to the initial screen by pressing Exit button twice 4 13 Ser...

Page 23: ...Steering D R Throttle D R RATE Steering D R rate RATE 0 100 Initial value 100 Throttle D R rate Throttle D R RATE 0 100 Initial value 100 1 Enter the function menu and use Dec or Inc button to access D R function 2 Press Enter button to get into D R function interface 3 Use Dec or Inc button to select Steering D R RATE press Enter key and the initial value of Steering D R RATE will blink Use Dec o...

Page 24: ...al screen by pressing Exit button twice 4 16 Programmable Mixes PMIX Programmable mixes between arbitrary channels These functions allow you to apply mixing between the steering throttle CH3 CH4 CH5 and CH6 Setup items LEFT Mixing rate Left side RGHT Mixing rate Right side MST Master channel SLV Slave channel Programmable Mixes PMIX MXMD Mix mode Enter the function menu and use Dec or Inc button t...

Page 25: ... Press Enter key the adjusted value stops blinking the selected mixing amount has been adjusted 4 Right brake or down side mixing amount adjustment Mixing amount 100 0 100 Select the setting item RGHT BRAK or DOWN These setup items are different depend on the master channel ST RGHT TH BRAK CH3 DOWN by pressing Dec or Inc button Press Enter key the initial value of RGHT BRAK or DOWN will blink Use ...

Page 26: ...E Channel 5 position POSI SW LOCK or VR RATE Channel 6 position POSI SW LOCK or VR RATE 1 Enter the function menu and use Dec or Inc button to access AUX function 2 Press Enter button to get into CH3 CH4 CH5 or CH6 function interface 3 Use Dec or Inc button to select Channel setup item Use Dec or Inc button to select POSI press Enter key and the value will blink use Dec or Inc button to select VR ...

Page 27: ...ng setting return to the initial screen by pressing Exit button twice the new setting model name will appear on the initial screen 4 19 Low Voltage Alarm The transmitter s low voltage alarm adjustable it depends on what kind of battery the 4 6V is may cause the battery over discharge and damage the battery So you can set transmitter s warning voltage when you use different battery There are four o...

Page 28: ... 100 CH3 100 100 CH4 100 100 CH5 100 100 CH6 100 100 Initial value 0 1 Enter the menu use Dec and Inc to select options to set 2 Press the button key Enter to enter menu 3 Use Dec and Inc to select SERVO then press Enter Now the initial value of SERVO will start flashing use handle to change the value 4 Press the button key Enter the value stops flashing now the value of SERVO is set 5 THROTTLE is...

Page 29: ... setting that is the default value set at the factory Not to reset Press Dec or Inc button the symbol YES will stop blinking and the symbol NO will blink press Enter key the symbol NO will stop blinking return to the initial screen by pressing Exit button twice Or you can press Exit button twice to quit resetting directly CAUTION Resetting the current model memory will permanently erase ALL progra...

Reviews: