background image

D9024 and D10024                             Analog Fire Alarm Control Panels

1997 Radionics                                      All rights reserved

The Radionics logo is a registered trademark of Radionics,

    1800 Abbott Street, Salinas, CA  93901, USA

74-07649-000-B        01/97
D9024/D10024 Installation


Page 1 of 17

Installation Instructions

Notice

The material and instructions covered in this manual have been carefully checked for accuracy and are

presumed to be reliable.  However, the manufacturer assumes no responsibility for inaccuracies and

reserves the right to modify and revise this document without notice.
These instructions cover the installation of the D9109A Enclosure and the installation of the D9024 or

D10024 system components within it.  See the Fire Alarm Control Panel Operator’s Manual for

instructions on powering up and operating the system.

Warnings and Cautions

Warning

is used in these instructions to indicate procedures to follow to avoid injury.

Caution

is used in these instructions to indicate procedures to follow to avoid damage to
equipment.

FCC Notices

Part 15

This equipment has been tested and found to comply with the limits for a Class A digital device, pursuant

to Part 15 of the FCC Rules. These limits are designed to provide reasonable protection against harmful

interference in a commercial installation. This equipment generates, uses and can radiate radio

frequency energy, and, if not installed in accordance with the instructions, may cause harmful

interference to radio communications. However, there is no guarantee that interference will not occur in a

particular installation. If this equipment does cause harmful interference to radio or television reception,

which can be determined by turning the equipment on and off, the user is encouraged to try to correct the

interference by one or more of the following measures:

1) Reorient or relocate the receiving antenna

2) Increase the separation between the equipment and the receiver

3)  Connect the equipment into an outlet on a circuit different from that to which the receiver is

connected.

4)  Consult the dealer or an experienced radio/TV technician for help.

UL/NFPA Notices

• 

UL listed for NFPA 72,  Local

All


references to NFPA and related requirements

 are based upon compliance with the 1993 edition of

NFPA 72, National Fire Alarm Code. Since installation specifications are nearly always based upon a specific

edition of a standard which has been legally adopted by the Authority Having Jurisdiction (AHJ), earlier

editions of NFPA standards will generally apply. Consult with the appropriate AHJ for 

confirmation.

www.PDF-Zoo.com

firealarmresources.com

Summary of Contents for D9024

Page 1: ...o provide reasonable protection against harmful interference in a commercial installation This equipment generates uses and can radiate radio frequency energy and if not installed in accordance with t...

Page 2: ...stallation 8 C 2 b D9067 Module Connection to the Control Module 9 C 2 c D9067 Module Connection to Class B Style 4 Circuit 9 C 2 d D9067 Module Connection to Class A Style 6 Circuit 10 C 2 e Shielded...

Page 3: ...Circuit Module Installation 8 Figure 7 Stacked Modules 9 Figure 8 D9067 Class B Style 4 Connection 9 Figure 9 D9067 Class A Style 6 Connection 10 Figure 10 D10024 Control Module Configuration 11 Figur...

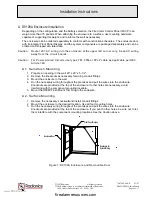
Page 4: ...ircuits use types FPL FPL R or FPLP cable as applicable per NEC Article 760 A 1 Semi flush Mounting 1 Prepare an opening in the wall 20 x 20 x 5 1 2 2 Remove the knockouts asnecessary forwiring condui...

Page 5: ...nts other than attention to the wire gauge Under extremely noisy conditions twisted pair wire is recommended to reduce interference If EMI is a problem use shielded cable being careful to ground the d...

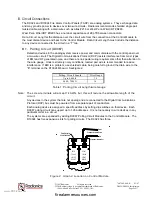
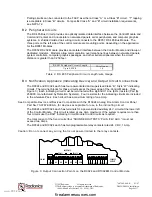
Page 6: ...ge B 3 Notification Appliance Indicating Device and Output Circuit Connections The D9024 and D10024 each has four power limited and supervised Class B Style W indicating circuits The terminal blocks f...

Page 7: ...ogrammed into the panel and are stored in the Central Processing Unit CPU to each analog device These levels can be altered through the front panel or PC programming Each device is programmed for Alar...

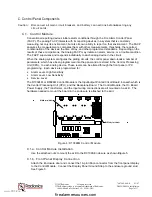
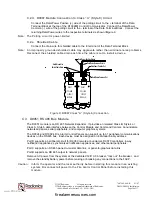
Page 8: ...as shown in Figure 6 COM 24V AUX 0V COM N C 24V N O N C N O AUX RELAYS RELAY 1 RELAY 2 OUT IN LOOP E 5 OUTPUTS SOUNDER 1 EARTH 2 DC DC E LOOP 4 E 3 LOOP E LOOP 2 E LOOP 1 D10024 Control Module 8 Wire...

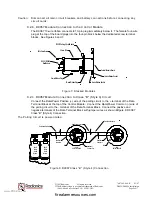
Page 9: ...e Ribbon Socket 8 wire Ribbon Socket Figure 7 Stacked Modules C 2 c D9067 Module Connection to Class B Style 4 Circuit Connect the Data Power Positive wire of the polling circuit to the terminal of th...

Page 10: ...on Return Data Power Positive Out Data Power Common Out Figure 9 D9067 Class A Style 6 Connection C 3 D9051 RS 485 Bus Module The D9051 module is an RS 485 Network Expander It provides an isolated Cla...

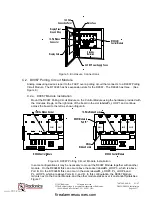
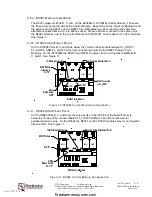
Page 11: ...above Ports B C and D See Figure 10 COM 24V AUX 0V COM N C 24V N O N C N O AUXRELAYS RELAY1 RELAY2 LOOP E 5 OUTPUTS SOUNDER 1 EARTH 2 DC DC E LOOP 4 E 3 LOOP E LOOP 2 E LOOP 1 D10024 Control Module 8...

Page 12: ...e top of the D9051 Module Connect the A wire to the A terminal next to it If Shielded cable is used connect the drain wire s to the E terminal of the terminal block at the top of the Control Module Bo...

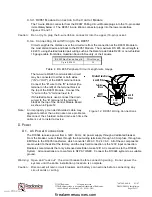
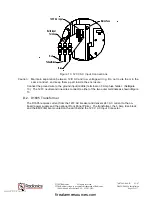
Page 13: ...hem in the same conduit and keep them apart inside the enclosure Connect the ground wire to the ground input middle terminal on 3 Amp fuse holder See Figure 13 The 120V neutral and line wires connect...

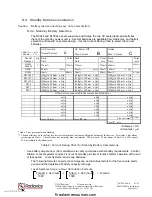
Page 14: ...300 A 300 mA x Qty 300 A 300 mA x Qty D327 320 A 320mA x Qty 320 A 320 mA x Qty 320 A 320 mA x Qty D329 280 A 280mA x Qty 280 A 280 mA x Qty 280 A 280 mA x Qty Other devices connected to the system n...

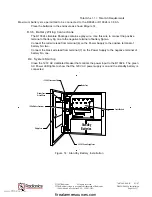
Page 15: ...No one to the negative terminal of battery N o two Connect the red wire lead from terminal 6 on the Power Supply to the positive terminal of battery No two Connect the black wire lead from terminal 7...

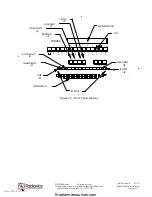
Page 16: ...LARM LED ALARM SILENCED LED AC POWER LED TROUBLE SILENCE KEY ALARM SILENCE KEY FIRE DRILL KEY 0 1 2 4 3 5 7 8 9 CHANGE System Trouble A N SHIFT 1 3 Alarm B O C P LED DISPLAY 7 Earth Fault 5 4 6 Troubl...

Page 17: ...el s internal buzzer will sound and the alphanumeric display will provide detailed information E 3 Alarm Conditions The red Alarm LED at the left of the indicator display flashes to indicate the syste...

Reviews: