RP5-GM32
Radio Replacement & Steering Wheel Control Interface
with OnStar Retention for General MotorsVehicles
Pacific Accessory Corporation
®
| Santa Ana, California 92705 | Ph. 866-931-8021 | support@pac-audio.com
©2012 Pacific Accessory Corporation
www.pac-audio.com
Rev. 053113
Pacific Accessory Corporation
Optional Steering Wheel Control Programming (cont.)
2/20/2013 - 11:03 AM
swi-rc radio and button chart.xls
Radio
Alpine
JVC
Kenwood
Clarion
Valor
OEM
Sony/Other
Pioneer
Blaupunkt Fusion
1
2
Volume -
Volume -
Volume -
Volume - Volume -
Volume -
Volume -
Volume -
Volume -
Volume -
3
Mute
Mute
Mute
Mute
Mute
Mute
Mute
Mute
Mute
Mute
4
Source
Source
Source
Source
Source
Source
Source
5
Preset -
Track +
Play
Track +
Next
Preset -
Preset -
Track +
Track +
6
Source
Track -
Track +
Search - Track -
Previous
Source
Source
Track -
Track -
7
Track +
Band/Disc +
Track -
Band
Up Cursor
Play/Ok
Track +
Track +
Disc +
Audio
8
Track -
Preset/Disc -
Disc/FM +
Send/End Down Cursor Band
Track -
Track -
Disc -
Power
9
Power
Select
Disc/AM -
Send
Ok
Up Cursor
Band
Band
Ok
10
Enter/Play
Attenuation
Answer
End
Down Cursor
Phone Menu
11
Band/Program Phone Receive Voice Dial
BT Answer
Answer Call
12
Receive
Phone Reject
On Hook
BT Hangup
End Call
13
End
Voice Dial
Off Hook
Voice Activation
14
Power
Mute (only
supported on
Multimedia units)
Other = Advent, Boyo, Dual, Lightning Audio & Visteon
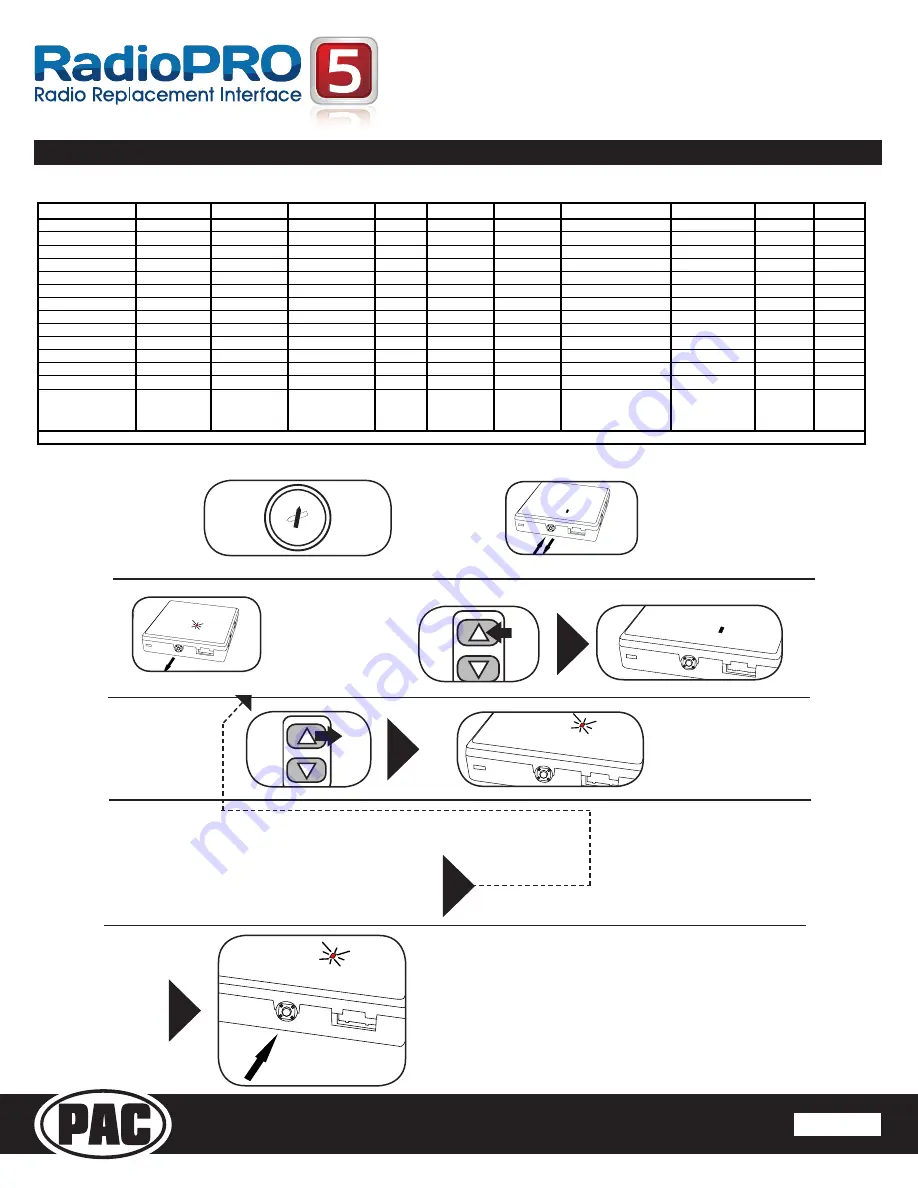
Optional Programming Order
Step B.
Press and
release the
programming
button.
Step C.
Once you
release the
programming
button. The
LED will turn
on.
SWC Connection
See above chart for
different radio type
connections
x3
SWC Connection
See above chart for
different radio type
connections
x3
Step A.
Turn the vehicle ignition to
the ON position.
OFF
ACC
IGN
STRT
SWC Connection
See above chart for
different radio type
connections
x3
Step E.
Release the button.
The LED will turn on
back on.
Step D.
Within 7 seconds
,
press and release the
button that is to be
learned on the steering
wheel.
The LED will
turn off during
this process.
SWC Connection
See above chart for
different radio type
connections
x3
VOL
VOL
Step F.
If you need to program more buttons,
repeat steps D & E for each additional
audio function on the steering wheel.
Program
remaining buttons
SWC Connection
See above chart for
different radio type
connections
x3
Once programming is
completed,
wait 7 seconds
.
The LED will flash three
times indicating the end of
programming.
Step G.
After all buttons are
programmed
Page 3


