background image


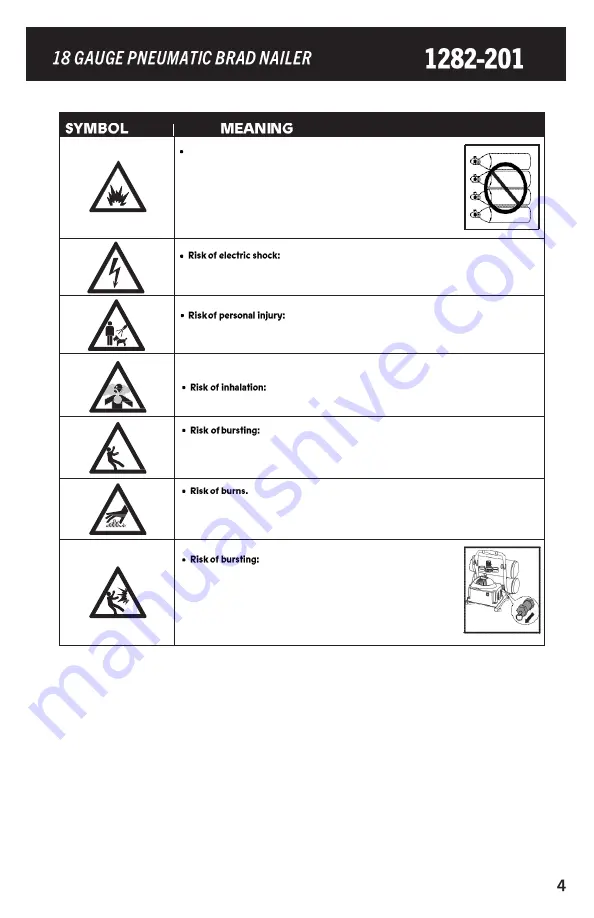
Oxygen


Do not use oxygen or any other combustible or bottled gas 
to power air-powered tools. Failure to observe this warning 
can cause explosion and serious personal injury or death.


Hydrogen


Use only the compressed air to power the air-powered


tools. Use a 

minimum of  ’

 (7.6 m) of hose to connect                                 

Explosive


the tool to the compressor. Failure to comply will result


in serious injury or loss of life.                                                                              

Combustible


Do not expose a compressor to rain. Store it indoors. 

Disconnect the compressor from power source before servicing. Compressor 
must be grounded. Do not use grounding adaptors.


Do not direct compressed air from the air hose towards 

the user or other personnel.


Never directly inhale the air produced by the compressor.


Do not adjust the pressure switch or safety valve for any reason. 

They have been preset at the factory for this 

compressor’s

 maximum pressure 

Tampering with the pressure switch or the safety valve may cause personal injury 
or property damage.


The pump and the manifold generate high temperatures. In order


to avoid burns or other injuries, do not touch the pump, the manifold, or the transfer


tube while the compressor is running. Allow the parts to cool down before handling


or servicing. Keep children away from the compressor at all times.


Make sure the regulator is adjusted so that the 

compressor outlet pressure is set lower than the maximum 
operating pressure of the tool. Before starting the compressor, 
pull the ring on the safety valve to make sure the valve moves 
freely. Drain water from tank after each use. Do not weld or 
repair tank. Relieve all pressure in the hose before removing


or attaching accessories.


Summary of Contents for 1282-201

Page 1: ...S MANUAL 3 Year Limited Warranty READ ALL INSTRUCTIONS BEFORE FIRST USE KEEP THIS MANUAL FOR FUTURE REFERENCE KEEP AWAY FROM CHILDREN WEAR CSA APPROVED EYE PROTECTION WEAR EAR PROTECTION WEAR FACE PROTECTION ...

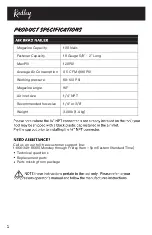
Page 2: ...CFM 90PSI Working pressure 60 100 PSI Magazine angle 90 Air inlet size NPT Recommended hose size 1 4 or 3 8 Weight 3 08lb 1 4 kg Call us on our toll free customer support line 1 866 349 8665 Monday through Friday 9am 5pm Eastern Standard Time Technical questions Replacement parts Parts missing from package ...

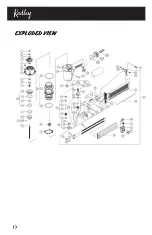
Page 3: ...tions 1 Table of Contents 2 Safety Guidelines 3 5 Symbols 6 Tool speci c arnings 7 Know your 18 gauge pneumatic brad nailer 8 Assembly and Operating 9 14 Maintenance 15 18 Exploded View 19 Parts List 20 22 Warranty 23 ...

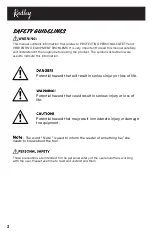
Page 4: ...his information Potential hazard that will result in serious injury or loss of life Potential hazard that could result in serious injury or loss of life Potential hazard that may result in moderate injury or damage to equipment The word Note is used to inform the reader of something he she needs to know about the tool These precautions are intended for the personal safety of the user and others wo...

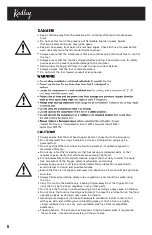
Page 5: ...sor Do not adjust the pressure switch or safety valve for any reason They have been preset at the factory for this compressor s maximum pressure Tampering with the pressure switch or the safety valve may cause personal injury or property damage The pump and the manifold generate high temperatures In order to avoid burns or other injuries do not touch the pump the manifold or the transfer tube whil...

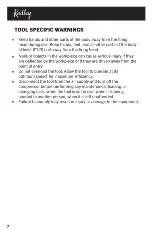
Page 6: ... parts or that requires repairs Verify that all screws are securely tightened For optimal safety and tool performance inspect the tool daily in order to ensure free movement of the trigger safety mechanisms and springs Always keep your air tool clean and lubricated Daily lubrication is essential to avoid internal corrosion and possible failures Ensure the oor is not slippery and wear non slip shoe...

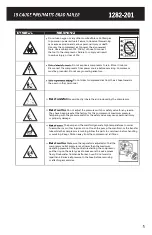
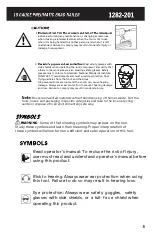
Page 7: ...r protection to prevent hearing damage and loss Failure to comply may result in moderate injury Recycle unwanted materials rather than disposing of them as waste Sort the tools hoses and packaging in speci c categories and take to the local recycling center or dispose of in an environmentally safe way Some of the following symbols may appear on the tool Study these symbols and learn their meaning ...

Page 8: ... ...

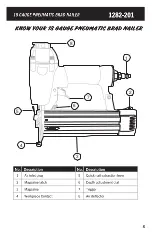
Page 9: ...8 1 2 3 4 5 6 7 ...

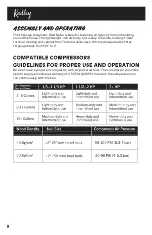
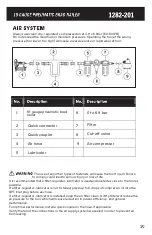
Page 10: ... easy to handle making it ideal for oor molding and cabinet trim The brad nailer has a 100 brad magazine that res 18 gauge brads from 8 to Be sure to use a proper air compressor with air powered tools The compressor should be able to supply a minimal air delivery of 0 5 CFM 90 PSI to ensure the compressor can run continuously with the tool ...

Page 11: ... comply could lead to serious injury or loss of life It is recommended that a lter regulator lubricator is used and located as close to the tool as possible If a lter regulator lubricator is not installed place up to 6 drops of compressor oil into the NPT inlet plug before each use If a lter regulator lubricator is installed keep the air lter clean A dirty lter will reduce the air pressure to the ...

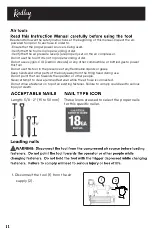
Page 12: ...dioxide or any other combustible or bottled gas to power this tool Do not use this tool in the presence of any ammable liquids or gases Keep hands and other parts of the body away from the ring head during use Do not point the tool towards the operator or other people Never attempt to clear a jammed fastener while the air hose is connected Do not drive a fastener on top of an existing fastener Fai...

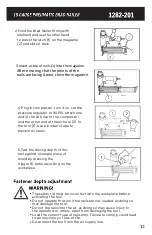
Page 13: ...to the tool 1 Use plumber s tape to prevent air leaks 5 Test the driving depth of the tool against a sample piece of wood by pressing the trigger 1 before working on the workpiece The safety tip must be in contact with the workpiece before activating the tool Do not operate the tool if the nails are not loaded as doing so may damage the tool Do not re nails into the air as doing so may cause injur...

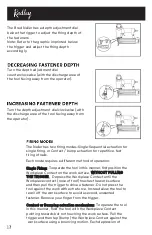
Page 14: ... different method of operation Single Firing To operate the tool in this manner first position the Workpiece Contact on the work surface WITHOUT PULLING THE TRIGGER Depress the Workpiece Contact until the Workpiece contact nose of tool touches the work surface and then pull the trigger to drive a fastener Do not press the tool against the work with extra force Instead allow the tool to recoil off ...

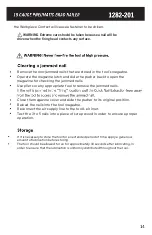
Page 15: ...ool to remove the jammed nails Close the magazine cover and slide the pusher to its original position Reload the nails into the tool magazine Reconnect the air supply line to the tool s air inlet Test re 3 to 5 nails into a piece of scrap wood in order to ensure a proper operation If it is necessary to store the tool for an extended period of time apply a generous amount of lubrication before stor...

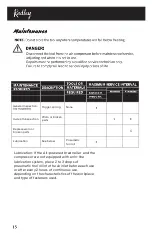
Page 16: ...ow Pneumatic tool oil Lubrication If the Air powered brad nailer and the compressor are not equipped with an in line lubrication system place 2 to 3 drops of pneumatic tool oil into the air inlet before each use or after every 2 hours of continuous use depending on the characteristics of the workpiece and type of fasteners used ...

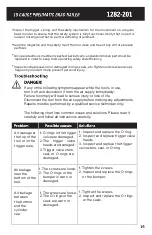
Page 17: ...ry or loss of life Disconnect the tool from the air supply before making any adjustments Repairs must be performed by a qualified service technician only The following chart lists common issues and solutions Please read it carefully and follow all instructions carefully Air leakage at the top of the tool or in the trigger area 1 O rings in the trigger valve are damaged 2 The trigger valve heads ar...

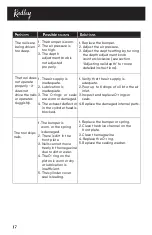
Page 18: ... The O rings or seals are worn or damaged 4 The e haust de ector in the cylinder head is blocked 1 Verify that the air supply is adequate 2 Pour up to 6 drops of oil into the air inlet 3 Inspect and replace O rings or seals 4 Replace the damaged internal parts The tool skips nails 1 The bumper is worn or the spring is damaged 2 There is dirt in the front plate 3 Nails cannot move freely in the mag...

Page 19: ...s are damaged 2 The driver guide is damaged or worn 3 The magazine screw is loose 4 There is dirt in magazine 1 Use proper nails See section Clearing a jammed nail 2 Inspect and replace the driver 3 Tighten the magazine 4 Open and clean the magazine ...

Page 20: ......

Page 21: ...other parts may create a safety hazard or cause damage to the tool Any attempt to repair or replace electrical parts on this tool may create a safety hazard unless repairs are performed by a quali ed technician For more information call the Toll free Helpline at 1 866 349 8665 ...

Page 22: ......

Page 23: ......

Page 24: ...battery and charger This warranty does not include expendable parts including but not limited to blades brushes belts and light bulbs This warranty covers defects in material or workmanship only It does not cover normal wear and tear failure due to abuse misuse or defects caused by careless or accidental mishandling If this Radley product is used for commercial or rental purposes this warranty doe...

Page 25: ... Limited Warranty on tool RADLEY TOOLS 1282 201 READ ALL INSTRUCTIONS BEFORE FIRST USE KEEP THIS MANUAL FOR FUTURE REFERENCE KEEP AWAY FROM CHILDREN WEAR CSA APPROVED EYE PROTECTION WEAR EAR PROTECTION WEAR FACE PROTECTION ...

Reviews: