background image


37 

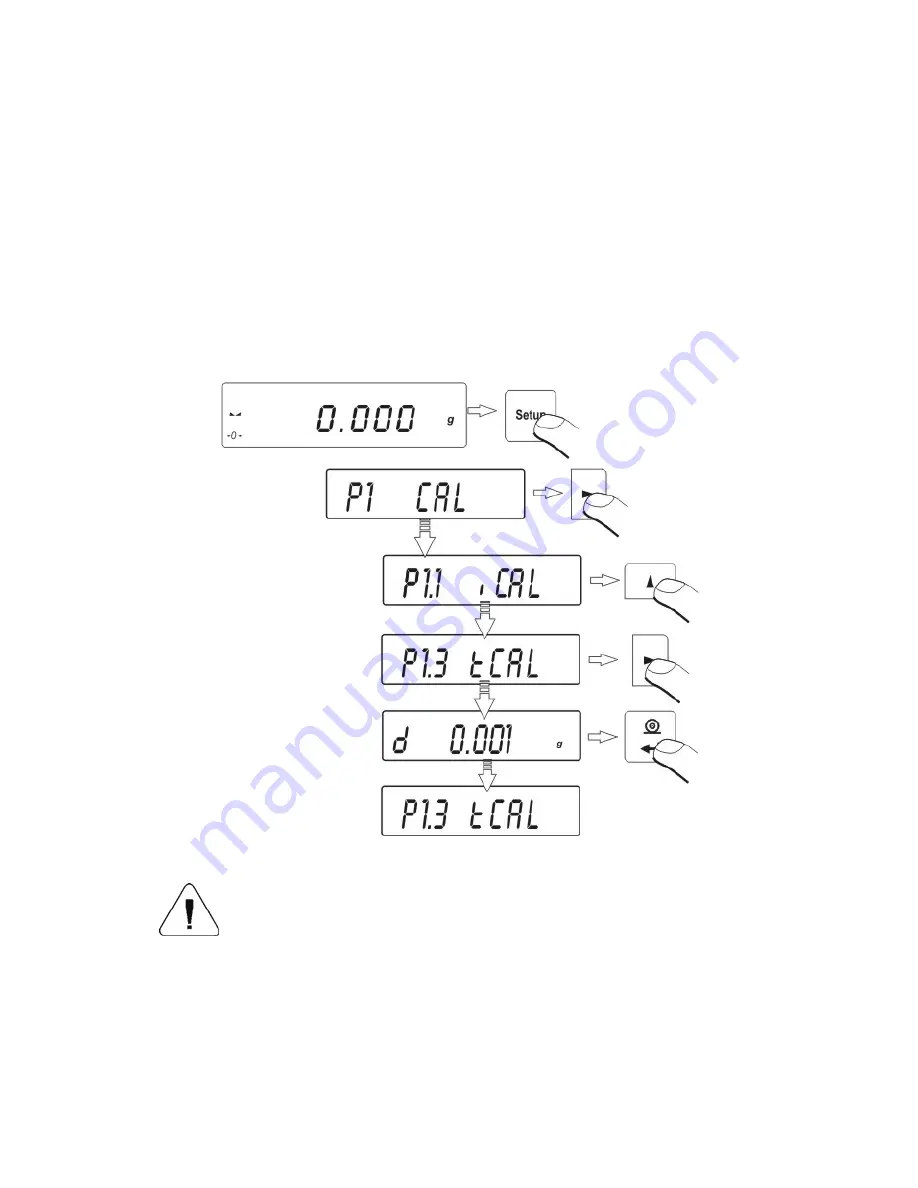
11.3. Calibration test 


11.3.1.  Balances with internal calibration 


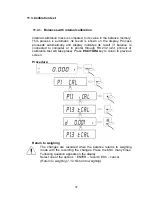
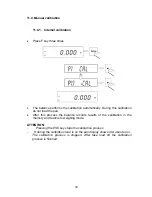
Internal calibration mass is compared to its value in the balance memory. 
This process is automatic. Its result is shown on the display. Process 
proceeds automatically and display indicates its result (if balance is 
connected to computer or to printer through RS 232 joint, printout of 
calibration test will take place). Press

 ESC/TARA

 key to return to previous 

screen. 


Procedure: 


Return to weighing  

The changes are recorded when the balance returns to weighing 
mode with the recording the changes. Press the ESC many times. 
Following question appears on the display.  
Select one of the options  : ENTER – record / ESC – cancel 

(Return to weighing 7.1.2. Return to weighing). 


Summary of Contents for PS Series

Page 1: ...ion balances PS series M A N U F A C T U R E R O F E L E C T R O N I C W E I G H I N G I N S T R U M E N T S RADWAG 26 600 Radom Bracka 28 Street POLAND phone 48 48 38 48 800 phone fax 48 48 385 00 10...

Page 2: ...2 JUNE 2008...

Page 3: ...Connection of additional equipment 12 5 BASIC FUNCTIONS OF THE INSTRUMENT 13 6 KEYBOARD 14 7 USER MENU 15 7 1 Moving in user menu 17 7 1 1 Return to weighing function 17 8 WEIGHING 17 8 1 Choice of b...

Page 4: ...of standard entered to balance memory by user 54 13 4 Defining thickness of solids and liquids 55 13 4 1 Testing thickness solids 56 13 4 2 Testing thickness of liquid 56 13 5 Summing function 57 14...

Page 5: ...S 72 19 ADDITIONAL EQUIPMENT 72 19 1 Vibration damping table 72 19 2 Rack for weighing load under balance 72 19 3 Set for defining thickness of solids and liquids 72 19 4 Additional display 73 19 5 Co...

Page 6: ...000 C 2 Max capacity 510g 2550ct 200 2000g 60g 110g 210g 360g 510g 600g 750g 1000g Tare range 510g 2550ct 2000g 60g 110g 210g 360g 510g 600g 750g 1000g Min capacity 0 02g 0 1ct 20mg 20 mg Readability...

Page 7: ...ty 2100 g 10500 ct 600 g 1200g 2100 g 3500 g 4500 g 6000 g Tare range 2100 g 10500 ct 600 g 1200g 2100 g 3500 g 4500 g 6000 g Min capacity 0 5 g 2 5 ct 500 mg Readability 0 01 g 0 05 ct 10 mg Repeatab...

Page 8: ...result Do not place any magnetic materials on the weighing pan as this can cause damage of the measuring system of the instrument Be sure to avoid impact shock and overloading the balance in excess o...

Page 9: ...by trained member of staff 3 TRANSPORT AND STORAGE 3 1 Acceptance check Please check the packaging immediately upon delivery and the device during unpacking for any visible signs of external damage 3...

Page 10: ...able surface not affected by vibrations and distant from heat sources Please take special safety measures when weighing magnetic loads as part of this balance is a strong magnet If there is a necessit...

Page 11: ...ing pan 1 on the rubber supporters 3 After putting on all of above parts please check if the weighing pan is firmly located on the rubber supporters Take of the tape which secures the static voltage s...

Page 12: ...nnected to mains only with a power adapter offered as standard accessory to the balance Nominal power supply of the power adapter specified on the data plate of the power adapter should be compatible...

Page 13: ...enu level 9 Functions for calibration and weighing modes Counting pieces PIECES Control HiLo Control of deviations according to standard mass Perc A Perc B Thickness of liquids d_Li or solids d_Co 9 C...

Page 14: ...lects the work mode MODE key Changes measure units UNITS key Sends information to external instrument PRINT or confirms parameter value or function ENTER PRINT ENTER Key Sets indication to zero Esc TA...

Page 15: ...CALr YES no report from calibration P2 GLP Good Laboratory Practice P2 1 USr _ name of user P2 2 PrJ _ name of project P2 3 Ptin YES no printout of measurement time P2 4 PdAt YES no printout of measur...

Page 16: ...3 Ct YES no ct carat P5 4 oZ YES no oz ounce P5 5 oZt YES no ozt troy ounce P5 6 dwt YES no dwt pennyweight P5 7 t YES no t tael P5 8 nno YES no mom momme P5 9 Gr YES no gr grain P6 Func Functions P6...

Page 17: ...ll go back to weighing 8 WEIGHING Before weighing or if the conditions of work changes e g if temperature of surrounding is higher then 3o C balance should be calibrated Balance should be loaded few t...

Page 18: ...key If user presses key ON OFF once again balance is ready to following measurements 8 1 Choice of basic weighing unit Function is used to setting the initial unit with which the balance will start af...

Page 19: ...nt 7 1 2 return to weighing ATTENTION Balance after switching on will start with set basic unit 8 2 Choice of weighing unit temporary Function enables choice of unit with which mass on the pan will be...

Page 20: ...e to be accessible for user after pressing SETUP key Enter group P6 Func 8 3 1 Choice of modes quantity accessible for user Function enables user to set if after pressing RIGHT ARROW key all operating...

Page 21: ...Balance will go back to displaying name ofsubmenu P6 1 FFun If function other than ALL is chosen procedure of returning to weighing differs from remaining ones If e g function PcS is chosen procedure...

Page 22: ...2 Press key Esc TARA balance will return to weighing 8 3 2 Setting contents of P6 1 FFun ALL parameters Function enables switching off modes not used by operator This causes faster access to used mode...

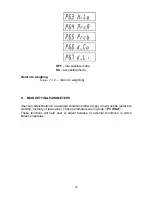
Page 23: ...weighing 9 MAIN SETTING PARAMETERS User can adjust balance to external conditions filter range or own needs autozero working memory of tare value These parameters are in group P3 rEAd These functions...

Page 24: ...edure using NAVIGATION BAR choose value of filter which is needed 1 filtr FASt fast 2 filtr StAnd standard 3 filtr Slouu slow Return to weighing see 7 1 2 return to weighing ATTENTION The higher filte...

Page 25: ...it is advisable to adjust the balance by selecting method of result confirmation as FAST_rEL Fast or rEL Depending on selected option time of weighing will be shorter or longer Fast_rEL fast release...

Page 26: ...value smaller than declared AUTOZERO range e g one division balance will zero automatically and stable result marker and zero indication will be displayed When AUTOZERO function is on each result sta...

Page 27: ...27 9 4 Light off the last display digit Function enables light off the last digit on the display ALuuAYS always nEuEr never uu_StAb when is stable Return to weighing see 7 1 2 return to weighing...

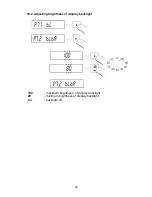
Page 28: ...according to point 6 1 10 1 Backlight of weighing result bl OFF backlight off bl On backlight on bl Aut If result of weighing doesn t change for 10 seconds backlight will turn off automatically Return...

Page 29: ...29 10 2 Adjusting brightness of display backlight 100 maximum brightness of display backlight 20 minimum brightness of display backlight no backlight off...

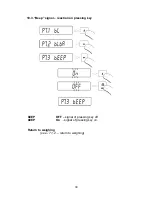
Page 30: ...30 10 3 Beep signal reaction on pressing key bEEP OFF signal of pressing key off bEEP On signal of pressing key on Return to weighing see 7 1 2 return to weighing...

Page 31: ...t be carried out for the location in the factory This adjustment process must be carried out for the commissioning after each change of location as well as in case of fluctuating environment temperatu...

Page 32: ...omatically or manually Manual way of operation is to press CAL key System of automatic calibration will automatically perform calibration informing user about successive stages Cycle of automatic cali...

Page 33: ...ion with regard to changes of temperature balance is provided with precise system of controlling temperature changes temperature of calibration is registered every time next is started if temperature...

Page 34: ...internal calibration balances with external calibration P1 3 tCAL Test of calibration comparison of internal calibration mass with its value saved in balance memory balances with internal calibration...

Page 35: ...35...

Page 36: ...ermining the time after which automatic calibration will start P1 6 CALr printout from calibration report Setting printout of report after finished calibration no printout of report off YES printout o...

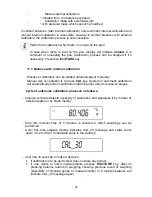
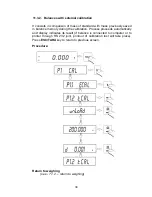
Page 37: ...result if balance is connected to computer or to printer through RS 232 joint printout of calibration test will take place Press ESC TARA key to return to previous screen Procedure Return to weighing...

Page 38: ...alance memory during the calibration Process proceeds automatically and display indicates its result if balance is connected to computer or to printer through RS 232 joint printout of calibration test...

Page 39: ...o not load the pan After this process the balance records results of the calibration in the memory and returns to weighing mode ATTENTION Pressing the ESC key stops the calibration process If during t...

Page 40: ...press the ENTER After the calibration the balance returns to submenu P1 2 uCAL Return to weighing as in the point 5 1 2 If balance is verified user does not have the possibility to perform external ca...

Page 41: ...ttled in menu group the report contains difference between calibration mass remembered by balance after last calibration and calibration mass determined during actual calibration and other information...

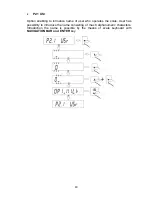
Page 42: ...o not print during report yes print during report 12 1 Setting the contents of printouts for GLP procedures P2 GLP group of parameters enabling to declare variables which will appear on calibration pr...

Page 43: ...introduce name of user who operates the scale User has possibility to introduce the name consisting of max 8 alphanumeric characters Introduction the name is possible by the means of scale keyboard wi...

Page 44: ...equivalents displayed by scale are shown on the drawing below Exemplary user name introduced to scale with capital letters OP1_WILK operator 1 WILK Exemplary user name introduced to scale with small...

Page 45: ...abling to print time of performed measurement P2 4 PdAt Option enabling to print data of performed measurement P2 5 PUSr Option enabling to print user name P2 6 PPrJ Option enabling to print project n...

Page 46: ...ring mass of set standard Control of deviation referring mass of standard Definition thickness of solids and liquids Press MODE key After pressing MODE key name of first available function will be ind...

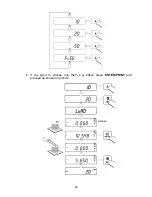
Page 47: ...ls of the same mass Balance in standard execution is equipped with option of counting small pieces of the same mass Counting pieces doesn t operate with other balance functions To use this option ente...

Page 48: ...48 if you want to choose one them e g 20pcs press ENTER PRINT and proceed as shown on picture...

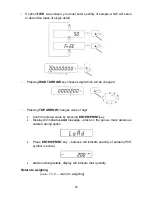
Page 49: ...Pressing TOP ARROW changes value of digit Confirm entered value by pressing ENTER PRINT key Display will indicate LoAd message place on the pan as many details as entered during option Press ENTER PRI...

Page 50: ...TER key when details are not placed on the pan message Er8 outr will be indicated for few second and balance will automatically return to weighing 13 2 control referring mass of set standard Procedure...

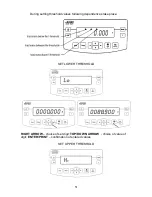
Page 51: ...etting threshold values following dependences take place SET LOWER THRESHOLD RIGHT ARROW choice of set digit TOP DOWN ARROW choice of value of digit ENTER PRINT confirmation of entered values SET UPPE...

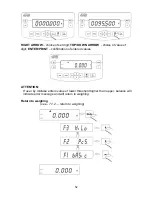
Page 52: ...ce of value of digit ENTER PRINT confirmation of entered values ATTENTION If user by mistake enters value of lower threshold higher than upper balance will indicate error message and will return to we...

Page 53: ...of standard can be determined by its weighing PERC A function or entered to balance memory by user PERC B function 13 3 1 Mass of standard determined by its weighing Procedure Enter to function place...

Page 54: ...referring mass of standard in 13 3 2 Mass of standard entered to balance memory by user Procedure Enter to function Display will show indication as above Using keys choice of set digit and choice of...

Page 55: ...thickness of solids and liquids There is equipment to defining thickness of solids and liquids in additional equipment For user request RADWAG service can render special software to determine thickne...

Page 56: ...sample on upper pan and weigh the same sample in liquid on lower pan Result is represented on display automatically after replacing sample in liquid 13 4 2 Testing thickness of liquid Basic element f...

Page 57: ...in order to make mixture After adding following component composition of the mixture is presented on the display During sum procedure masses of the components are sent to joint RS 232 printout on the...

Page 58: ...58...
Page 59: ...g 14 FUNCTIONS FOR USING RS 232 Choose speed of transmission Define sent data as stable not stable Continuous work Setting data as additional element of parameter in printouts Turn on off sign of last...

Page 60: ...60 14 1 Speed of transmission Method of setting speed of transmission choose required speed of transmission 2400 bit s 4800 bit s 9600 bit s 19200 bit s Return to weighing see 7 1 2 return to weighing...

Page 61: ...Continuous transmission 14 2 1 Continuous transmission off in basic interval Procedure CntA no continuous transmission off CntA YES continuous transmission on Return to weighing see 7 1 2 return to w...

Page 62: ...62 14 2 2 Continuous transmission of in actual units Procedure Cntb no continuous transmission off Cntb YES continuous transmission on Return to weighing see 7 1 2 return to weighing...

Page 63: ...to weighing Automatic operating takes place according to following scheme press TARE key to zero the balance display will indicate marker of stable measurement and marker of zero place the load balanc...

Page 64: ...data type sent through RS 232 joint only for non verified balances Procedure PStb no sending stable or temporary result of weighing PStb YES sending stable result of weighing Return to weighing see 7...

Page 65: ...functions Software enables setting operating of function automatic operating for automatic operating result will not be sent to computer or printer until indication of mass goes below set Lo net value...

Page 66: ...s 8 Stop bit 1 Parity control none Sending weighing results to computer can take place manually after pressing PRINT key continuously after function activating or sending steering commend automaticall...

Page 67: ...67 15 1 Schedules of connecting conductors WEIGHT COMPUTER 2 RxD 3 TxD 3 TxD 2 RxD 4 DTR 6 DSR 5 GND 5 GND 6 DSR 6 DTR 7 RTS 8 CTS 8 CTS 7 RTS...

Page 68: ...is possible to do Example of printout with statistics from series of measurement 1 9 02 15 7 0016 g 2 9 02 39 5 0152 g 3 9 02 58 12 0171 g 4 9 03 15 9 9937 g 5 9 03 34 12 0169 g 6 9 03 48 22 0111 g D...

Page 69: ...r of exceeding the range on Mark space for positive values or for negative values mass 9 marks alignment to the right units 3 marks alignment to the left 15 4 2 Format of sent data for orders generate...

Page 70: ...arks alignment to the left 16 WEIGHING LOADS UNDER BALANCE In standard analytical and precision balances can weigh load on suspension To use this function Remove plastic plug in basic of balance There...

Page 71: ...rk mode on manual printout Function CONSTANCE WORK equivalent for key conb on Format CU 1 CR LF start continuous transmission off in actual interval Function MANUAL WORK equivalent for order conb OFF...

Page 72: ...f standard mass 19 ADDITIONAL EQUIPMENT 19 1 Vibration damping table Thanks to this stable base all vibrations are eliminated Inside of table marble plate is installed which makes foundation for balan...

Page 73: ...g possibility of bending the display 19 5 Computer software PW WIN 2004 gathering data from any balance made by RADWAG RAD KEY 2000 enables to introduce result of weighing to Exel REC FS 2000 making m...

Page 74: ...74 MANUFACTURER OF ELECTRONIC WEIGHING INSTRUMENTS RADWAG 26 600 Radom Bracka 28 Street POLAND Central phone 48 48 38 48 800 phone fax 48 48 385 00 10 Sales Department 48 48 366 80 06 www radwag com...

Reviews: