RADWIN
2000
C
Plus
User
Manual
Release
3.5.70
4
‐
20
Installing
a
Link
Chapter
4
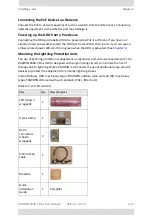
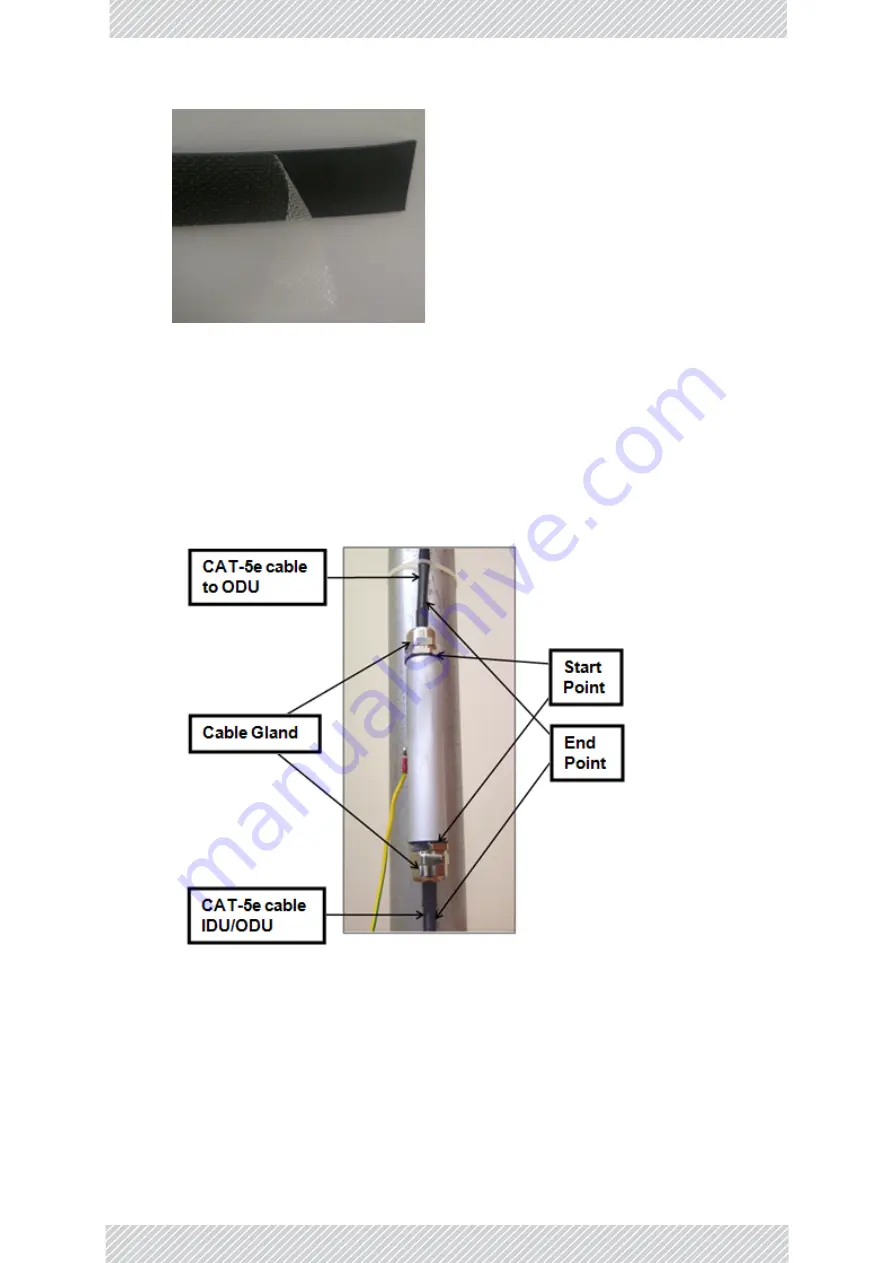
Figure
4
‐
21:
Exposing
the
tacky
side
of
the
sealing
tape
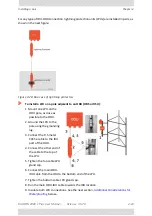
3.
After
connecting
the
short
CAT
‐
5e
IDU/ODU
cable
(provided
in
the
box)
from
the
ODU
to
the
unit,
tighten
the
cable
gland
cap
firmly
and
use
the
insulation
tape
scotch
23
to
fully
cover
both
of
the
cable
glands.
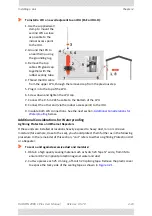
4.
Connect
the
tape
with
tacky
side
up
on
the
cable
gland
cap
and
the
CAT
‐
5e
cable.
Start
at
Start
Point
at
the
bottom
of
the
cable
gland
as
shown
in
Finish
at
End
Point
of
the
CAT
‐
5e
cable,
2.5cm
after
the
end
of
the
shrink
tubing.
Stretch
the
tape
and
apply
half
‐
overlapped
to
form
gap
‐
free
joint.
Figure
4
‐
22:
Start
and
End
points
for
protective
‐
taping
the
unit
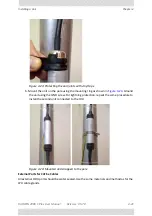
5.
Wrap
two
layers
of
any
scotch
vinyl
plastic
electrical
type
(e.g
Scotch
Super
88
Vinyl
Plastic
Tape
from
3M)
to
protect
the
joints
as
shown
in
.
Ensure
that
the
bottom
of
the
cable
gland
and
the
end
of
the
CAT
‐
5e
cable
are
covered
with
the
sealing
splicing
tape
and
with
vinyl
plastic
tape.
Summary of Contents for 2000 C PLUS
Page 1: ...USER MANUAL RADWIN 2000 C PLUS POINT TO POINT BROADBAND WIRELESS Release 3 5 70...
Page 17: ...Part 1 Basic Installation Release 3 5 70...
Page 139: ...Part 2 Site Synchronization Release 3 5 70...
Page 166: ...Part 3 Advanced Installation Topics Release 3 5 70...
Page 167: ...RADWIN 2000 C Plus User Manual Release 3 5 70 12 1 Chapter 12 Reserved...
Page 188: ...RADWIN 2000 C Plus User Manual Release 3 5 70 17 1 Chapter 17 Reserved...
Page 189: ...Part 4 Field Installation Topics Release 3 5 70...
Page 219: ...Part 5 Product Reference Release 3 5 70...
Page 296: ......

