RADWIN
5000
HPMP
User
Manual
Release
3.5.70
16
‐
3
Commissioning
and
Installation
•
1
x
RF
Cable,
1.5m
•
RADWIN
Manager
supplied
either
on
CD
or
by
electronic
means
Commissioning
and
Installation
Preparing
the
GSU
for
Use
At
the
depot,
log
on
to
the
unit
using
Local
Connection
or
IP
address
10.0.0.120
to
change
its
IP
address
from
the
default
(10.0.0.120).
The
method
is
the
same
as
is
used
for
an
HBS.
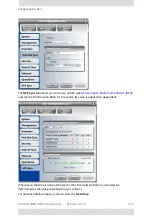
In
the
example
screen
captures
below,
we
use
10.104.20.1
with
Subnet
Mask
255.255.0.0
and
Gateway
10.104.10.21.
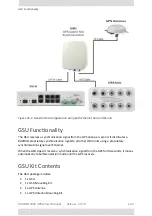
GSU
Installation
The
GSU
looks
like
a
small
form
factor
ODU.
Mounting
the
GSU
follows
the
standard
pattern.
The
GPS
antenna
is
mounted
outside
on
a
wall
or
pole.
Configuring
the
GSU
Getting
Started
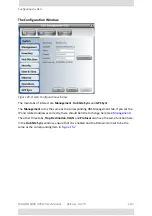
To
configure
the
GSU,
you
log
on
to
it,
exactly
as
in
.
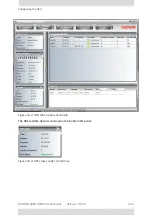
The
GSU
Main
Window
Here
is
the
main
window
for
GSU
configuration:
Summary of Contents for 5000 HPMP
Page 1: ...USER MANUAL RADWIN 5000 POINT TO MULTIPOINT BROADBAND WIRELESS Release 3 5 70...
Page 21: ...Part 1 Basic Installation Release 3 5 70...
Page 69: ...Part 2 Sector Installation Release 3 5 70...
Page 155: ...Part 3 Sector Management Release 3 5 70...
Page 197: ...RADWIN 5000 HPMP User Manual Release 3 5 70 8 42 Nomadic...
Page 252: ...RADWIN 5000 HPMP User Manual Release 3 5 70 11 8 Registering HMUs 3 Open the Air Interface tab...
Page 290: ...Part 4 Site Synchronization Release 3 5 70...
Page 319: ...RADWIN 5000 HPMP User Manual Release 3 5 70 16 7 Configuring the GSU...
Page 320: ...Part 5 Advanced Installation Topics Release 3 5 70...
Page 354: ...Part 6 Field Installation Topics Release 3 5 70...
Page 396: ...Part 7 Product Reference Release 3 5 70...
Page 517: ......


