RADWIN
5000
HPMP
User
Manual
Release
3.5.70
3
‐
3
Stage
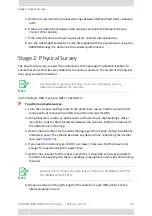
2:
Physical
Survey
5.
Determine
and
record
the
compass
bearings
between
HBS
and
fixed
HSUs,
relative
to
north.
6.
If
there
are
obstructions
between
the
two
sites,
calculate
the
Fresnel
Zone
(see
for
details).
7.
If
the
sites
chosen
do
not
meet
requirements,
consider
alternative
sites.
8.
Use
the
Link
Budget
Calculator
(on
the
CD
supplied
with
the
equipment
or
using
the
RADWIN
Manager)
to
determine
the
expected
performance.
Stage
2:
Physical
Survey
The
physical
site
survey
reviews
the
environment
of
the
proposed
installation
location,
to
ensure
that
the
sector
sites
are
suitable
for
the
wireless
network.
The
results
of
the
physical
site
survey
should
be
recorded.
In
what
follows,
ODU
may
be
an
HBS
or
a
fixed
HSU:
To
perform
a
physical
survey:
1.
From
the
compass
readings
taken
in
the
preliminary
survey,
find
the
azimuth
(hori
‐
zontal
position)
that
each
fixed
HSU
should
face
towards
the
HBS.
2.
Using
binoculars,
locate
any
obstructions
such
as
tall
trees,
high
buildings,
hills
or
mountains.
Look
for
other
RF
towers
between
the
two
sites.
Mark
the
locations
of
the
obstructions
on
the
map.
3.
Determine
the
location
for
the
ODUs
(having
regard
for
existing
rooftop
installations
and
tower
space).
They
should
be
above
any
obstructions,
considering
the
Fresnel
zone
(see
).
4.
If
you
need
to
install
any
type
of
ODU
on
a
tower,
make
sure
that
the
tower
is
far
enough
from
overhead
electric
power
lines.
5.
Determine
a
location
for
the
indoor
equipment;
it
should
be
as
close
as
possible
to
the
ODU.
At
an
existing
site,
there
is
probably
an
equipment
room
with
cable
‐
routing
channels.
6.
Measure
and
record
the
path
length
of
the
cable
from
each
ODU
position
to
the
indoor
equipment
room.
Note
It
is
advisable
to
go
on
a
clear
day,
so
you
can
more
easily
see
any
obstructions
between
the
two
sites.
Note
Outdoor
CAT
‐
5e;
Maximum
cable
length:
100m
for
10/100BaseT
and
75m
for
1000BaseT
(GbE
PoEs)
Summary of Contents for 5000 HPMP
Page 1: ...USER MANUAL RADWIN 5000 POINT TO MULTIPOINT BROADBAND WIRELESS Release 3 5 70...
Page 21: ...Part 1 Basic Installation Release 3 5 70...
Page 69: ...Part 2 Sector Installation Release 3 5 70...
Page 155: ...Part 3 Sector Management Release 3 5 70...
Page 197: ...RADWIN 5000 HPMP User Manual Release 3 5 70 8 42 Nomadic...
Page 252: ...RADWIN 5000 HPMP User Manual Release 3 5 70 11 8 Registering HMUs 3 Open the Air Interface tab...
Page 290: ...Part 4 Site Synchronization Release 3 5 70...
Page 319: ...RADWIN 5000 HPMP User Manual Release 3 5 70 16 7 Configuring the GSU...
Page 320: ...Part 5 Advanced Installation Topics Release 3 5 70...
Page 354: ...Part 6 Field Installation Topics Release 3 5 70...
Page 396: ...Part 7 Product Reference Release 3 5 70...
Page 517: ......

