background image

34

    MEMORY RECALL

The KNOW SUGAR Meter automatically stores 120 test results, letting you review them in order from
the most recent to the oldest. The meter also calculates and displays 7, 14 and 28-day averages. You
can review the individual or average test result by entering the memory mode.

Recall the Memory

STEP 1.

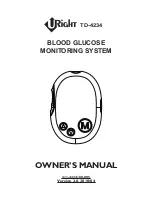
Enter the Memory Mode While the meter is turned off, press M
BUTTON to turn on the meter. When the strip symbol blinks in the
display, press M BUTTON again to enter memory mode.

STEP 2.

Recalling Average Test Results When entering the memory mode,
the 7-day average will appear. If you continue to press the M BUTTON,
the 14-day and 28-day averages will appear in order.

Summary of Contents for KNOW SUGAR

Page 1: ...W SUGAR is designed to help you and your healthcare professionals monitor your blood glucose levels All questions about interpreting the results should be directed to your healthcare professionals The...

Page 2: ...plied by the manufacturer 4 Do not use the device if it is not working properly or if it has suffered any damage 5 Before using any product to test your blood glucose read all instructions thoroughly...

Page 3: ...TEST 21 PREPARE FOR BLOOD SAMPLING 26 PERFORMING BLOOD TEST 28 UNDERSTANDING YOUR TEST RESULT 31 TABLE OF CONTENTS COMPARING WITH LABORATORY RESULTS 32 MEMORY RECALL 34 REVIEWING RESULTS ON A PERSONA...

Page 4: ...glucose hyperglycemia If your results are below 60 mg dL 3 3mmol L or above 240 mg dL 13 3mmol L repeat the test and if the results are still below 60 mg dL 3 3mmol L or above 240 mg dL 13 3mmol L con...

Page 5: ...8 mmol L 5 0 mg dL 0 11 mmol L 2 mg dL 0 51 mmol L 10 mg dL 0 13 mmol L 3 0 mg dL 14 8 mmol L 400 mg dL 22 6 mmol L 2000 mg dL 3 33 mmol L 60 mg dL 1 54 mmol L 90 mg dL 12 9 mmol L 500 mg dL 0 44 mmol...

Page 6: ...6 REFERENCE 1 Kahn R and Weir G Joslinis Diabetes Mellitus 13thed Philadelphia Lea and Febiger 1994 489 2 Krall L P and Beaser R S Joslin Diabetes Manual Philadelphia Lea and Febiger 1989 261 263...

Page 7: ...equivalent results to fingertip testing What is the advantage Fingertips feel pain more readily because they are full of nerve endings receptors At other body sites nerve endings are not so numerous...

Page 8: ...tine glucose results are often fluctuating You are pregnant How to increase the accuracy Stimulating blood perfusion by rubbing the puncture site prior to blood extraction has a significant influence...

Page 9: ...pecial chemicals of the test strip The electrical current changes with the amount of glucose in the blood sample The KNOW SUGAR Meter measures the strength of the electrical current calculates your bl...

Page 10: ...f reducing substances such as ascorbic acid and uric acid may cause result slightly higher than the actual glucose level 4 High altitudes above than 3 402 meter 11 158 feet may affect the test results...

Page 11: ...1 User s manual X 1 Quick reference guide X 1 Strip instruction X 1 Control solution instruction X 1 Battery CR2032 preinstall in the meter X 1 NOTE The KNOW SUGAR meter is available as a meter only o...

Page 12: ...arts of your OKmeter Optima 1 LCD DISPLAY The large easy to read display shows test results messages test results stored in memory 2 M BUTTON Main button press button to turn the meter on or perform o...

Page 13: ...ENT Holds ONE 3v Lithium battery battery type CR2032 The battery is pre installed into meter when new purchasing 6 DATA PORT RS232 port allows you to transfer the information stored in the meter to a...

Page 14: ...re is above or below the acceptable range needed for testing 6 CONTROL SOLUTION TEST SYMBOL Appears when you are in Control Solution Mode Your test result will not be stored in meter memory 7 UNIT OF...

Page 15: ...from the vial replace the vial cap and close it tightly 6 Only apply a blood sample or a control solution sample to the test strip s absorbent channel Applying other substances to the test strip s abs...

Page 16: ...not carry loose glucose strips in your carrying case 10 Do not use damaged test strips or test strips changed in any way Warning Keep the test strips vial away from children the vial cap and the test...

Page 17: ...ated at the right side of battery compartment The meter will turn on and enter the setting mode STEP 2 Set the Year The year appears with the number flashing Press and release the M BUTTON to obtain t...

Page 18: ...ET BUTTON to confirm and move to next minutes setting STEP 6 Set the Minutes The minute appears with the number flashing Press and release the M BUTTON to obtain the desired minute Press SET BUTTON to...

Page 19: ...ant to clear the memory press the SET BUTTON again to skip this step If you want to clear ALL memory press and hold M BUTTON for 4 seconds The image will appear on the LCD screen to indicate that all...

Page 20: ...n display test result in milligram per deciliter mg dL or millimoles per liter mmol L The mg dL unit is standard in the United States The mmol L unit is standard in Canada and European countries Your...

Page 21: ...on test 1 To ensure that your meter and test strip are working properly together 2 To allow you to practice testing without using your own blood When should the control solution test be performed 1 Wh...

Page 22: ...n after squeezing wipes off the dispenser tip to avoid contaminations These steps ensure you will get a good sample and an accurate result 5 Store the control solution closed at temperatures below 30...

Page 23: ...tch you may begin test otherwise press M button to code your meter first STEP 3 Mark as a Control Solution Test After the blood symbol appears press M BUTTON and a CONTROL SOLUTION TEST SYMBOL shows u...

Page 24: ...the first drop and wipe off the dispenser tip with a clean tissue paper or cotton Squeeze the bottle again to get the second drop onto a clean non absorbent surface or on your fingertip first STEP 5 A...

Page 25: ...ou continue to get the result falling outside the range your meter and test strip may not be working properly DO NOT use the system to test your blood until you get a test result falls within the cont...

Page 26: ...ets Information 1 Lancet is for single use only 2 Keep lancing device and lancets clean 3 Use caution when removing the used lancet from the device and when disposing the used lancet 4 The lancing dev...

Page 27: ...rates from the lancet 3 Replace the lancing device cap and set the puncture depth to the desired number NOTE The depth selector offers 5 levels of skin 1 2 for soft or thin skin 3 for average skin 4 5...

Page 28: ...ace vial cap after removing test strips Insert test strip immediately into strip slot as illustrated The meter turns on automatically STEP 3 Check Code Number When the code number appears on the scree...

Page 29: ...gertip STEP 5 Obtain a Blood Sample Gently massage your finger or puncture site to obtain the required blood volume To perform the test you need only 0 7 L of blood sample Do not smear the blood sampl...

Page 30: ...unting NEVER try to add more blood to the test strip Discard the test strip and retest with a new one 4 If you do not apply a blood sample within two 2 minutes the meter will automatically turn off Yo...

Page 31: ...after removing it from the vial 2 Was the volume of the blood sample sufficient 3 Was the meter setting the right code 4 Was the test strip vial cap tightly sealed 5 Was the test strip used before th...

Page 32: ...is working properly 2 It is best to fast for at least eight 8 hours before doing comparison tests 3 Take your meter with you to the lab While at the lab 1 Make sure that the samples for both tests th...

Page 33: ...ht hours before doing comparison tests Factors such as the amount of red blood cells in the blood a high or low hematocrit or the loss of body fluid severe dehydration may also cause a meter result to...

Page 34: ...or average test result by entering the memory mode Recall the Memory STEP 1 Enter the Memory Mode While the meter is turned off press M BUTTON to turn on the meter When the strip symbol blinks in the...

Page 35: ...onds to turn off the meter NOTE 1 The control solution results are NOT stored in the memory if you preset the control test correctly Please refer to the CONTROL SOLUTION TEST Section for details The l...

Page 36: ...al Computer Connect the RS232 Interface Cable to your computer With the meter turned off connect the Interface Cable to the Data Port of the meter The meter will turn on and Lnk will appear on the dis...

Page 37: ...ting low You will still be able to test with low battery but you should replace it as soon as possible When battery symbol appears together with E b on the display the meter will no longer give result...

Page 38: ...not affect the test result stored in memory However the time and date may need to re set 2 As with all small objects the battery should be kept away from small children as a safety precaution If the...

Page 39: ...wipe with a cloth moistened with tap water or a mild cleaning agent then dry the device with a soft and dry cloth Do not flush with water 2 Do not use organic solvents to clean the meter Your meter i...

Page 40: ...s You may touch the test strip anywhere with clean dry hands when removing it from the vial or inserting it into the meter Use each test strip immediately after removing it from the vial Do not bend c...

Page 41: ...RISTIC Accuracy Within 15 mg dL 0 83 mmol at glucose concentration 75 mg dL or 4 2 mmol L and within 20 glucose concentration 75 mg dL or 4 2 mmol L Precision CVs of intermediate precision and repeata...

Page 42: ...seconds Measuring Range 20 600 mg dL 1 1 33 3 mmol L Acceptable Hematocrit Range 35 55 Operating Condition 10 C 40 C 50 F 104 F between 10 85 R H Storage Transportation Condition 4 C 40 C 39 F 104 F b...

Page 43: ...under action to take DISPLAY DESCRIPTION ACTION TO TAKE Display check If some parts of the display are not working Contact your local distributor for help Moving Strip The meter is waiting for test s...

Page 44: ...ot confirmed by the way you feel review proper testing procedure and perform a control test Repeat blood test if the display still appears please call medical assistance immediately Test result is low...

Page 45: ...2 defective meter Temperature is out of the operating range Maybe 1 Battery is dead 2 Wrong strip be inserted 3 Meter is defective You have to 1 Repeat test with a new test strip 2 Contact your local...

Page 46: ...0123 2 LOT SYMBOLS DESCRIPTION For in vitro diagnostic use Temperature limitation Store at Please consult instructions for use Use by Expiry date Do not reuse Manufacturer Lot number EU representative...

Page 47: ...47 CONTACT INFORMATION Parsi Anjuman Vazirabad Nanded 431 601 INDIA Ph 912462 244778 Fax 912462 244779 E mail info rahulsurgicals com www rahulsurgicals com Mkt by...

Page 48: ...products purchased The Warranty does not cover the following 1 Transportation costs risks of transport 2 Cost of repairs and or defects resulting from repairs carried out by unauthorized persons 3 Pe...

Page 49: ...d distributor resellers reserve the right to refuse warranty services if any unclear information has been given WARNING This apparatus may or may not suit all users For your own safety and other healt...

Page 50: ...50 FROM STAMP TO...

Page 51: ...riginal warranty expiration or ninety 90 days after shipment of the repaired or replacement system whichever period is longer This warranty is limited to replacement due to defects in parts or workman...

Reviews: