4
RailKing Royal Hudson Steam Engine
Basic Operation
Throttle
– Throttle up the power to your track. Give about 10-12 volts or
enough power so that the engine’s headlight shines brightly. Then put the
engine into motion by either firmly pressing the Direction button on your
transformer or remote once or dropping and advancing the throttle to put the
engine in forward.
Operation Buttons
Use the operation buttons on your transformer as described below.
Horn/Whistle
- To sound the whistle, firmly press the Horn/Whistle button.
The whistle will sound for as long as you continue to depress the button. It
will stop when you release the button. The whistle has four different endings,
depending on whether you hold the button for less than three seconds, three
seconds, four seconds, or five seconds or longer.
Bell
- To sound the bell, firmly press and release the Bell button. To turn the
bell off, press and release the Bell button again. The bell will continue to ring
from the time you turn it on until you press and release the button again to turn
it off.
Direction
– Your train is programmed to start in neutral. The first direction
after neutral upon start-up is forward. Firmly press and release the Direction
button to allow the engine to move forward. Just as you must stop your
automobile between forward and reverse, this engine will not go directly from
forward to reverse; it goes into neutral between directions. If the train has been
moving forward, the first press of the Direction button will put the train from
forward into neutral, the second press into reverse, the third press back into
neutral, and the fourth back into forward. To prevent accidental high-speed
start-ups, this engine is programmed to restart in neutral each time the track
voltage is turned off for 25 seconds or more.
Volume Control
–
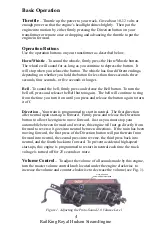
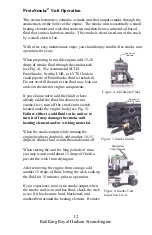
To adjust the volume of all sounds made by this engine,
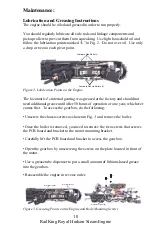
turn the master volume control knob located under the engine clockwise to
increase the volume and counter-clockwise to decrease the volume (see Fig. 1 ).
Proto-Sound 2.0
Volume Adjustment Knob
Figure 1. Adjusting the Proto-Sound 2.0 Volume Level


