Installing The Locomotive Couplers
This RailKing One-Gauge locomotive is designed to accept 3 different types of
G-Gauge couplers - an MTH Remote Control Proto-Coupler™, an MTH Hook
& Loop coupler or a 1/32nd Kadee coupler. For your convenience, the MTH Proto-
Coupler and the hook & loop couplers have been included with your locomotive. The
Kadee type must be the 1/32nd size and can be purchased from a Kadee coupler
retailer.
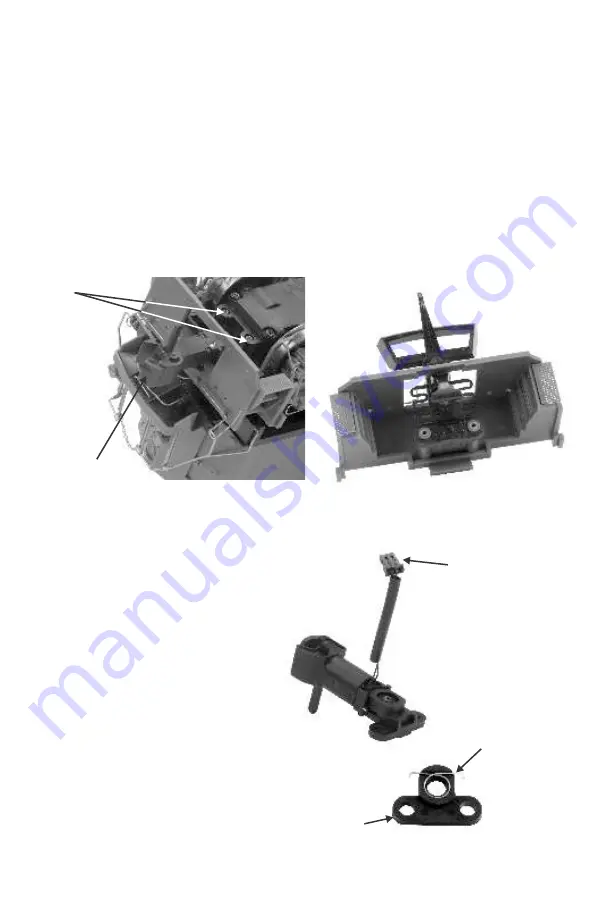
Both the Proto-Coupler and the Hook & Loop coupler designs attach to the locomotive
trucks in the same manner (shown below). To apply the Hook & Loop coupler, remove
the 2 coupler mounting screws and unplug the Proto-Coupler from the chassis. Then
apply the Hook & Loop coupler in its place.
Figure: Mounting Position A For Proto-Coupler
and Hook & Loop Couplers
Coupler Mounting
Screws
Proto-Coupler
Figure: Hook & Loop coupler
RailKing One-Gauge SD70ACe Diesel Engine w/Proto-Sound® 3.0
4
If the locomotive is to be mated up
with a different scaled G-Gauge
locomotive, freight or passenger car,
the height of the Proto-Coupler may
need to be adjusted. The Proto-
Coupler comes installed in position A
(see figure above). To lower the
coupler to position B first remove the
two screws that hold coupler to the
truck and unplug the connector from
the chassis. Then remove the screw
that holds the spacer to the coupler
(be careful not to lose the spring).
Next, apply the spring to the position
B spacer that is provided, as seen in
figure to the right.
Connector
Spring
Position B
Spacer


