background image

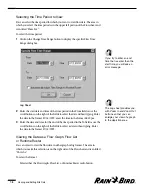
Removing a Schedule

You can remove a schedule from the site’s list of schedules. This does not erase or
destroy the schedule.

To remove a schedule:

From the list of schedules, select the schedule you want to remove and click
the Remove button

The schedule is removed from the list.

Viewing and Editing a Schedule’s Properties

You can view and edit the properties of a schedule from the Schedule sheet in the
Site window.

To view and edit the schedule properties:

1

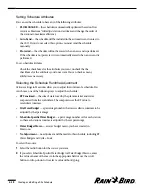
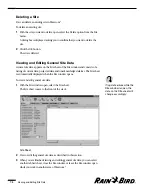
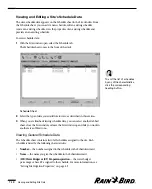
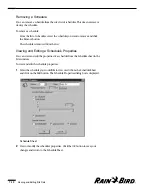
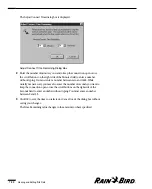
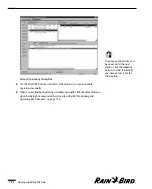
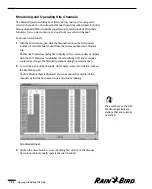
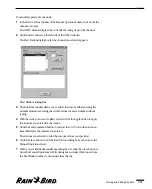
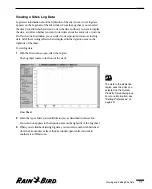
Select the schedule you would like to view or edit from the Schedule Sheet
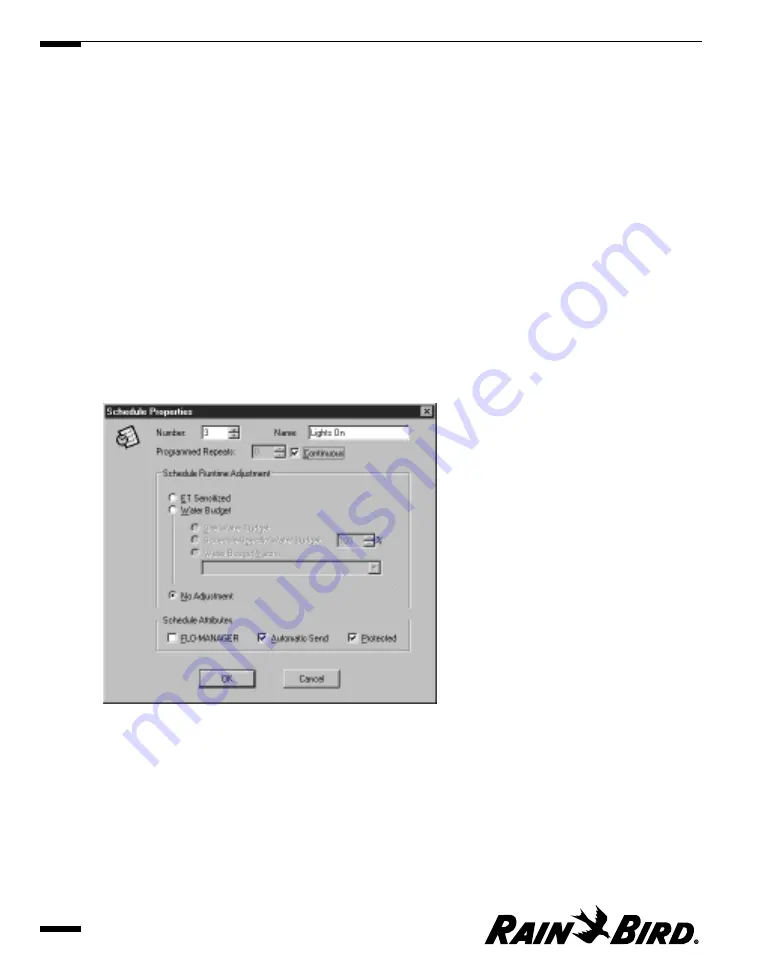
and click on the Edit button. The Schedule Properties dialog box is displayed.

Schedule Sheet

2

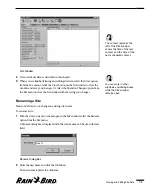
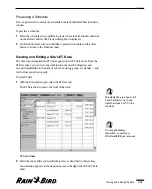
View or modify the schedule’s properties. Click the OK button to save your
changes and return to the Schedule Sheet.

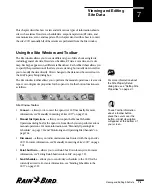
Viewing and Editing Site Data

7.12

Summary of Contents for Freedom System for Maxicom2

Page 1: ...User Manual...

Page 2: ......

Page 3: ...TWARE PRODUCT on a storage device such as a network server used only to install or run the SOFTWARE PRODUCT on your other computers over an internal network however you must acquire and dedicate a lic...

Page 4: ...transferred only as part of that single product package and may not be separated for use on more than one computer 4 COPYRIGHT All title and copyrights in and to the SOFTWARE PRODUCT including but not...

Page 5: ...e Software 1 3 Installing the Maxicom2 Tour 1 4 Installing Adobe Acrobat Software 1 5 Running the Upgrade Utility 1 5 2 Getting to Know Maxicom2 2 1 Starting Maxicom2 2 1 Using theWindows 2 4 Standard...

Page 6: ...dding Text 2 22 Selecting Text 2 22 Deleting Text 2 23 Deleting All Text 2 23 Replacing Text 2 23 Cutting Text 2 23 Copying Text 2 24 Pasting Text 2 24 Using Maxicom2 On line Help 2 25 Viewing the Hel...

Page 7: ...Zone 4 5 SettingWeather Sources for the Site 4 5 Setting the Site Map File Location 4 6 Setting Site Contact Properties 4 6 Setting the Communication Port and Telephone Number 4 7 Setting Times to Co...

Page 8: ...BirdWeather Station Properties 5 6 Selecting the Time Zone 5 6 Setting Times to Receive Data 5 7 Setting the Elevation and Latitude 5 7 Setting theWeather Station s Default ET 5 7 Setting theWeather S...

Page 9: ...iting a Schedule 6 16 Setting Schedule Properties 6 17 Setting ExecutionWindow Programmed Repeats 6 17 Setting Schedule Attributes 6 18 Selecting the Schedule Runtime Adjustment 6 18 Setting the Nomin...

Page 10: ...View 7 14 Modifying the ET or Rainfall 7 15 Viewing and Editing a Site s Event Data 7 15 Setting NoWatering Days 7 16 Setting Auto Pop Up Memos 7 16 Setting Up andViewing the Site Map 7 17 Joining the...

Page 11: ...reasing the Amount of Time for Contact 8 9 Displaying CurrentWeather Source Data 8 9 Getting LoggedWeather Source Data 8 10 EditingWeather Source Properties 8 10 Manually UpdatingWeather Data 8 11 Dis...

Page 12: ...10 1 Viewing the Status of All Ports Simultaneously 10 2 Viewing One Port in Detail 10 2 Disconnecting from a Port 10 3 Viewing a FREEDOM Port in the Communication StatusWindow 10 4 11 Backing Up Data...

Page 13: ...orts that display the information you need control all operations from one computer with an easy to useWindows interface that does not require previous computer experience The benefits you realize by...

Page 14: ...parts See the illustration on the opposite page 1 Central Computer uses the Maxicom2 software program to control the entire irrigation system 2 Computer to CCU or computer to weather source data path...

Page 15: ...nt Radio Link Trunk Radio Cellular Telephone Decoder CCU at site Valve Valve Sensor Hardwire Short haul Modem Two wire Path TW MAXILink Radio LINK R Weather Station Valve Valve Sensor Switch Switch CC...

Page 16: ...eather Source Properties Tells you how to set up a new Maxicom2 weather source in your system This chapter contains instructions on how to set the type of weather source and such particulars as the we...

Page 17: ...sor in a text field or on a menu option checkbox or radio button and press the left mouse button Check means to click a checkbox so that a check mark appears in the checkbox Enter means to type text I...

Page 18: ...are described in Chapter One 2 Set system properties described in Chapter Three 3 Set up your sites described in Chapter Four 4 Set up your weather sources described in Chapter Five and 5 Create sched...

Page 19: ...ardware and software requirements The recommended hardware and software requirements also listed here will maximize the speed of your Maxicom2 software Minimum Hardware and Software Requirements The p...

Page 20: ...recommended requirements for running Maxicom2 Pentium III 450 MHz or faster processor 64 megabytes RAM VGA monitor 101 key standard AT keyboard 4 GB hard disk drive 3 5 inch floppy disk drive CD ROM...

Page 21: ...e converted properly Because Maxicom2 now allows you to identify sites devices and other field items with a name of your choice you may want to change these Upgrading users should also make sure that...

Page 22: ...uld like an on line overview of the Maxicom2 software install the Maxicom2 Tour To install the Maxicom2 tour 1 From the main menu of the Maxicom2 installation CD click the Maxicom2 Tour button The ins...

Page 23: ...intain your existing data you must run the Upgrade Utility after you install the new Maxicom2 software To run the Upgrade Utility 1 Use theWindows95 98 Start menu as described in theWindows95 98 Users...

Page 24: ......

Page 25: ...ve installed Maxicom2 there are three ways you can start the Maxicom2 interface To start Maxicom2 Double click the Rain Bird icon in the tray in the right bottom corner of your screen Or Right click t...

Page 26: ...og Box If you have used a previous version of Maxicom2 and ran the Upgrade Utility after installing the Maxicom2 software the System window is displayed If you launched the program from the Rain Bird...

Page 27: ...n a red back ground If an unacknowledged alarm is present an exclamation point is next to the Rain Bird icon Rain Bird Icon in the Tray Maxicom2 Active Rain Bird Icon Turns Blue Maxicom2 Not Active Ra...

Page 28: ...Window with Maxicom2 Central Window Title bar Contains the title of the window or dialog box When the window is active the title bar changes color Click in a window to make the window active Close but...

Page 29: ...window or dialog box Click the up or down arrows in the horizontal scroll bars or the left and right arrows in the vertical scroll bars to move a line at a time or drag the bar within the scroll bars...

Page 30: ...on a drop down list to select it a selected item appears highlighted Display areas Allow you to view data Display areas cannot be edited Tooltips Display the name or function of an icon in the status...

Page 31: ...ndow is displayed The System window is the base window from which all other interface activity takes place System Window Getting to Know Maxicom2 2 7 Application icon and menu Application title bar Wi...

Page 32: ...ze allows you to use the arrow keys to resize the window and the Enter key to end the operation Minimize minimizes the size of the window to an icon Maximize maximizes the size of the window on your s...

Page 33: ...Maxicom2 Help files Selection pane The selection pane contains buttons that allow you to select any open window The Maxicom2 Central window button the Communication Status window button and the Event...

Page 34: ...ns six hot spots Click a picture hot spot to activate it Central Window Weather Allows you to view weather source information Click theWeather hot spot to display the Create or Open aWeather Source di...

Page 35: ...o find and arrange these open windows Finding a Specific Window To find the open window you want Select the icon for the window you want to see from the selection pane of the System window Or Select t...

Page 36: ...windows on your screen To change the size of the window Select the Restore Maximize or Minimize option from the Application menu or click the Maximize or Restore window buttons The size of the window...

Page 37: ...enu bar quickly and without using the mouse To select an option from the Main menu bar by using the accelerator keys 1 Press and hold down the Alt key then while holding down the Alt key type the lett...

Page 38: ...gistration station property macros database service passwords and FREEDOM For more information see Setting System Properties on page 3 1 Passwords accelerator A Allows you to change the master site or...

Page 39: ...95 98 user manual Print accelerator P Allows you to select the number of copies the printer and other printing options For more information about printing see yourWindows95 98 user manual Backup accel...

Page 40: ...igure accelerator F Allows you to configure the active site by using the Site wizard which automatically fills in any information that may already exist for the open site and guides you through a seri...

Page 41: ...devices by displaying the results of the diagnostics messages sent by Maxicom to the devices via MaxiLINK For more information see ViewingWireless Diagnostics Data on page 7 21 Rain Shut Down acceler...

Page 42: ...the active weather source by using theWeather Source wizard which automatically fills in any information that already exists for the open weather source and guides you through a series of steps to co...

Page 43: ...tor Alt R Report Menu Field Device accelerator D Allows you to create a report that tells how the CCU and its attached field devices are configured For more information see Creating a Field Device Rep...

Page 44: ...erator 1 Allows you to bring the Maxicom2 Central window to the front of your screen The Central window is always listed on theWindow menu and its accelerator is always 1 For more information see Maxi...

Page 45: ...modem connected to your computer Maxicom2 Help Topics accelerator H Allows you to view the Help Topics window which contains a Contents sheet an Index sheet and a Search sheet For more information se...

Page 46: ...by typing Selecting Text Once you have selected text you can delete replace cut or copy it To select a word 1 Position the cursor anywhere in the word 2 Double click the left mouse button The word is...

Page 47: ...p menu again and select Delete All of the text fields are cleared and set to their default values Replacing Text To delete text and replace it with new text 1 Select the text you want to delete The te...

Page 48: ...stays on the clipboard until it is replaced by other text or you exit the application Pasting Text To paste text that you have cut or copied 1 Position the cursor where you would like to paste the cu...

Page 49: ...o see the Help Contents and then read the associated Help files 1 Select the Maxicom2 Help Topics option from the Help menu or click the Help hot spot on the Maxicom2 Central window or click on the qu...

Page 50: ...can read the associated Help file The information you have selected is displayed in the Information window List of Subtopics Help Information 5 When you are finished reading the Help Information windo...

Page 51: ...pot on the Maxicom2 Central window or click on the question mark button on the Main toolbar The Help Topics window is displayed on the left and the Help Information window is displayed on the right Th...

Page 52: ...tion you selected is displayed in the Help Information window Help Topics Index Sheet with Help Information Displayed 4 When you are finished reading the Information window select a new Help Index ent...

Page 53: ...k button on the Main toolbar The Help Topics window is displayed on the left and the Help Information window is displayed on the right The Help Topics window includes a Contents an Index and a Search...

Page 54: ...ching word list to narrow the search and highlight the word you want As you enter the word the application searches for matching words in the word list and highlights the topic closest to the word you...

Page 55: ...n the Help Information window Help Information Window 5 When you are finished reading the Help Information window perform a new Search or select Exit from the File menu to exit Help Getting to Know Ma...

Page 56: ...typed If this option is not available it means that your word list was not set up to support phrase searching In this case you can recreate the word list using the Rebuild option and specify that you...

Page 57: ...he recommended setting because maximizing or customizing the list can slow the search process The rebuilding feature uses a wizard to guide you through the process of creating the Find word list The w...

Page 58: ...ive Help Information window When a topic is annotated a paper clip icon appears at the top of the topic Click the paper clip icon to display your annotation Copy copies the entire topic to the system...

Page 59: ...out Maxicom2 option from the Help menu The About Maxicom2 dialog box is displayed About Maxicom2 Dialog Box 2 When you are finished reading the information click the OK button The About Maxicom2 dialo...

Page 60: ...the Site menu orWeather menu The window or dialog box reverts to the state in which it was last saved Exiting the Maxicom2 Interface It is not necessary to run the Maxicom2 interface for the Maxicom2...

Page 61: ...om2 Control On Turning the Maxicom2 Control Engine On and Off To turn off the Maxicom2 control engine 1 Exit the Maxicom2 interface See Exiting the Maxicom2 Interface above 2 Right click the Rain Bird...

Page 62: ......

Page 63: ...rd runs automatically the first time you open Maxicom2 Or you can set system properties by using the System Properties Setup dialog box without the wizard The System Property Setup dialog box contains...

Page 64: ...the Next button The next section of the wizard will be displayed 4 When you have finished the last section of the wizard click the Finish button System setup is completed and your work is saved Setti...

Page 65: ...egistration Passwords FREEDOM Preferences Station Property Macros and Database Service 3 Follow the instructions in this chapter for the sheet you have selected 4 When you are finished working with th...

Page 66: ...or radio If the port is a telephone port it also has a Modem designation To set system communications properties 1 With the System Properties Setup dialog box open select the Communications tab The C...

Page 67: ...adio delay in milliseconds in the Radio Delay field Telephone Modem Dedicated or Pooled click the arrow next to the Modem field to view and select the modem type from the drop down list enter the init...

Page 68: ...select another tabbed sheet or click OK to save your changes and close the dialog box Apply to save your changes without closing the dialog box or Cancel to cancel your changes and close the dialog bo...

Page 69: ...cally protects your system from unauthorized use To set passwords 1 With the System Properties Setup dialog box open select the Passwords tab Or Select the Passwords option from the System menu The Pa...

Page 70: ...ters long 4 Re enter the new password in the Confirm New Password field 5 Click the OK button Your new password is saved Changing Site Passwords Each time you select a site to work with from the Site...

Page 71: ...pted for the password for the weather source You can use the master password as the weather source password or you can set different passwords for the weather sources From the Passwords sheet you can...

Page 72: ...nt to limit the time frame window during which the FREEDOM System can send commands to Maxicom2 To set a FREEDOM TimeWindow 1 With the System Properties Setup dialog box open select the FREEDOM tab Th...

Page 73: ...or Cancel to cancel your changes and close the dialog box Setting Preferences The Preferences sheet allows you to select a variety of preferences including units of measure currency types default wat...

Page 74: ...r click OK to save your changes and close the dialog box Apply to save your changes without closing the dialog box or Cancel to cancel your changes and close the dialog box Setting Station Property Ma...

Page 75: ...you want to add a new macro click the Add button The EditWater Budget Macro dialog box is displayed Edit Water Budget Macro Dialog Box 4 Enter the name and value you want to give the macro in the Nam...

Page 76: ...ase Service sheet With the System Properties Setup dialog box open select the Database Service tab The Database Service sheet comes to the front of the stack Database Service Sheet To purge and back u...

Page 77: ...r entering the number of months 1 24 or use the scroll buttons on the right side of the field to enter a number without typing The purge date automatically changes below 2 Press the Manually purge the...

Page 78: ......

Page 79: ...erty to you gives an explanation of the property and a default value You can move forward or backward within the wizard or even cancel the wizard at any time The Site wizard runs automatically when yo...

Page 80: ...works Site Wizard 2 Follow the instructions in the wizard If you need more help read Using the Site Properties Setup Dialog Box for Setup on page 4 3 3 After finishing each section of the wizard clic...

Page 81: ...the front of the stack Available sheets are General Contact Irrigation FLO MANAGER FLO WATCH and CCU 3 Follow the instructions in this chapter for the sheet you have selected 4 When you are finished w...

Page 82: ...ady displayed in the Site Name field General Sheet 2 Set the general site properties as described in this section 3 When you are finished setting general site properties you can select another tabbed...

Page 83: ...OK button The new site password is saved Setting the Site s Time Zone The time zone is used to calculate evapotranspiration ET and rainfall data regardless of the relative location of the central comp...

Page 84: ...ntral computer will contact the site s CCU To set contact properties for the site 1 With the Site Properties Setup dialog box open select the Contact tab The Contact sheet comes to the front of the st...

Page 85: ...automatic send and receive times 1 Enter the time to send schedules in the Auto Send Contact Time field Or use the scroll buttons on the right side of the field to enter the time without typing You ca...

Page 86: ...tact radio button if you want manual contact to take priority select the Delay Automatic Contact radio button Setting Retrieval of Logs During Rain Shut Down You can set your system to retrieve logs a...

Page 87: ...to save your changes and close the dialog box Apply to save your changes without closing the dialog box or Cancel to cancel your changes and close the dialog box Setting the Site s Water Budget Adjus...

Page 88: ...e value from 0 to 5 00 in the Minimum ETValue field or use the scroll buttons on the right of the field to select a value without typing Setting the Maximum Daily ET Value The evapotranspiration ET va...

Page 89: ...ion ET to refill the soil to the percentage you select To set the soil moisture refill percentage Enter the value from 0 to 100 in the Soil Moisture Refill Percentage field or use the scroll buttons o...

Page 90: ...Depending on the selection you made in the currency field enter a corresponding symbol e g in the Prefix field Setting the Water Price The water price is the cost per unit of water Setting the estimat...

Page 91: ...20 FLO MANAGER flow zones To set FLO MANAGER properties for the site 1 With the Site Properties Setup dialog box open select the FLO MANAGER tab The FLO MANAGER sheet comes to the front of the stack F...

Page 92: ...NAGER Flow Zones You can enter the flow zone name capacity and point of connection for each zone To set up the flow zones associated with the FLO MANAGER point of connection 1 Double click the row of...

Page 93: ...at an average for the stations in the flow zone You can create up to 20 FLOWATCH zones To set up FLOWATCH zones 1 With the Site Properties Setup dialog box open select the FLOWATCH sheet The FLOWATCH...

Page 94: ...alog box or Cancel to cancel changes and close the dialog box Setting Site CCU Properties The CCU sheet allows you to select and set up the CCU for the site To set site CCU properties 1 With the Site...

Page 95: ...line To set the CCU s call handle 1 Enter the call handle in the CCU Call Handle field 2 Click the Send button to send the new call handle to the CCU and save it into the site database OR Save button...

Page 96: ...on each satellite maximum cycle and minimum soak time for each station on each satellite precipitation rate for each station on each satellite flow rate for each station on each satellite which stati...

Page 97: ...one of the following properties flow rate cycle time soak time landscape coefficient precipitation rate FLOWATCH zone FLO MANAGER zone Decoder Sensor setting We recommend that you fill in the spreads...

Page 98: ...ite Properties CCU sheet then some Device Category options will not be available For example if you had selected a two wire CCU as opposed to a radio link CCU then the radio link satellite and ESP Sit...

Page 99: ...nly the property you have selected Or Double click the cell to display the Set Station Properties dialog box which contains all properties for that cell Or right click the cell and select the Properti...

Page 100: ...ies the property information in the selected cell to the system clipboard Paste Special allows you to select which property items in the cell to copy to the system clipboard Paste All pastes all prope...

Page 101: ...ather Source wizard runs automatically when you select the New option from theWeather menu If you already have a weather source open you can also run the wizard for the currently activeWeather Source...

Page 102: ...ructions in the wizard If you need more help read Using the Weather Source Properties Setup Dialog Box for Setup on the next page 3 After finishing each section of the wizard click the Next button The...

Page 103: ...her Source Properties Setup Dialog Box 2 Select either of the tabbed sheets to bring that sheet to the front of the stack Available sheets are theWeather Source Type and one of the following depending...

Page 104: ...roperties Setup dialog box open select theWeather Source Type tab TheWeather Source Type sheet comes to the front of the stack with the weather source name displayed Weather Source Type Sheet 2 Set th...

Page 105: ...rce password is saved Selecting the Type of Weather Source You can select one of the following six types of weather sources Rain BirdWeather Station a hardware item made by Rain Bird that collects wea...

Page 106: ...ther station properties you can select another tabbed sheet or click OK to save your changes and close the dialog box Apply to save your changes without closing the dialog box or Cancel to cancel your...

Page 107: ...g the Elevation and Latitude To set the elevation and latitude of the weather station 1 Enter the elevation from 30 000 to 30 000 in the Geographical Elevation field 2 Enter the latitude from 90 to 90...

Page 108: ...d automatically for new data when the old data expires To enable or disable automatic contact Check the Auto Contact checkbox to enable automatic contact uncheck the checkbox to disable automatic cont...

Page 109: ...e CIMIS sheet To set CIMIS properties 1 With theWeather Source Properties Setup dialog box open select the CIMIS BBS tab The CIMIS BBS sheet comes to the front of the stack CIMIS BBS Sheet 2 Set the C...

Page 110: ...t side of the field 2 A new dialog box is displayed that allows you to edit delete select all or select no items Choose the number of the time you want to change and click on the Edit button 3 Enter t...

Page 111: ...te with Maxicom2 If you select a contact port that is a telephone modem you must provide the phone number to reach the CIMIS Bulletin Board System The default phone number is 1 800 955 6837 to reach t...

Page 112: ...the front of the stack CCU Based ET Gauge Sheet 2 Set the CCU Based ET gauge properties as described in this section 3 When you are finished setting the CCU Based ET gauge properties you can select an...

Page 113: ...to edit delete select all or select no items Choose the number of the time you want to change and click on the Edit button 3 Enter the time or use the scroll buttons on the right of the fields to set...

Page 114: ...ounter Sheet 2 Set the CCU Based Site Rain Counter properties as described in this section 3 When you are finished setting CCU based rain counter properties you can select another tabbed sheet or clic...

Page 115: ...e contacted automatically for new data when the old data expires To enable or disable automatic contact Check the Auto Contact checkbox to enable automatic contact uncheck the checkbox to disable auto...

Page 116: ...the City field The historical ET data for the location you have chosen is displayed at the bottom of the sheet 5 When you are finished setting historical ET database properties you can select another...

Page 117: ...on theWeather Data Time Zone field select the time zone that applies to your weather station The time zone you select is used to calculate the ET and rainfall log data regardless of the relative loca...

Page 118: ...User EnteredWeather Source button on theWeather SourceWindow toolbar The Update User EnteredWeather Source Data dialog box is displayed 6 Enter the weather source data you desire and click OK to save...

Page 119: ...omatically when you create a new schedule To create a new schedule for a particular site 1 If the site is not already open select Open from the Site menu or click the Open button on the System toolbar...

Page 120: ...n Existing Schedule on page 6 10 6 After finishing each section of the wizard click the Next button The next section of the wizard is displayed 7 When you finish the last section of the wizard click t...

Page 121: ...2 Enter a schedule number in the Assign a Schedule Number field or use the scroll buttons to the right of the field to select the number without typing The default number assigned by the Schedule wiza...

Page 122: ...ield or use the scroll bars to the right of the filed to select the percentage without typing Water Budget Macro Click on the drop down menu to select from the list of water macros you have already cr...

Page 123: ...pon the system s hydraulic capacity Automatic Send Maxicom2 will automatically send the schedules to the CCU s at a predetermined time each day Protected Does not allow Maxicom2 to erase this schedule...

Page 124: ...ies tab at the top of the Schedule window The Schedule Properties sheet moves to the front of the stack Schedule Properties Sheet See Using the Schedule EditorWindow and Toolbar page 6 14 to learn how...

Page 125: ...pen the Schedule wizard and click on the Choose from Templates radio button Schedule Wizard 2 Enter a schedule number in the Assign a Schedule Number field or use the scroll buttons to the right of th...

Page 126: ...e Clear Freeze Reset FreezeWatch Lights Off Lights On Master Schedule MasterValve Rain Check Rain Count RainWatch Regular Everyday Wind Count WindWatch Click on the Finish button Creating and Editing...

Page 127: ...view the properties of the schedule click on the Properties tab at the top of the Schedule Editor window The Schedule Properties sheet moves to the front of the stack Properties Sheet See Using the Sc...

Page 128: ...mplate or copy an existing schedule To create a schedule based upon an existing schedule 1 Open the Schedule wizard and click on the Copy From an Existing Schedule radio button Schedule Wizard 2 Enter...

Page 129: ...would like to copy a schedule and then click the Next button Select a Site 4 Select a schedule from that site that you would like to copy and click the Next button Select a Schedule to Copy Creating...

Page 130: ...w Schedule Name field and click on the Finish button Name the New Schedule The Schedule Editor window is displayed with the schedule information from the schedule you copied displayed Edit Schedule Sh...

Page 131: ...ditor window The Schedule Properties sheet moves to the front of the stack Properties Sheet See Using the Schedule EditorWindow and Toolbar page 6 14 to learn how to modify the schedule you have copie...

Page 132: ...want to edit then click the Edit button The Schedule Editor window opens displaying two tabbed sheets the Edit Schedule sheet and the Properties sheet 5 Follow the instructions in this section to edit...

Page 133: ...rate or stop operating Pulse Count allows you to define an event that will occur when a pulse decoder reaches a specified number of counts Possible events include schedule stopping irrigation turning...

Page 134: ...problems or inconsistencies are detected in the schedule you will see an error message For more information see Auditing a Schedule below Auditing a Schedule When a schedule is saved the schedule is...

Page 135: ...nine times for the schedule to repeat itself automatically after it has finished running This is called Programmed Repeats To set programmed repeats Enter the number of repeats in the Programmed Repea...

Page 136: ...settings in Maxicom2 allow you to adjust the runtime of a schedule You can choose one of the following ways to adjust the schedule ET Sensitized the sum of water used by the plant material and water e...

Page 137: ...section of the Properties sheet is used to do a what if analysis You can change the evapotranspiration ET value and see the associated cost to run the schedule at different ET values To set the ET for...

Page 138: ......

Page 139: ...oolbar Connect allows you to contact the open site s CCU manually For more information see Manually Contacting a Site s CCU on page 7 18 Manual Site Operations allows you to open the Manual Schedule O...

Page 140: ...ore information see Setting Site CCU Properties on page 4 16 To open a Site window for a new site Select the New option from the Site menu The Site wizard begins to run automatically Follow the direct...

Page 141: ...ws you to change an existing site s name To rename a site 1 With the site you want to rename open in the Site window select the Rename option from the Site menu A Rename dialog box is displayed with t...

Page 142: ...cted data and unacknowledged alarms The Site sheet is automatically displayed when the Site window opens To view and edit general site data 1 With the Site window open select the Site sheet The Site s...

Page 143: ...period based upon the cost of water defined in the System Property Setup dialog box ThisWeekTotalVolume the total volume of water used since the previous Auto Send time in the type of units selected...

Page 144: ...t of the expected total water volume based on the cost of water defined in the System Property Setup dialog box Total Station Runtime the total expected runtime of all stations in all schedules which...

Page 145: ...epiction area on the right side of the sheet To view log data 1 With the Site window open select the Log tab The Log sheet comes to the front of the stack Flow Sheet 2 Select the type of data you woul...

Page 146: ...Enter the date and time for the end of the time period in the To field or use the scroll buttons on the right of the fields to select a date without typing Enter the date in the format 07 16 1999 Vie...

Page 147: ...LOWATCH Zone radio button 2 If you choose the FLOWATCH Zone radio button select the name of the zone from the drop down list Viewing Actual Log Data or Projected Data Depending upon the time range you...

Page 148: ...ewing schedule data you can select another tabbed sheet close the Site window or leave the Site window open while you work in another area of Maxicom2 Viewing General Schedule Data The Schedule sheet...

Page 149: ...Site Schedule on page 6 1 To add a new schedule to the list of schedules for the open site 1 Click the New button on the Schedule sheet The Schedule wizard begins to run automatically The wizard dialo...

Page 150: ...Editing a Schedule s Properties You can view and edit the properties of a schedule from the Schedule sheet in the Site window To view and edit the schedule properties 1 Select the schedule you would...

Page 151: ...heet From the ET Data sheet you can view any combination of actual ET irrigation and accepted rainfall data in the form of a check book log graph or calendar and for the time period you specify To vie...

Page 152: ...in check book log graph or calendar format The check book option allows you to see moisture deposits rainfall and irrigation and withdraws evapotranspiration The area in which you make this selection...

Page 153: ...displays a calendar for the open site The calendar is displayed based upon the current date but you can scroll forward to the first month of the next calendar year or back to the last month of the pr...

Page 154: ...isplayed 3 Select NoWatering Day A No AutoWatering icon is displayed on the selected day and automatic sends for that day will be skipped for that day only Setting Auto Pop Up memos You can write memo...

Page 155: ...ile with Other Site Data To see the site map when you open the Map sheet you have to tell Maxicom2 where to find the image file To join the site s map image with other Site data 1 Click the Select Map...

Page 156: ...e window toolbar Or select Manual Contact from the Site menu then select Connect Maxicom2 displays a status dialog box as it attempts to contact the CCU Connecting to Field Device Dialog Box If Maxico...

Page 157: ...ve your changes and close the window or click on Cancel to close the window without saving your changes 4 When you are finished with the connection click the Disconnect button on the Site window toolb...

Page 158: ...ber between zero and 1600 While usually not necessary you may also enter the number of seconds you want to keep the connection open or use the scroll buttons on the right side of the Seconds field to...

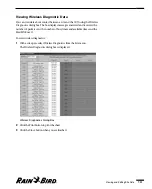
Page 159: ...mber of packets sent the number of busy times and available times and the MaxiLINK used To view wireless diagnostics 1 With a site open selectWireless Diagnostics from the Site menu TheWireless Diagno...

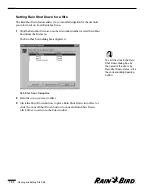
Page 160: ...enu The Rain Shut Down dialog box is displayed Rain Shut Down Dialog Box 2 Select the site s you want to affect 3 Click the Shut Down button to place Rain Shut Down into effect or click the Cancel Shu...

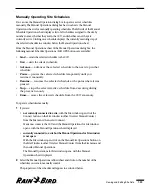
Page 161: ...it manually Resume resumes the selected schedule at the point where it was paused Stop stops the selected active schedule from executing during the present run only Erase erases the selected schedule...

Page 162: ...operating schedules manually click the Close button to close the dialog box or monitor the site as described in Monitoring and Operating Site Channels on page 7 26 Viewing and Editing Site Data 7 24...

Page 163: ...figuration data for a site you can manually send that data to the CCU To send configuration data to the CCU 1 With the site open select Send Configuration Data to CCU from the Site menu or click the S...

Page 164: ...Manual Operations dialog box is displayed If you are not already on line with the CCU Maxicom2 establishes contact with the CCU and continues contact for as long as the Manual Operations dialog box re...

Page 165: ...enter a number without typing 4 With the station you want to affect selected click the Apply button to apply the runtime you entered for the station 5 Click the Send Command button to instruct the CC...

Page 166: ......

Page 167: ...er data from the weather source see Getting LoggedWeather Source Data on page 8 10 Disconnect allows you to end manual contact with a weather source For more information see Disconnecting from aWeathe...

Page 168: ...opens for the weather source you have selected Weather Source Window 2 View or edit the weather source data as described in this chapter 3 When you are finished viewing and editing weather source data...

Page 169: ...text field Rename Dialog Box 2 Enter the new name and click OK The new name replaces the old name Deleting a Weather Source You can delete an existing weather source in Maxicom2 To delete an existing...

Page 170: ...ect the Recent tab The Recent sheet comes to the front of the stack Recent Sheet 2 View or edit the recent weather source data as described in this section 3 When you are finished viewing and editing...

Page 171: ...the weather source You can add edit and remove sites on this list To add a site to the list 1 Click the Add button The Select Sites dialog box is displayed containing a list of all sites configured in...

Page 172: ...ather Source window open select the Historical sheet The Historical sheet comes to the front of the stack Historical Sheet 2 View historical weather source data as described in this section Your selec...

Page 173: ...ing to View Data as a Calendar Graph or List You can display the data in the form of a calendar graph or list The Show As area in which you make this selection is on left side of the Historical sheet...

Page 174: ...nterrupting the ongoing process receiving notice when the device is available or aborting the contact TheWeather Station Current Conditions dialog box appears Weather Station Current Conditions Dialog...

Page 175: ...ng You must enter a number between 0 and 16 Click OK The Time Left value changes to the amount you have specified Displaying Current Weather Source Data You can view the current conditions of a weathe...

Page 176: ...Or use the scroll buttons on the right side of the field to select the days without typing 3 Click the OK button The dialog box shows you the progress of the update of your database You can interrupt...

Page 177: ...data in the Date field or use the scroll buttons on the right of the field to select a date without typing 3 Select either the Direct ET or ET Components radio button 4 If you selected Direct ET enter...

Page 178: ...at any time To manually disconnect from a weather source With theWeather Source window open select the Manual Contact option from theWeather menu and then select Disconnect Or click the Disconnect ico...

Page 179: ...window Clear allows you to clear entries from the log Delete All Deletes all events from the Event Log Statistics Shows specific event statistics for all sites or weather sources Filter allows you to...

Page 180: ...r data in the Event Log window so that you view only the data most important to you You can filter data to include or exclude any combination of the following Alarms a notice concerning system integri...

Page 181: ...ld like to acknowledge 2 Click on the Acknowledge button on the Event Log toolbar The event is acknowledged To acknowledge all events at once 1 Click on the Acknowledge All button on the Event Log too...

Page 182: ...clear all the events All events are cleared Viewing Event log Statistics The event log statistics shows you the following information for all sites and weather sources Site Weather Source Number Site...

Page 183: ...Log window open click the Report button on the Event Log window toolbar A preview of the Event Log Data report is displayed 2 To view and print the report click the Print button to print the report Ne...

Page 184: ...hing each section of the wizard click the Next button The next section of the wizard will be displayed 4 When you have finished the last section of the wizard click the finish button The wizard will g...

Page 185: ...f the fields to select a date and time without typing Use the date format 07 11 99 use the time format 04 00 PM Click the Next button 3 From the list of sites select the sites you want to include in t...

Page 186: ...1999 3 Enter the time for which you want to begin data collection in the Start Time field or use the scroll buttons on the right of the field to select a time without typing Use the time format 04 00...

Page 187: ...r the Station Runtime automatically adjusted check the Automatically Adjust Time Range option 8 Click the Finish button The report you created is displayed in a Flow Time Cost Report window 9 The wiza...

Page 188: ...e Next button 3 From the list of sites select the sites you want to include in the report or if you want to include more than one site hold down the shift key while you select the sites 4 From the lis...

Page 189: ...previewing the Print dialog box will allow you to specify which pages you would like to print Next Page Click on this button to preview the next page of a multi page report Prev Page Click on this but...

Page 190: ...Viewing the Event Log and Generating Reports 9 12 Zoom Out Click on this button to decrease the screen size of the report you are previewing Close Click on this button to close the preview dialog box...

Page 191: ...the status of each on the right side of the window and more detailed information about the selected port on the left side of the window If the port you are viewing is a FREEDOM communication port plea...

Page 192: ...pears in the all ports area on the left side of the window Device Type shows the type of device connected to the port This corresponds to the icon that appears in the all ports area on the left side o...

Page 193: ...om which you want to disconnect The highlighted port appears in the detail area of the Communications Status window 2 Click the Disconnect button A dialog box is displayed asking you to confirm that y...

Page 194: ...d like to view The FREEDOM port status is displayed on the right side of the window Viewing a FREEDOM Port in the Communication Status Window If a FREEDOM user is entering numerical commands they will...

Page 195: ...e back up is stored into the following location X your drive Maxicom2 Backup You can also manually back up your data If you choose to do so Maxicom2 will store the back up in the same location as the...

Page 196: ......

Page 197: ...rigation system channel Each of the field devices connected to the CCU is assigned a number or channel cluster control unit See CCU CIMIS California Irrigation Management Information System An electro...

Page 198: ...se the water budget feature ET evapotranspiration source A type of weather source that collects data useful in calculating and storing ET values event Actions to or by Maxicom2 event log A list of all...

Page 199: ...most recently used operating system The software that controls the way your PC operates and the flow of data to and from the central processing unit PC personal computer IBM compatible computer used...

Page 200: ...be sensitive to current ET and will adjust the schedule appropriately sensor A field device that monitors an area and reports current conditions back to the CCU Flow sensors soil moisture sensors win...

Page 201: ...ted weather source A source of weather data Weather data comes in two types of concern to irrigation evapotranspiration ET and rainfall Taken together with the soil type of the landscape a reasonably...

Page 202: ......

Page 203: ...ltaneously 10 2 disconnecting from 10 3 FREEDOM viewing 10 4 one viewing in detail 10 2 window 10 1 communications properties setting 3 4 crop coefficient 4 10 currency 3 12 4 11 cursor 2 22 D databas...

Page 204: ...eather 2 18 window 2 19 minimize button 2 5 modem telephone dedicated 3 5 pooled 3 5 N no watering days setting 7 16 nominal ET 6 19 P passwords CIMIS 5 11 FREEDOM setting 3 10 master changing 3 8 set...

Page 205: ...perties setting 4 1 4 3 rain shut down 4 8 7 22 renaming 7 3 time zone setting 4 5 toolbar 7 1 water budget 4 9 weather sources setting 4 5 wizard 4 2 software installing 1 3 minimum requirements 1 1...

Page 206: ...st view 8 7 time period selecting 8 7 type of data selecting 8 7 viewing 8 6 historical ET database 5 3 5 15 password 3 9 5 5 properties 5 1 8 10 Rain Bird weather station 5 3 5 6 renaming 8 3 sites a...

Page 207: ...il 3 Visit the Rain Bird web site for current information at www rainbird com 4 Fax us at 520 741 6146 and you will receive a reply via fax 5 Call Rain Bird Technical Support between 7 30 a m and 4 00...

Page 208: ...PN 633627...
Reviews: