HEIGHT
ADJUSTMENT
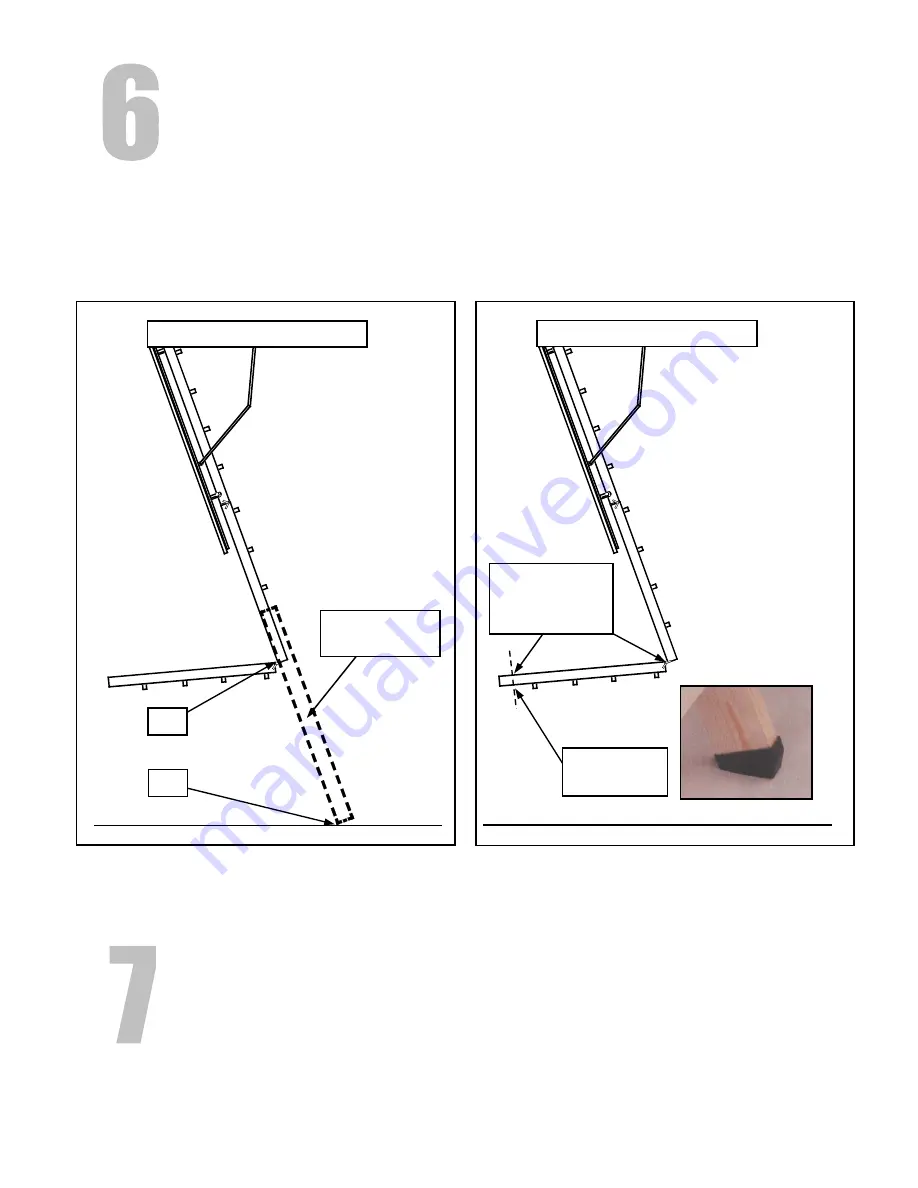
1. Unfold all sections as shown in Figure 10.
2. Using a straight edge, measure the distance from Point A to Point B using the
back side of center section as a guide.
3.
Cut section at 90 degree angle and attach floor bumpers using screws provided.
Screw from bottom. Figure 11.
(
Note: Measure and cut each leg separately
since there may be a variation in the floor level.)
Note: If cut line is within 1” of bottom of tread, remove tread and make cut.
Tread should not be put back as it is not needed. The set screw as shown in
Figure 9 will be used to make final adjustment.
Page 5
Figure 11
Transfer
Measurement
and make cut
Figure 10
A
B
Straight Edge
Ruler
FINAL
ADJUSTMENT
1. Extend all sections to a straight position. Stair should now rest firmly on floor with
no gaps where sections come together.
2. If there are gaps or if the stair does not reach the ground, turn the set screw
(Figure 9) clockwise to lower stair, or counter-clockwise to raise it.
Note: Be sure to adjust both sides equally, and in small increments until stair
rests properly on floor and there are no visible gaps between sections.
Attach Floor
Bumpers


