background image

• This pump is made for indoor use only.

• To prevent suction loss, install the pump as close to the water

source as possible.

• Mount the pump securely using the base plate bolt holes.

• Minimize bending any attached pipes.

• Make sure the connections are water tight and ensure the pipes

are supported independently.

• Install a pressure gauge in the discharge pipes to allow proper

monitoring and diagnostics.

• Ensure the input voltage (V), frequency (Hz), and phase (PH)

matches the specifications marked on the label. When the

voltage is greater than ± 10V, the thermal protector will shut off

the pump.

• Ensure the pump is reliably grounded with a circuit breaker.

• The power cord should be less than 15 feet and approved for


the

current delivered to this pump.

• Ensure that you have made the correct electrical connections


for

the pump.

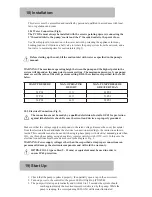
To avoid burning the seal and damaging the pump, never


let the

pump run without water.

The fan should turn freely by hand when disconnected


from

power 

and

 water.

The fan should rotate clockwise when viewed from the


back of

the pump

For proper startup, fill at the discharge drain plug to prime


it.

To begin the flow, turn on the pump and open the discharge

valve.

Before stopping the pump and disconnecting the power,


close

the


upstream discharge valve to avoid siphoning.

• Avoid excessive start and stop operations.


 5) 

Electrical Connection

:

6) 

Starting, Operation, and Stopping the Pump

:

 4) 

Ins

tallation

:

Summary of Contents for MHP75A

Page 1: ...MHP75A MHP150A User Manual It is the installer s responsibility to read understand and comply with these instructions...

Page 2: ...ance Mainly applicable for pumping industrial fluids such as mineral water soft water pure water clean oil and circulation and boosting of other weak chemical industrial mediums Rainwater harvesting s...

Page 3: ...eliably grounded with a circuit breaker The power cord should be less than 15 feet and approved for the current delivered to this pump Ensure that you have made the correct electrical connections for...

Page 4: ...rmal protector for damage The pump does not pump properly The head is too high The water level is too low Intake isn t in water No water Leak in inlet or outlet hoses Make sure the head isn t too high...

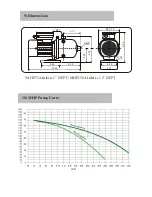
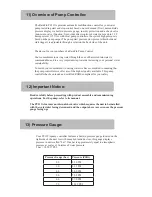
Page 5: ...15 95 5 43 6 30 1 NPT 4 33 4 25 33 13 75 5 11 9 29 8 19 Inlet 5 11 MHP75A Inlet is 1 NFPT MHP150A Inlet is 1 5 NFPT 9 Dimensions 10 MHP Pump Curve...

Page 6: ...s with most pump controllers the system high pressure is based on the pump output The pump start pressure low pressure threshold and start trigger is adjustable through a screw on the back side of the...

Page 7: ...for automatic start after a failure Power supply LED POWER Pump switch on LED ON Safety system activation LED FAILURE Power supply voltage 1 115 125V Maximum current 16 A Max pump power 1100W 1 25 HP...

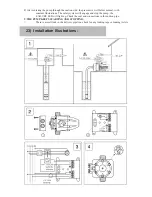
Page 8: ...assembled and installed by personnel qualified in accordance with local laws regulations and codes 18 1 Water Connection Fig 1 The PC115A must always be installed with the arrows pointing upward conne...

Page 9: ...nner systematically every thirty minutes for 24 hours If the failure still persists after all these attempts the system will remain in this condition until the problem has been resolved by manual inte...

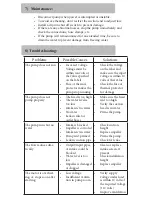
Page 10: ...through the suction side the pressure is well below normal with constant fluctuations The safety system will engage and stop the pump the FAILURE LED will light up Check the seal and connections in t...

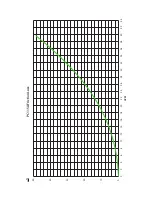
Page 11: ...34 32 30 28 26 44 42 40 38 36 24 22 20 18 16 14 12 10 8 6 4 2 0 GPM 30 50 40 20 10 0 H ft PC115A Friction Loss...

Page 12: ...MHP75A MHP150A Pump...
Reviews: