6
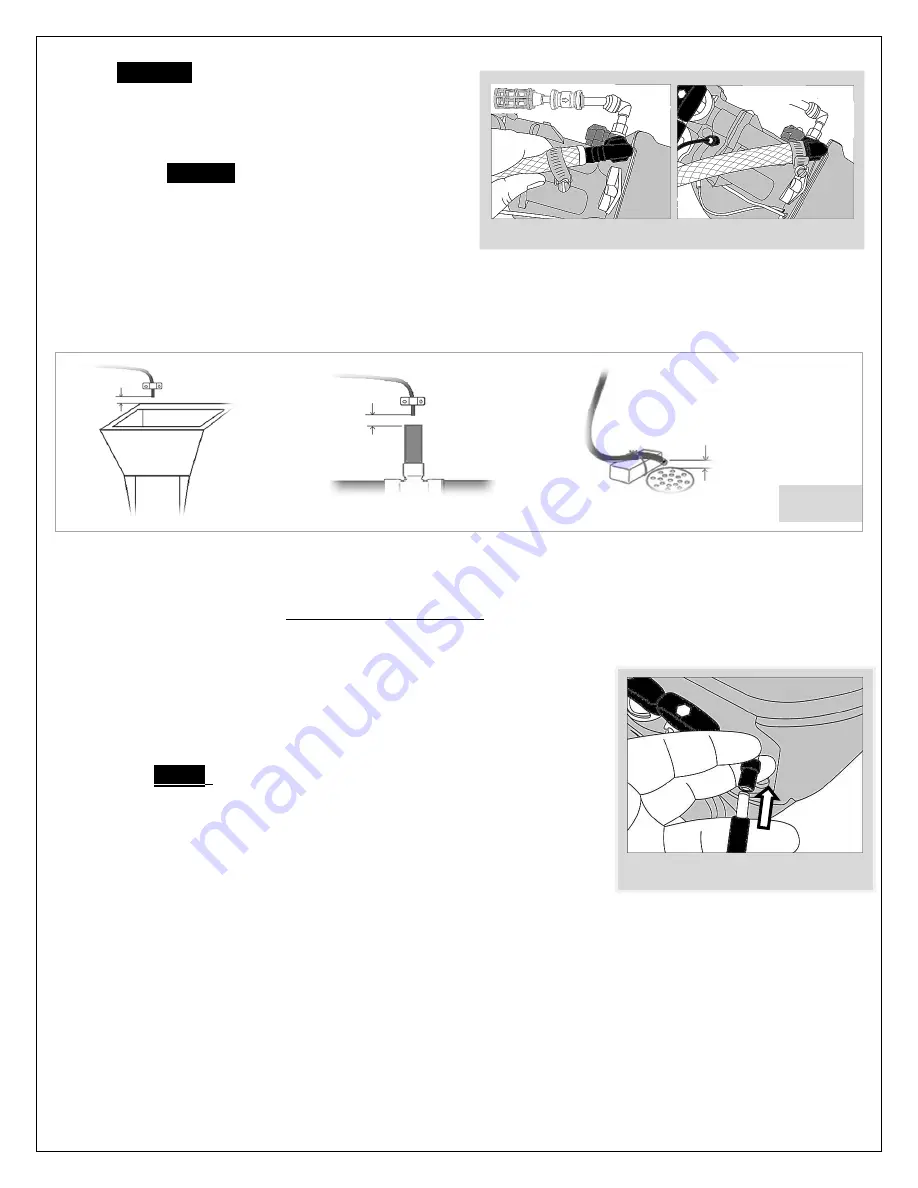
for where to run filter discharge water.
o
WARNING:
NEVER MAKE A DIRECT CONNECTION
INTO A WASTE WATER DRAIN
. A PHYSICAL AIR GAP
OF AT LEAST 3" SHOULD BE USED TO AVOID
BACTERIA AND WASTEWATER TRAVELLING BACK
THROUGH THE DRAIN LINE INTO THE CAFO FILTER
(
Fig 8)
.
CAUTION:
If you have other water
conditioners, such as a water softener, tannin filter
etc.,
RUN THE DRAIN TUBING FOR EACH UNIT
SEPARATELY. DO NOT TEE (COMBINE) DRAIN
TUBING FROM OTHER UNITS
.
o
There will be a fair amount of pressure on this flexible plastic drain line when the filter is in the backwash mode,
so secure it to the drain fitting by a hose clamp. Also secure the drain tube to the wall or ceiling.
You can also use code-approved air-gap attachments available at most plumbing stores.
Before proceeding further, once again make sure that the bypass valve is in the bypass position
(Fig 3)
Close all open taps and turn on the switch for the well pump.
Insert the Allen key into the
inlet side of the bypass valve
and turn it on only slightly and watch for leaks. Make sure
a faucet is on somewhere and that any aerator is removed to avoid clogging from loosened scale in the pipes. Leave
the bypass valve in the same position and slowly turn the main shutoff valve on all the way. If you have no leaks,
proceed to the next steps.
Connect the control valve to the AC power source (
Fig 9)
.
Manually put the CAFO filter into the BACKWASH cycle by pressing the
REGEN button (
see page 10
).
o
NOTE :
WITHOUT PERFORMING BACKWASH THIS UNIT
WILL NOT BE READY FOR SERVICE
.
Turn the bypass valve slightly more into the service position to allow water
to run into the unit.
You want water to initially fill the tank slowly. Once
the tank is full of water, you can open valve fully. This prevents filter
media from being pushed up into the control head by the initial surge of
water going in.
Once the tank is full of water you should start to see water flowing from the drain line. It may look
somewhat discoloured at first. This is normal. Once the water runs clear and free from air pockets, turn both
handles of the bypass valve into the full "service position". You should have a full flow to the drain at this point.
Your water may be discoloured for a day to two after initial installation or may appear milky due to small air
bubbles. This is normal. Also, it will take a few days to get all the untreated water out of your hot water tank and
you may choose to empty your hot water tank at the time of installation and clean it before letting water in from
the filter.
The system is now ready for use.
Fig 8
LAUNDRY
TUB
STANDING
PIPE
FLOOR DRAIN
OR SUMP
Min 1.5”
air gap
Min 1.5”
air gap
Min 1.5
”
air gap
Fig 7
Fig 9


