


6
Lift and mount each side panel onto the sides of the stove. Attach the back to the stove,
and place the soapstone top plate on the top of the stove. Refer to the picture next page.
Mount the special RAIS collar using the included hardware. When installing the first piece
of pipe (at the stove), place the pipe over the collar, which is designed so any moisture or
creosote will drip back into the stove and burn away. If using a crimped pipe, cut that
section off at the bottom and place it over the collar. Install the remaining stovepipe
segments with the crimped end down whenever possible.
Chimney
The RAIS stoves must be installed using a Class A UL 103 HT
approved factory-built chimney system or a code-approved
masonry chimney with a flue liner. In Canada, the installation
must conform to CAN/CSA-B365.
The chimney must extend through the roof at least 3’ (1m),
and 2’ (.6m) above any structure within 10’ (3m).
The condition of the chimney and height is very important. We
suggest a total minimum height of 10’ (3m).
Do not connect this stove to a chimney flue serving
another appliance.
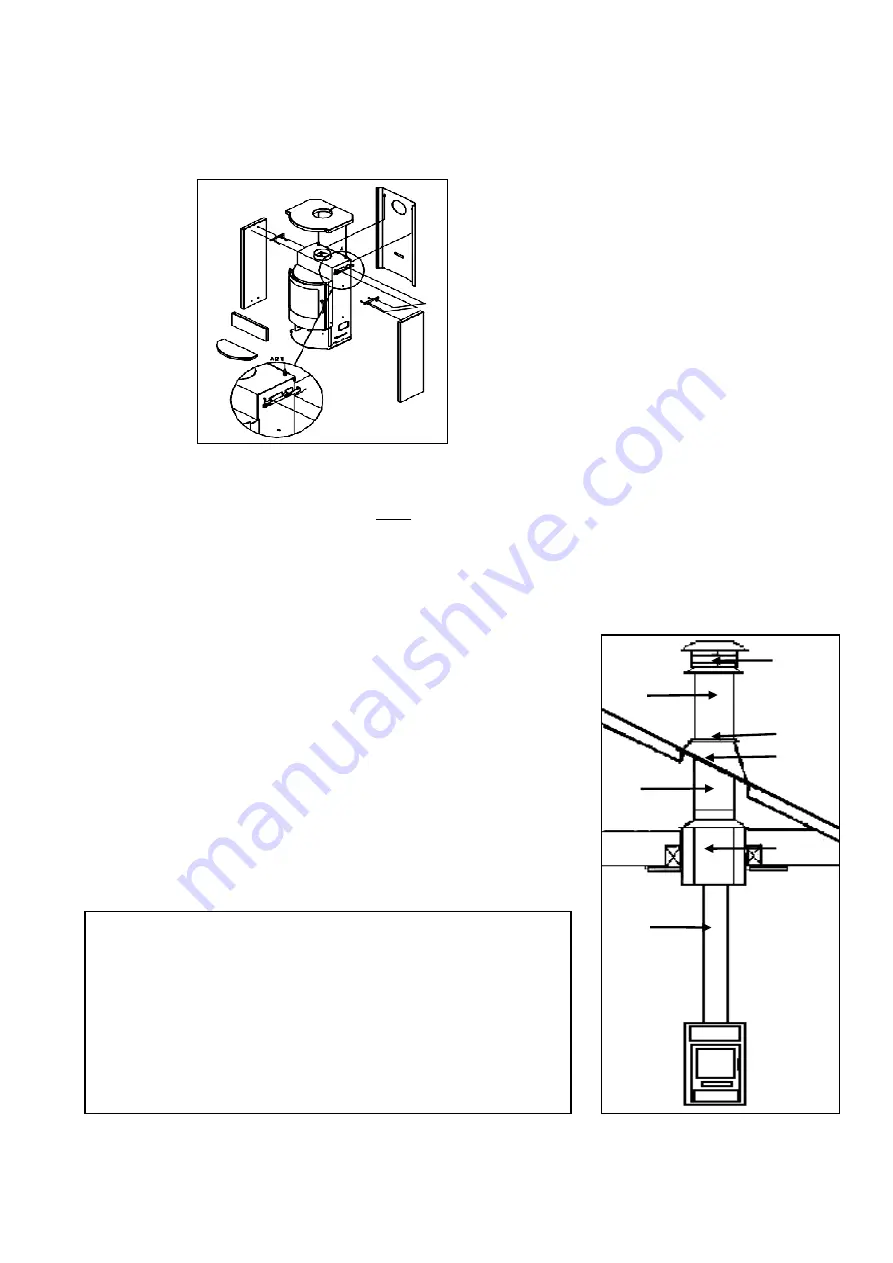
B.
A.
E.
F.
C.
D.
B.
Reguired Installation Components
A. Chimney Cap
B. Insulated Chimney
C. Storm Collar
D. Roof Flashing
E. Ceiling Support Box or Joist Shield/Firestop Spacer
F. Chimney Connector Pipe


