ENGLISH
RAIS manual for Rais QTee
13
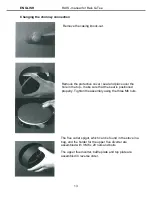
Remove the casing knockout.
Remove the protective cover / seal and place over the
hole in the top make sure that the seal is positioned
properly. Tighten the assembly using the three M6 nuts.
The flue outlet spigot, which can be found in the stove in a
bag, and the holder for the upper flue diverter are
assembled with 3 M6 x 20 nuts and bolts.
The upper flue diverter, baffle plate and top plate are
assembled in reverse order.
Changing the chimney connection
Summary of Contents for Q-TEE
Page 2: ...ENGLISH RAIS manual for Rais Q Tee 2...
Page 12: ...ENGLISH RAIS manual for Rais Q Tee 12...
Page 27: ...ENGLISH RAIS manual for Rais Q Tee 27...
Page 33: ...ENGLISH RAIS manual for Rais Q Tee 33...
Page 34: ...ENGLISH RAIS manual for Rais Q Tee 34...
Page 35: ...ENGLISH RAIS manual for Rais Q Tee 35...
Page 36: ...ENGLISH RAIS manual for Rais Q Tee 36...
Page 37: ...ENGLISH RAIS manual for Rais Q Tee 37...
Page 38: ...ENGLISH RAIS manual for Rais Q Tee 38...
Page 39: ...ENGLISH RAIS manual for Rais Q Tee 39...
Page 40: ...ENGLISH RAIS manual for Rais Q Tee 40...


