M
anual for Rais Visio 1, Visio 2 and Visio 3
78
Rev 7
February 2016
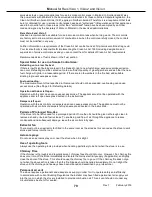
SUPPLEMENTARY OPERATING INSTRUCTIONS FOR THE UK MARKET
TO BE READ IN CONJUNCTION WITH THOSE IN THE INSTRUCTION BOOKLET
READ THE INSTRUCTION BOOKLET AND THESE INSTRUCTIONS
READ THE INSTRUCTION BOOKLET AND THESE INSTRUCTIONS
READ THE INSTRUCTION BOOKLET AND THESE INSTRUCTIONS
CAREFULLY BEFORE USING THE STOVE
CAREFULLY BEFORE USING THE STOVE
CAREFULLY BEFORE USING THE STOVE
WARNING NOTE
Properly installed, operated and maintained this stove will not emit fumes into the dwelling. Occasional
fumes from de
‑
ashing and re
‑
fuelling may occur. However, persistent fume emission is potentially
dangerous and must not be tolerated. In the event of fume emission from the appliance, then the following
immediate action should be taken:
‑
(a) Open doors and windows to ventilate room and then leave the premises
(b) Let the fire go out
(c) When safe to do so, check for flue or chimney blockage and clean if required
(d) Do not attempt to relight the fire until the cause of the fume emission has been identified and corrected.
If necessary seek expert advice.
The most common cause of fume emission is flueway or chimney blockage. For your own safety these
must be kept clean at all times.
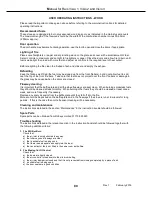
IMPORTANT NOTES
General
Before lighting the stove check with the installer that the installation work and commissioning checks
described in the installation instructions have been carried out correctly and that the chimney has been
swept clean, is sound and free from any obstructions. As part of the stoves’ commissioning and handover
the installer should have shown you how to operate the stove correctly.
CO Alarm
Your installer should have fitted a CO alarm in the same room as the appliance. If the alarm sounds
unexpectedly, follow the instructions given under “Warning Note” above.
Use of fireguard
When using the stove in situations where children, aged and/or infirm persons are present a fireguard must
be used to prevent accidental contact with the stove. The fireguard should be manufactured in accordance
with BS 8423:2002 (Replaces BS 6539).
If the fire is left unattended a spark guard to BS 3248, specification for spark guards for use with solid fuel
appliances should be used.
Chimney cleaning
The chimney should be swept at least twice a year. It is important that the flue connection and chimney are
swept prior to lighting up after a prolonged shutdown period.
If the stove is fitted in place of an open fire then the chimney will require sweeping after a month of
continuous operation. This is a precaution to ensure that any “softer” deposits left from the open fire usage
have not been loosened by the higher flue temperatures generated by the closed stove.
In situations where it is not possible to sweep through the stove the installer will have provided alternative
means, such as a soot door. After sweeping the chimney the stove flue outlet and the flue pipe connecting
the stove to the chimney must be cleaned with a flue brush.
The Clean Air Act 1993 and Smoke Control Areas
Under the Clean Air Act local authorities may declare the whole or part of the district of the authority to be a
smoke control area. It is an offence to emit smoke from a chimney of a building, from a furnace or from any
fixed boiler if located in a designated smoke control area. It is also an offence to acquire an "unauthorised
fuel" for use within a smoke control area unless it is used in an "exempt" appliance ("exempted" from the
controls which generally apply in the smoke control area).
The Secretary of State for Environment, Food and Rural Affairs has powers under the Act to authorise
Summary of Contents for VISIO 1
Page 2: ...Manual for Rais Visio 1 Visio 2 and Visio 3 2 Rev 7 February 2016...
Page 3: ...Manual for Rais Visio 1 Visio 2 and Visio 3 3 Rev 7 February 2016...
Page 4: ...Manual for Rais Visio 1 Visio 2 and Visio 3 4 Rev 7 February 2016...
Page 5: ...Manual for Rais Visio 1 Visio 2 and Visio 3 5 Rev 7 February 2016...
Page 6: ...Manual for Rais Visio 1 Visio 2 and Visio 3 6 Rev 7 February 2016...
Page 7: ...Manual for Rais Visio 1 Visio 2 and Visio 3 7 Rev 7 February 2016...
Page 8: ...Manual for Rais Visio 1 Visio 2 and Visio 3 8 Rev 7 February 2016...
Page 9: ...Manual for Rais Visio 1 Visio 2 and Visio 3 9 Rev 7 February 2016...
Page 10: ...Manual for Rais Visio 1 Visio 2 and Visio 3 10 Rev 7 February 2016...
Page 11: ...Manual for Rais Visio 1 Visio 2 and Visio 3 11 Rev 7 February 2016...
Page 12: ...Manual for Rais Visio 1 Visio 2 and Visio 3 12 Rev 7 February 2016...
Page 13: ...Manual for Rais Visio 1 Visio 2 and Visio 3 13 Rev 7 February 2016...
Page 14: ...Manual for Rais Visio 1 Visio 2 and Visio 3 14 Rev 7 February 2016...
Page 15: ...Manual for Rais Visio 1 Visio 2 and Visio 3 15 Rev 7 February 2016...
Page 16: ...Manual for Rais Visio 1 Visio 2 and Visio 3 16 Rev 7 February 2016...
Page 17: ...Manual for Rais Visio 1 Visio 2 and Visio 3 17 Rev 7 February 2016...
Page 18: ...Manual for Rais Visio 1 Visio 2 and Visio 3 18 Rev 7 February 2016...
Page 19: ...Manual for Rais Visio 1 Visio 2 and Visio 3 19 Rev 7 February 2016...
Page 20: ...Manual for Rais Visio 1 Visio 2 and Visio 3 20 Rev 7 February 2016...
Page 21: ...Manual for Rais Visio 1 Visio 2 and Visio 3 21 Rev 7 February 2016...
Page 22: ...Manual for Rais Visio 1 Visio 2 and Visio 3 22 Rev 7 February 2016...
Page 23: ...Manual for Rais Visio 1 Visio 2 and Visio 3 23 Rev 7 February 2016...
Page 24: ...Manual for Rais Visio 1 Visio 2 and Visio 3 24 Rev 7 February 2016...
Page 25: ...Manual for Rais Visio 1 Visio 2 and Visio 3 25 Rev 7 February 2016...
Page 26: ...Manual for Rais Visio 1 Visio 2 and Visio 3 26 Rev 7 February 2016...
Page 27: ...Manual for Rais Visio 1 Visio 2 and Visio 3 27 Rev 7 February 2016...
Page 28: ...Manual for Rais Visio 1 Visio 2 and Visio 3 28 Rev 7 February 2016...
Page 29: ...Manual for Rais Visio 1 Visio 2 and Visio 3 29 Rev 7 February 2016...
Page 30: ...Manual for Rais Visio 1 Visio 2 and Visio 3 30 Rev 7 February 2016...
Page 31: ...Manual for Rais Visio 1 Visio 2 and Visio 3 31 Rev 7 February 2016...
Page 32: ...Manual for Rais Visio 1 Visio 2 and Visio 3 32 Rev 7 February 2016...
Page 33: ...Manual for Rais Visio 1 Visio 2 and Visio 3 33 Rev 7 February 2016...
Page 34: ...Manual for Rais Visio 1 Visio 2 and Visio 3 34 Rev 7 February 2016...
Page 35: ...Manual for Rais Visio 1 Visio 2 and Visio 3 35 Rev 7 February 2016...
Page 36: ...Manual for Rais Visio 1 Visio 2 and Visio 3 36 Rev 7 February 2016...
Page 37: ...Manual for Rais Visio 1 Visio 2 and Visio 3 37 Rev 7 February 2016...
Page 38: ...Manual for Rais Visio 1 Visio 2 and Visio 3 38 Rev 7 February 2016...
Page 39: ...Manual for Rais Visio 1 Visio 2 and Visio 3 39 Rev 7 February 2016...
Page 40: ...Manual for Rais Visio 1 Visio 2 and Visio 3 40 Rev 7 February 2016...
Page 41: ...Manual for Rais Visio 1 Visio 2 and Visio 3 41 Rev 7 February 2016...
Page 42: ...Manual for Rais Visio 1 Visio 2 and Visio 3 42 Rev 7 February 2016...
Page 43: ...Manual for Rais Visio 1 Visio 2 and Visio 3 43 Rev 7 February 2016...
Page 44: ...Manual for Rais Visio 1 Visio 2 and Visio 3 44 Rev 7 February 2016...
Page 45: ...Manual for Rais Visio 1 Visio 2 and Visio 3 45 Rev 7 February 2016...
Page 46: ...Manual for Rais Visio 1 Visio 2 and Visio 3 46 Rev 7 February 2016...
Page 47: ...Manual for Rais Visio 1 Visio 2 and Visio 3 47 Rev 7 February 2016...
Page 48: ...Manual for Rais Visio 1 Visio 2 and Visio 3 48 Rev 7 February 2016...
Page 49: ...Manual for Rais Visio 1 Visio 2 and Visio 3 49 Rev 7 February 2016...
Page 50: ...Manual for Rais Visio 1 Visio 2 and Visio 3 50 Rev 7 February 2016...
Page 51: ...Manual for Rais Visio 1 Visio 2 and Visio 3 51 Rev 7 February 2016...
Page 52: ...Manual for Rais Visio 1 Visio 2 and Visio 3 52 Rev 7 February 2016...
Page 53: ...Manual for Rais Visio 1 Visio 2 and Visio 3 53 Rev 7 February 2016...
Page 54: ...Manual for Rais Visio 1 Visio 2 and Visio 3 54 Rev 7 February 2016...
Page 55: ...Manual for Rais Visio 1 Visio 2 and Visio 3 55 Rev 7 February 2016...
Page 56: ...Manual for Rais Visio 1 Visio 2 and Visio 3 56 Rev 7 February 2016...
Page 57: ...Manual for Rais Visio 1 Visio 2 and Visio 3 57 Rev 7 February 2016...
Page 58: ...Manual for Rais Visio 1 Visio 2 and Visio 3 58 Rev 7 February 2016...
Page 59: ...Manual for Rais Visio 1 Visio 2 and Visio 3 59 Rev 7 February 2016...
Page 60: ...Manual for Rais Visio 1 Visio 2 and Visio 3 60 Rev 7 February 2016...
Page 61: ...Manual for Rais Visio 1 Visio 2 and Visio 3 61 Rev 7 February 2016...
Page 62: ...Manual for Rais Visio 1 Visio 2 and Visio 3 62 Rev 7 February 2016...
Page 63: ...Manual for Rais Visio 1 Visio 2 and Visio 3 63 Rev 7 February 2016...
Page 64: ...Manual for Rais Visio 1 Visio 2 and Visio 3 64 Rev 7 February 2016...
Page 65: ...Manual for Rais Visio 1 Visio 2 and Visio 3 65 Rev 7 February 2016...
Page 66: ...Manual for Rais Visio 1 Visio 2 and Visio 3 66 Rev 7 February 2016...
Page 67: ...Manual for Rais Visio 1 Visio 2 and Visio 3 67 Rev 7 February 2016...
Page 68: ...Manual for Rais Visio 1 Visio 2 and Visio 3 68 Rev 7 February 2016...
Page 69: ...Manual for Rais Visio 1 Visio 2 and Visio 3 69 Rev 7 February 2016...
Page 70: ...Manual for Rais Visio 1 Visio 2 and Visio 3 70 Rev 7 February 2016...
Page 71: ...Manual for Rais Visio 1 Visio 2 and Visio 3 71 Rev 7 February 2016...
Page 72: ...Manual for Rais Visio 1 Visio 2 and Visio 3 72 Rev 7 February 2016...
Page 73: ...Manual for Rais Visio 1 Visio 2 and Visio 3 73 Rev 7 February 2016...
Page 74: ...Manual for Rais Visio 1 Visio 2 and Visio 3 74 Rev 7 February 2016...

