USER MANUAL --Raiscube A8R 3D Printer
14
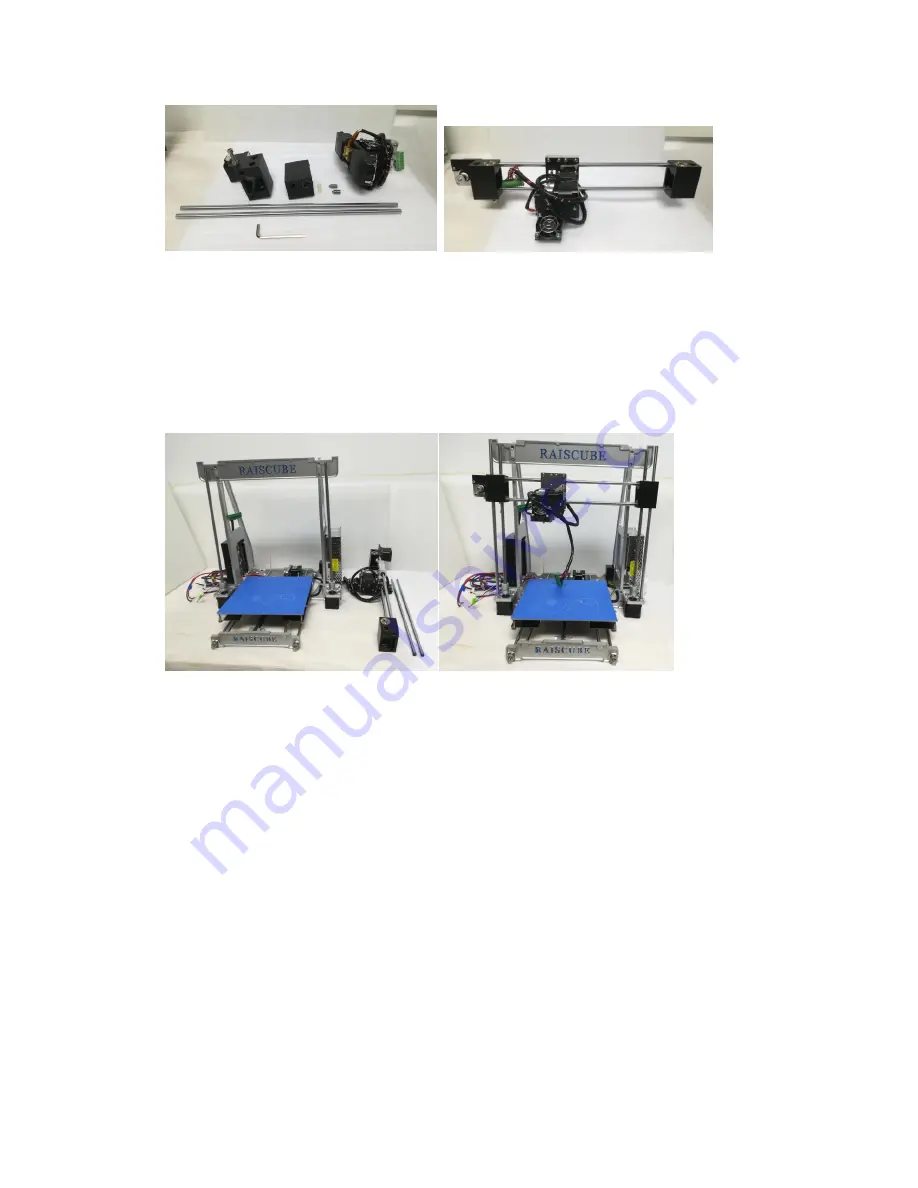
Fig.b30
Fig.b31
STEP.3-2. Add “X Axis module” to machine body. Please note there is threaded hole in each
link block, please target this over onto threaded rods which are with Z motors. And then turn
“flexible couplings” downside by Z motor to screw down “X Axis Module” evenly. Please refer
to Fig.b32 and Fig.b33 for this.
Fig.b32
Fig.b33
STEP.3-3 Construct its roof. Please have the pair of Top Lock Plate, filament rack, and 8pcs
of M3*10 screws and one allen key too. They are as in left of Fig.b34, And Fig.35 shows what
will be like when done this substep.

