USER MANUAL --Raiscube A8R 3D Printer
20
STEP TWO: Even bed. We aim to make same distance of it between nozzle and bed in
different positions. In our case, we make point of four corners to stand for all other positions. (It
makes sense since bed is absolutely even made). Let’s make sequences as “Front Left” --
“Front Right” -- “Back Right” -- “Back Left” and “Back Right” -- “Front Right” -- “Front Left”.
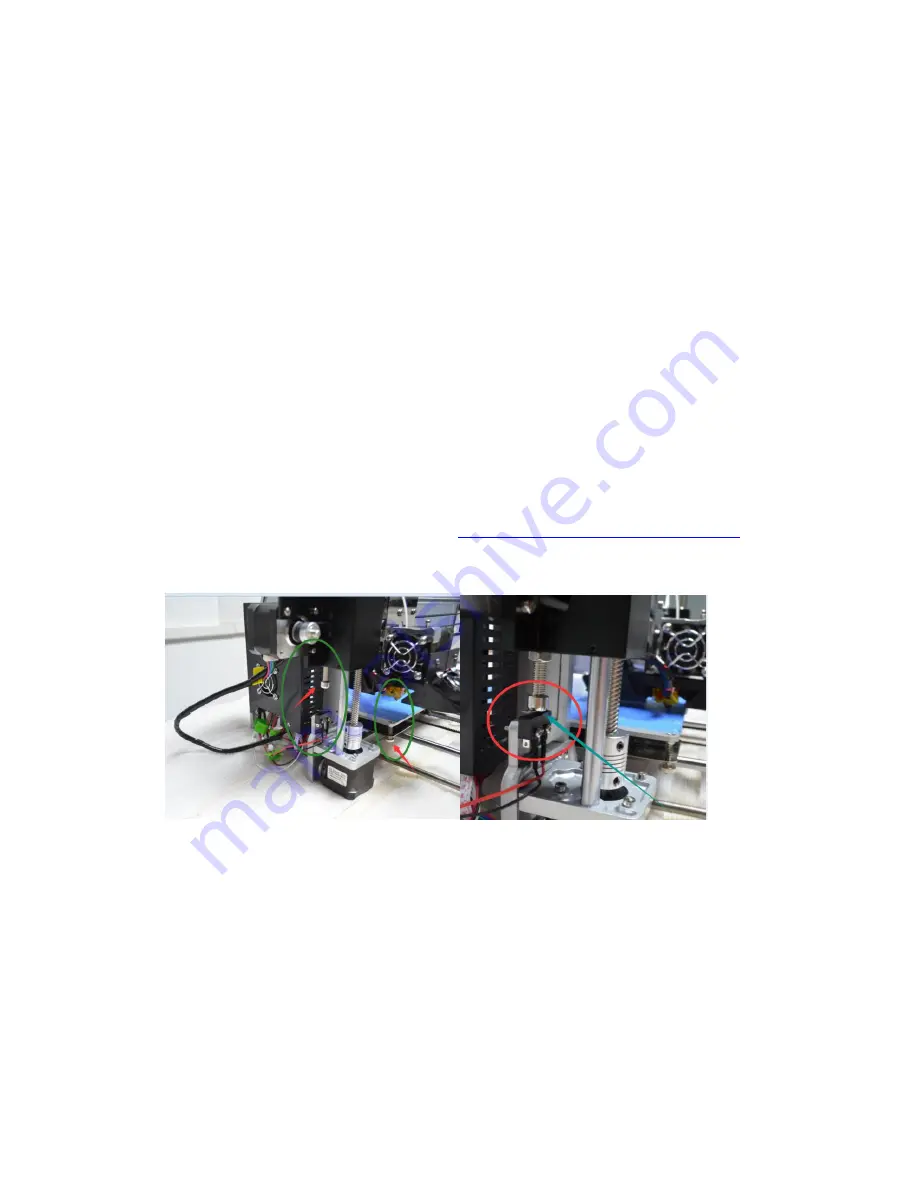
There are two elements can be adjusted to even bed -- M6 screw under left link block and
Hotbed Fastener Set. (Fig.g03
Left green circle is M6 screw, right green circle is “Hotbed
Fastener Set”).
Let’s adjust first point -- Front Left. First, disable the Stepper motors in the LCD menu, so we
can move the extruder and plate by hand to “Front Left”. And use “Z home” order from LCD
Screen, the M6 screw will hit Z axis End-stop switch by then. Now we check and adjust M6
screw to make the nozzle top just touch bed, or allow dragging a piece of A4 paper through.
Move extruder to “Front Right”,
and “Z Home” command from Panel control, check and
adjust the thumbscrew under hotbed to make he nozzle top just touch bed, or allow dragging a
piece of A4 paper through. Repeat this step in other point by sequence set above.
For further detailed information, please find on
http://reprap.org/wiki/Leveling_the_Print_Bed
.
Fig.g03
Fig.g04
PRINT TEST.
Whether it is well leveled or not, we need to test. To print a model and particular observe how
the first few layers are stick to bed. If not good enough, we need to stop printing and check and
adjust leveling again, or review and check other steps during full installation.
Further details of printing, let’s go next to “sample print show”.


