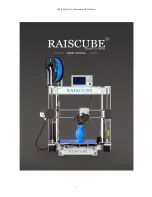
USER MANUAL --Raiscube A8R 3D Printer
5
Build Instruction of Raiscube A8R 3D Printer
Simply we can divide A8R into four segments – Frame, Build Platform, X&Z Motion, and circuit.
We are going to build it one by one in order. Therefore, four major steps to go completing it,
taking 1-3 hours from package to make it on in right way.
Ahead of building, get all parts including tools and screws out of box (Please refer to its
packing list for all parts), and check all if any damage exists, especially the wires and their
connectors. And
Switch PSU to the correct position according to the voltage in your country.
E.g: 110V for US, 220V for UK.
STEP ONE
, FRAME BUILD. Build Aluminum frame first and add remains to it in next three
steps.
First step, We need, left frame module, right frame module, Z Axis Stepper (R&L), Y Axis
Stepper, frame crossbeam, middle bottom plate, back plate, M3 Hex Key Wrench, and 18pcs
of M3*10 Socket Cap Screws. Please pick them from A8R package refer to Fig.b01.
Fig.b01


