USER MANUAL --Raiscube A8R 3D Printer
8
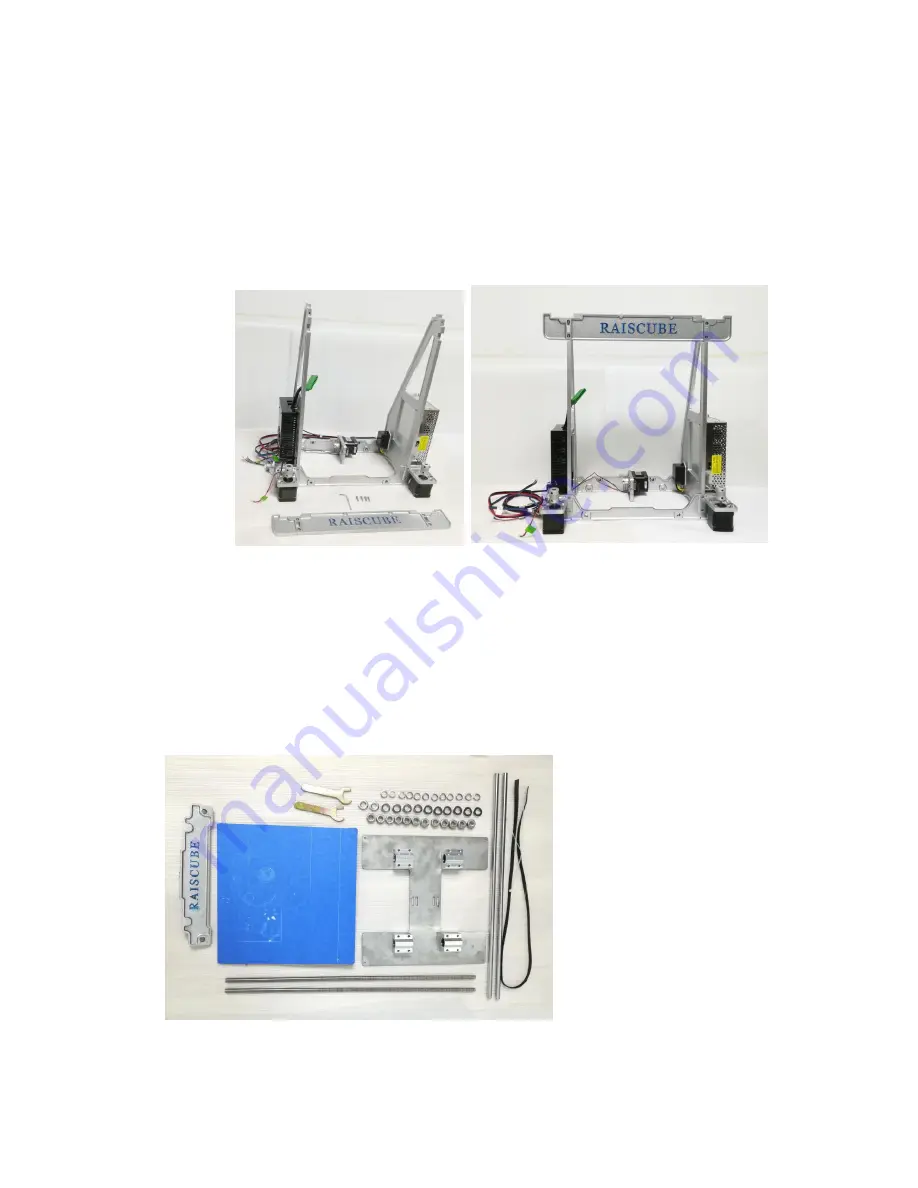
STEP 1-5: Add crossbeam. Find “Frame Crossbeam” in the package and also 4pcs of M3*10
Socket Cap Screws, connect it to main frame as in Fig.b10 and Fig.b11. Now we have finished
building A8R frame. Double check it again to make sure everything in the right way as in
pictures. Afterwards, time to move to next major step – Build Platform assembly.
Fig.b10
Fig.b11
STEP TWO
– “Build Platform” assembly.
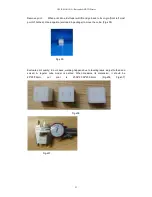
“Build Platform” is a function module including “hotbed” and its “ “H” support plate”, 2pcs of
420mm threaded rods, 2pcs of 390mm rods, front plate, a belt, and 12pcs M8 nuts, 12sets of
M8 Nut-Spacer-washer, to install these we need 2pcs of M8 wrench, and 2pcs of zip-tie.
Please refer to Fig.b12 and “Packing List” to pick all these elements out.
Fig.b12


