USER MANUAL --Raiscube A8R 3D Printer
9
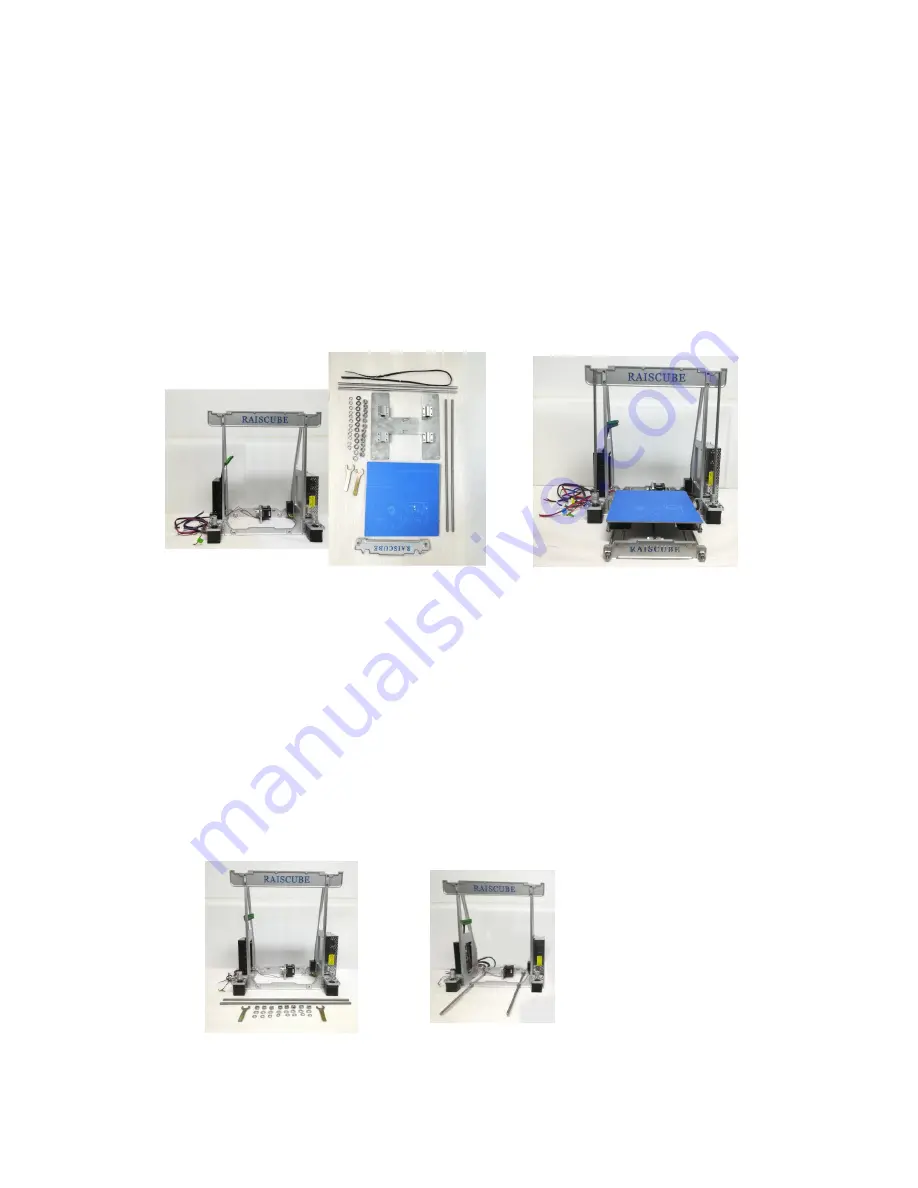
“Build Platform” includes three layers, first layer is at the bottom made by two pcs of 420mm
threaded rod along with 6 pairs of nut sets, which across back plate, middle plate, and front
plate, and each plate is locked by two pairs of M8 Nut set along the threaded rods, each pair of
nuts set on both sides of each plate. Second layer is the moving system, includes Y Axis
stepper, Belt, belt bearing behind front plate, 390mm rods, (which go through four linear
bearings beneath “H” plate, cross over middle plate and heads covered by holes of front and
back plate), “H” module. And hotbed on the top for third layer. These three layers are
combined together to form a movable “Build Platform”. In brief, what got to do is to turn Fig.b13
into Fig.b14.
Fig.b13
Fig.b14
Layer by layer, simply we divide STEP TWO into four substeps, well why not three, we need to
connect double Z threaded rods to both Z Steppers respectively. preparation for STEP
THREE.
STEP 2-1: Fasten 420 threaded rods to the frame with 4 pairs of M8 nut set. One pair of each
hole point, two pairs of each plate. Here we need two M8 wrenches, 4 pairs of M8 Nut sets,
and two pcs of 420mm threaded rods. Please refer to “video demo” in SD Card to get details of
how to stack nut set and how to place each nut set along threaded rods.
Following Fig.b15, Fig.b16 show what looks like before and after this substep.
Fig.b15
Fig.b16

