


RAISCUBE R10 3D PRINTER MANUAL
14
Step 2 Hotbed Leveling.
1
Panel Control, press control button, “
Prepare
” → “
Auto Home
”, to move nozzle to origin
point. Check if nozzle top almost touches hotbed surface. If not, find the long screw behind Left
Z-Axis Link Block, and adjust it to be.
2
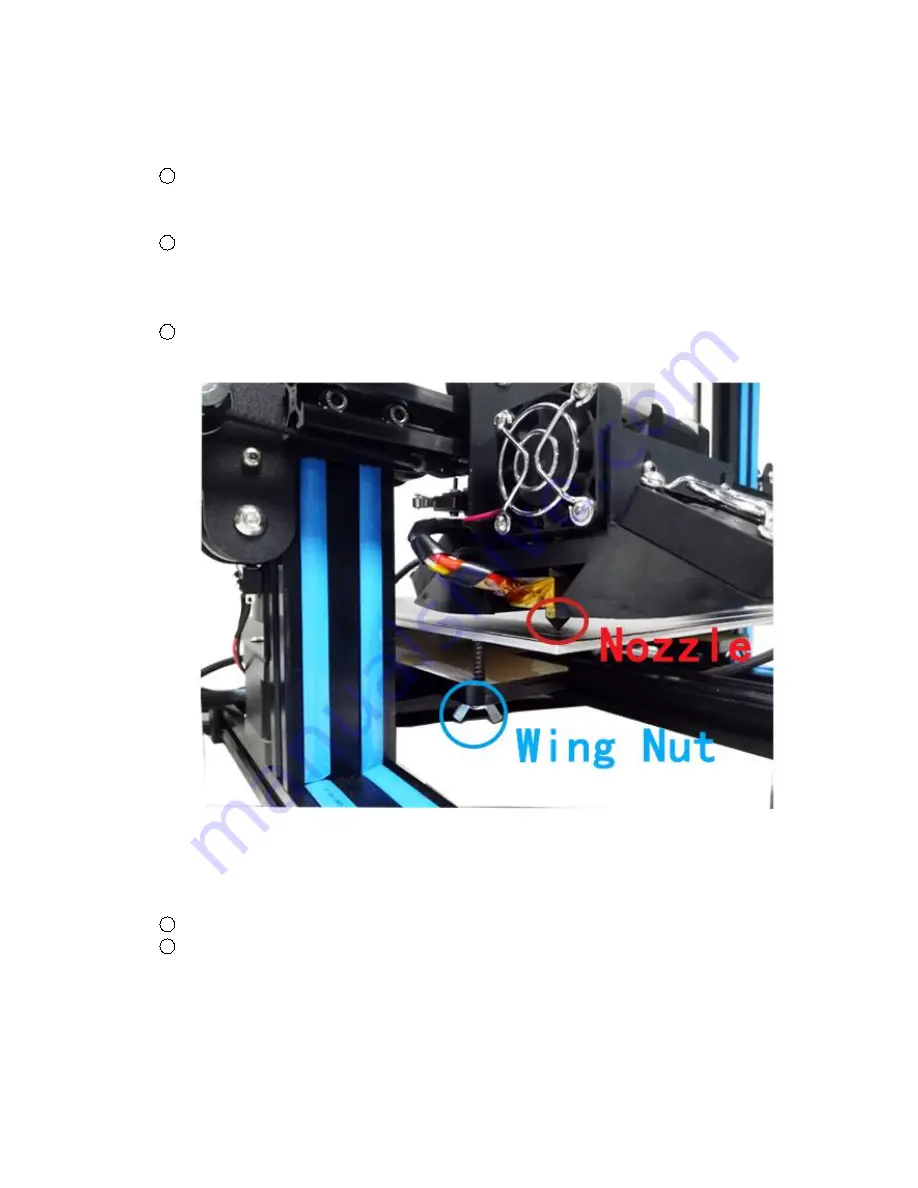
Moving the Extruder towards the one of corners of hotbed. Panel Control, “
Prepare
” → “
Z
Home
”, then Extruder moves towards hotbed. It should be only allow a piece of A4 paper to pass
through. If not, make clockwise (or counterclockwise) rotation of the Wing Nuts beneath hotbed
surface. Please refer to Fig.10.
3
Manually move hotbed or slide Extruder to other vertexes of hotbed to make four corners of
hotbed level evenly.
Fig.10
Step 3 Loading Filament.
1
Load a spool of filament onto the filament rack.
2
Cut off the used or bent end of the filament at an angle and it will be easier to feed into the
Extruder.
Step 4 Preheat Filament.
Panel Control, “
Prepare
” → “
Preheat PLA
”.
Summary of Contents for R10
Page 1: ...RAISCUBE R10 3D PRINTER MANUAL 1 RAISCUBE R10 USER MANUAL ...
Page 8: ...RAISCUBE R10 3D PRINTER MANUAL 8 Fig 06 Also please refer to Fig 07 when connecting ...
Page 9: ...RAISCUBE R10 3D PRINTER MANUAL 9 Fig 07 Overall Details ...
Page 11: ...RAISCUBE R10 3D PRINTER MANUAL 11 2 User Manual Screen Information ...


