background image

CAUTION

Always hand tighten the shaft log
hose clamps. Tightening clamps
too tight will damage the packing
material and the shaft, ultimately
leading to system failure.

4. Check the rubber coupling, it should be

watertight. If leakage is apparent, tighten
hose clamps. If hose is damaged, or the
leak persists, refer the problem to your
Rampage Yachts dealer.

CHECK FUEL SYSTEM LINES AND
CONNECTIONS FOR LEAKS

1. Check all lines and connections at the

fuel tanks, and at the generator and
engines.

WARNING

DO NOT operate the engines when
fuel leaks have been detected. All
fuels are combustible. Repair any
leak before starting the engine or
the generator.

2. Tighten any connection that may be

leaking. If problem persists, or fuel lines
are damaged, refer the problem to your
Rampage Yachts dealer.

!

!

CHECK BATTERY CHARGE

1. Turn MASTER BATTERY switch on.

2. Move the battery test switch to “1” to

check the starboard engine cranking bat-
tery, and to “2” to check the port engine
cranking battery.

3. Move the test switch to “3” to check on

the auxiliary batteries.

4. When you have checked all the batter-

ies, turn the test switch to the “OFF”
position.

Every 50 Hours

CLEAN SEAWATER STRAINERS

Refer to “Check Strainers” in “Before Every
Use.”

CLEAN FRESHWATER FILTER

IMPORTANT

Freshwater system must be com-
pletely drained before attempting to
service filter.

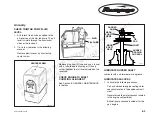
1. Grab filter housing at bottom and

unscrew from cover.

2. Remove screen from housing and flush

with clean water. Use a brush to remove
any sediment.

6-5

45 Sportfish Series

3. Return screen to housing bottom, and

reattach bottom to housing cover.

INSPECT RUDDER TIE BAR

1. Check tie bar at each end for loose hard-

ware and damaged or missing cotter
pins. Tighten and replace as needed.

2. Check cylinder where it attaches to tie

bar for loose hardware. Tighten as need-
ed.

3. Check connecting arm at rudder shaft for

looseness. Tighten as needed.

4. Check rudder shaft setscrew for loose-

ness or damage. Tighten or replace as
needed.

5. Check hydraulic lines for leaks.

CHECK RUDDER DRIPLESS 
COLLARS FOR LEAKS

1. Check rudder shaft at shaft log for signs

of leakage. Turn the steering wheel to
actuate the rudder hydraulics. There
should be no water entry.

2. If leakage is apparent, adjust the shaft

log hose clamps.

®

Downloaded 

from 

Cruisers 

Owners 

Forum 

http://www.CruisersOwnersForum.com

Summary of Contents for 45 Sportfish Series

Page 1: ...on 4 1 5 Getting Underway 5 1 6 Periodic Checks and Services 6 1 7 Storage for Extended Lay Up 7 1 8 General Maintenance 8 1 9 Accessory Items 9 1 10 Troubleshooting 10 1 i 45 Sportfish Series 45 Sportfishing Yachts Table of Contents V1526900 Downloaded from Cruisers Owners Forum http www CruisersOwnersForum com ...

Page 2: ...ii 45 Sportfish Series Downloaded from Cruisers Owners Forum http www CruisersOwnersForum com ...

Page 3: ...r s Manual 1 2 Owner s Manuals Envelopes 1 3 AVAILABLE FEATURES 1 3 WARRANTY INFORMATION 1 3 Dealership Responsibilities 1 3 Your Responsibilities 1 4 Warranty Service 1 4 1 1 45 Sportfish Series Downloaded from Cruisers Owners Forum http www CruisersOwnersForum com ...

Page 4: ...e you to the features of the boat and provide you with a general knowledge of how the equipment works The manual is divided into ten sections and each section is introduced by a table of contents to help you quickly find needed information Become familiar with the material in each section before operating your boat Throughout the manual you will come across safety precautions labeled WARNING or CA...

Page 5: ...onditioner Information Packet Stereo System Operation Manual Gas Fume Detector Manual Compass Manual Microwave User Manual Marine Toilet Manual Halon Automatic Fire Extinguisher Information Carbon Monoxide CO Detector Handbook Ice Maker Manual WARRANTY INFORMATION Warranties for onboard systems and compo nents furnished by suppliers other than Rampage Yachts are located in the enve lope inside the...

Page 6: ...ou refer to your engine warranty for initial inspection and service requirements 6 Perform or provide for the appropriate periodic maintenance outlined in the owner s manuals and service guides Warranty Service You are entitled to all the benefits and ser vices set down in the warranties If a prob lem arises with your Rampage Yachts boat as a result of workmanship or materials contact your Rampage...

Page 7: ... Section 2 Specifications and Layout 2 1 45 Sportfish Series SPECIFICATIONS 2 3 ENGINES 2 3 GENERAL LAYOUT 2 4 Downloaded from Cruisers Owners Forum http www CruisersOwnersForum com ...

Page 8: ...2 2 45 Sportfish Series Downloaded from Cruisers Owners Forum http www CruisersOwnersForum com ...

Page 9: ...shield 16 2 4 93 m Height Keel to Top of Hardtop 20 3 6 20 m Height Keel to Top of Marlin Tower 29 7 9 02 m Draft Hull with Engine 48 1 22 m Dead Rise 10 Bridge Clearance Marlin Tower 27 6 8 38 m Bridge Clearance Hardtop 17 9 5 41 m Bridge Clearance w o Towers 14 4 27 m Sleeping Accommodations 6 Person ENGINES Diesel Engines C 12 CAT DSL 700 HP C 12 CAT DSL 700 HP with Trolling Valves 3406E CAT DS...

Page 10: ...t 3 AC DC Panel 4 TV VCR 5 Ice Maker 6 Salon Stereo 7 Refrigerator 8 2 Burner Stove 9 Microwave 10 Galley Sink 11 FSR Head Vanity 12 FSR Head 13 FSR Shower 14 FSR Closet 15 FSR 16 Dinette 17 Stereo 18 Subwoofer 19 ASR 20 ASR Closet 21 ASR Head Vanity 22 ASR Head 23 ASR Shower 24 Central Vacuum optional Downloaded from Cruisers Owners Forum http www CruisersOwnersForum com ...

Page 11: ... 10 Rod Holder Large 11 Hawse Corner 12 Baitwell 13 Fish Box 14 Raw Water Faucet 15 Waste Plate 16 Water Plate 17 Windlass 18 Bow Roller 19 Sink or Small Kill Box 20 Fuel Access Hatches 21 Helm Station 22 Fire Extinguisher 23 Freezer Box 24 Engine Room Entry 25 Wetbar Sink 26 Mooring Cleat Note 1 Item 2 is located on the forward corners of the hardtop 2 Item 4 is located on the starboard side of t...

Page 12: ...2 7 8 9 10 38 18 41 35 15 40 2 1 24 42 34 25 18 21 42 20 30 29 32 36 31 19 21 42 18 26 27 23 37 6 5 3 13 12 14 18 16 42 17 R4 R001D SHT2 28 GENERAL LAYOUT ENGINE ROOM Downloaded from Cruisers Owners Forum http www CruisersOwnersForum com ...

Page 13: ...Water Strainer 20 Port Engine Raw Water Strainer 21 Engine Room Blower 22 Genset Fuel Filter 23 Starboard Engine Coolant Bottle 24 Port Engine Coolant Bottle 25 Port Engine Fuel Filter 26 Power Steering Oil Reservoir 27 Power Steering Oil Filter 28 Starboard Engine Fuel Filter 29 Starboard Engine Seacock 30 Port Engine Seacock 31 Fuel Crossover Assembly 32 Fire Extinguisher 33 Oil Exchange Pump 34...

Page 14: ...tery Switch 10 Port Engine Battery Switch 11 Engine Room Ladder 12 Access Door 13 x 24 13 Cruisair Drain Box 110V Cruisair Drain Box 220V 14 Cruisair Drain Box Stand 15 A C Pump 16 Battery Tray Board 17 Starboard Battery Tray Base 18 Small Battery Box Assembly 19 Freezer Plate Thermostat 20 Large Battery Box Assembly 21 Battery X Connect Panel 22 Genset 23 400 Amp Fuse Block 24 300 Amp House Fuse ...

Page 15: ...inguisher 2 Engine Strainer 3 3 Strainer Board 10 x 17 4 Transmission Control Box 5 Control Box Board 12 x 20 6 Wire Chase 7 Grounding Buss Bar 8 Grounding Buss Bar Board 12 x 2 NOTE Items 4 and 5 are fastened to the engine room ceiling liner Downloaded from Cruisers Owners Forum http www CruisersOwnersForum com ...

Page 16: ...2 10 45 Sportfish Series Downloaded from Cruisers Owners Forum http www CruisersOwnersForum com ...

Page 17: ...sory Switch and Breaker 3 3 Fwd Bilge Pump and Breaker 3 3 Mid Bilge Pump and Breaker 3 3 Aft Bilge Pump 3 3 Blowers Switch and Breaker 3 3 Horn Switch and Breaker 3 3 Windlass Control and Breaker 3 3 Engine Stop Switches 3 3 Start Switches Diesel 3 4 Trim Tab Switches and Breaker 3 4 Port and Starboard Sync Switch 3 4 Slow Vessel Mode Switch 3 4 Twin Disc Controls 3 4 Throttle Controls 3 4 Halon ...

Page 18: ...on the engine the alarm may sound immedi ately or after a few seconds delay 6 COMPASS The compass has not been compensated The compensating should be performed by a qualified compass adjuster After the com pass has been adjusted do not allow any iron or steel objects to be placed in its vicinity even temporarily Refer to the owner s manual included in the Skipper s Kit for detailed information 7 H...

Page 19: ... engine compartment for the presence of fuel odor Operate blowers for at least four minutes before cranking engine Run blow ers when operating engines below cruising speed Push the top of the rocker switch to turn blowers on and at the bottom to turn them off Blower circuit protection is provided by a resettable circuit breaker located in the breaker panel 20 HORN SWITCH AND BREAKER Press the top ...

Page 20: ...control flashes This will allow throttle only 5 Bring the control back to NEUTRAL and it will return to the Throttle Shift mode To Stop Push the bottom of the ignition switch Turn off the keys at the AC DC panel if you are leaving the boat 30 and 31 THROTTLE CONTROLS Item 30 is the throttle control lever for the port engine and item 31 is the throttle con trol lever for the starboard engine Revers...

Page 21: ...Y PARALLEL SWITCH The battery parallel switch is located on the dash The battery parallel switch allows you to start either engine off of either battery This will allow you to start both engines when one battery is dead or both batteries are low 34 12 VOLT OUTLET This receptacle provides 12 volt DC power to portable accessories such as cellular tele phones 35 DRIVETRAIN DISPLAY BREAKERS These brea...

Page 22: ... Sportfish Series 6 4 2 30 27 28 26 26 33 35 31 3 1 7 32 34 29 20 19 12 13 14 15 21 18 17 16 11 10 9 8 23 22 25 24 5 45RCAT 1 DASH LAYOUT Downloaded from Cruisers Owners Forum http www CruisersOwnersForum com ...

Page 23: ...19 AC Panel 4 21 Schematics 4 26 A Word About Electrolysis 4 55 A Word About Bonding 4 55 Bonding Wire Layout 4 56 FRESHWATER SYSTEM 4 58 Freshwater Tank 4 58 City Water Hookup 4 58 Hot Water Heater 4 58 Freshwater Layout 4 59 Plumbing Hardware Layout 4 60 Fresh Water System Layout 4 62 Forward Engine Room Bulkhead Forward Side 4 63 Liner Plumbing 4 64 Deck Plumbing 4 65 Shower Sump Hose Runs 4 66...

Page 24: ...t exchanger cools the closed system coolant and is returned to the sea via the exhaust system ALARM SYSTEMS Alarm systems are on all boats The alarm will sound under the following conditions Engine temperature exceeds specified limits Engine oil pressure drops below specified limits Transmission oil temperature exceeds specified limits Ignition switches are ON engines are OFF To test the alarm sys...

Page 25: ...ft is supported on the out side of the hull by a strut The strut is equipped with a water lubricated plastic bearing that permits free rotation of the pro peller shaft Propellers The propellers installed on your boat were selected because their diameter and pitch provide the optimum speed and perfor mance under average conditions of load Propeller selection must be based upon the ability of the en...

Page 26: ...vent of a line break To access the shut off valves or tank fittings open the fuel access hatches The fuel fill caps are located on the port walk around of the boat The forward fuel fill cap is for the forward tank and the aft fuel fill cap is for the aft tank Near the fill cap is a vent which allows air to move in and out of the tank as the fuel level changes Shut off valves are attached to each f...

Page 27: ...LAYOUT 1 Oil Exchange Unit 2 Generator Unit 3 Exchange to Genset 4 Exchange to Starboard Engine 5 Exchange to Starboard Transmission 6 Exchange to Port Transmission 7 Exchange to Port Engine Downloaded from Cruisers Owners Forum http www CruisersOwnersForum com ...

Page 28: ... 1 1 9 2 2 4 4 3 6 3 5 3 6 7 FUEL TANK FITTINGS 1 5 8 x 3 8 Adapter 2 Elbow ST 3 8 NPT to 3 8 3 3 4 Closed Nipple 4 3 4 to 3 4 Elbow 5 3 4 Ball Valve 6 3 4 to 3 8 Reducer 7 3 8 Adapter 8 3 4 to 5 8 Adapter 9 Tank Shut Off Valve Downloaded from Cruisers Owners Forum http www CruisersOwnersForum com ...

Page 29: ...el Tank 225 10 Starboard Engine to X Over 69 11 Starboard Filter to X Over 66 12 Starboard Filter to Forward Fuel Tank 96 13 X Over to Aft Tank Return 231 14 X Over to Port Cooler 81 15 X Over to Forward Tank Return 60 16 X Over to Starboard Cooler 60 17 Aft Tank to Genset Filter 123 18 Genset Filter to Genset 28 19 Genset to Aft Tank Return 84 20 Forward Fuel Tank Fill 21 Forward Fuel Tank Vent 2...

Page 30: ...ilter to X Over 70 10 Port Filter to Aft Fuel Tank 225 11 Starboard Engine to X Over 69 12 Starboard Filter to X Over 66 13 Starboard Filter to Forward Fuel Tank 96 14 X Over to Aft Tank Return 231 15 X Over to Port Cooler 81 16 Port Engine to Port Cooler 23 17 X Over to Forward Tank Return 60 18 X Over to Starboard Cooler 60 19 Starboard Engine to Starboard Cooler 23 20 Aft Tank to Genset Filter ...

Page 31: ...are aware of its limitations Follow the operating techniques in Section 5 CAUTION The carrier seal should be inspect ed regularly for excessive water entry If left unattended excessive water entry could result in the submergence of the engine com partment or of the entire boat R4 R006B 76 1 2 CENTER TO CENTER OF RUDDERS 76 5 8 CENTER TO CENTER OF BALL JOINTS OF RUDDER ARMS Rudder The twin rudders ...

Page 32: ...portfish Series 8 5 4 2 7 1 31 6 12 10 SEE VIEW C 11 TO HELM SEE VIEWS D E SEE VIEW B 3 26 24 25 SEE VIEW A R4 R009D A POWER STEERING LAYOUT Downloaded from Cruisers Owners Forum http www CruisersOwnersForum com ...

Page 33: ...ring Ram to Helm 9 Power Steering Pump 10 Power Steering Oil Cooler 11 Power Steering Oil Reservoir 12 Power Steering Oil Filter 13 Oil Cooler Bracket 14 10 12 Swivel Nut 15 8 12 Swivel Nut 16 8 8 Swivel Nut 17 10 8 Swivel Nut 18 28 28 Swivel Nut 19 90 Elbow 20 6 8 Tee 21 90 Elbow comes on pump 22 10 12 Male Elbow 23 8 6 Male Elbow 24 Tie Bar 25 Rudder Bearing Arm 26 Power Steering Servo 27 28 28 ...

Page 34: ...attery charger etc The AC power nor mally is supplied from dockside connections when moored to a dock or optionally a generator when underway or at anchorage Your yacht is equipped with one or two 50 ampere 240VAC dockside outlets Each dockside receptacle is capable of providing your yacht with 3 600 Watts of power or a total of 7 200 Watts of power if you have two docksides Similarly the generato...

Page 35: ...T 1 Poly Board 17 1 4 x 19 2 Halon Control Box 3 Positive Terminal Bar 4 Accessory Fuse Block 200 Amp 5 Accessory Fuse 125 Amp 6 Negative Terminal Bar 7 Windlass Fuse Block 200 Amp 8 Windlass Fuse 125 Amp Downloaded from Cruisers Owners Forum http www CruisersOwnersForum com ...

Page 36: ...ld they allow you to manually enable or interrupt a circuit by moving the switch on or off and they protect the system receiving the DC current power by automatically opening the circuit should a short or over load condition occur The resettable circuit breakers protect the system receiving the DC power by automati cally opening the circuit should a short or overload occur OPERATION OF DC SYSTEMS ...

Page 37: ...4 15 45 Sportfish Series R4 V001E DC PANEL Downloaded from Cruisers Owners Forum http www CruisersOwnersForum com ...

Page 38: ...e sump pumps off WARNING The sump pump breaker should be left on whenever oper ating In addition to air conditioner condensation the showers and sinks drain into the sump pump These circuit breakers are installed to handle an additional DC system that you may want to add to the existing systems Generator Blower Breaker Turn generator breaker to the ON position at the DC panel to operate Blowers an...

Page 39: ...ops out push it to reset immediately In OFF position power to these DC circuits is interrupted Power is supplied to AUTO BILGE PUMPS as long as auxiliary battery is connected to auxiliary system and has a charge The MANUAL BILGE PUMP switches will bypass the auto feature allowing the option of controlling the pumps manually Returning the MANUAL BILGE PUMP switches to OFF position will return bilge...

Page 40: ... the loads on both Docksides 1 2 not to exceed 12 000 Watts Because of the number of accessories available on your yacht along with the use of coffee makers blender toaster hair dryers etc you may need to turn off some accessories to avoid tripping the main breaker on your AC panel TIPS Energize one appliance at a time Don t use hot water heater with other major appliances Only warm one Range burn...

Page 41: ...boat is much like the system in your home The hot wire usually black sends current to the AC system The neutral wire always white sends current back to the source and the ground wire always green grounds all systems to a common ground In your boat the common ground is the copper bonding strip located in the engine compartment AC MASTER PANEL The AC master panel consists of one volt meter one ammet...

Page 42: ... conditions monitored are A 28 13 1 1 shorted or open condition of any diode A 28 13 1 2 failure to block galvanic current at 1 1 volts DC A 28 13 1 3 circuit continuity of the shore grounding circuit A 28 13 1 4 operation of the status monitor ing device Yachts with single docksides have one galvanic isolator Yachts with dual docksides have two galvanic isolators The galvanic isolators have statu...

Page 43: ...4 21 45 Sportfish Series R4 E002D AC PANEL Downloaded from Cruisers Owners Forum http www CruisersOwnersForum com ...

Page 44: ... purged of all fumes Operate the blowers for at least 4 minutes Generator Breaker Turn generator breaker to the ON position at the DC panel Start Switch Push the switch up until you hear that the generator has started and then release the switch Stop Switch Push the switch up to stop the generator SHORE MAIN 1 Be sure that this circuit breaker is turned off before connecting shore power to boat ho...

Page 45: ...that you may want to add to the existing system REFRIGERATOR The refrigerator freezer operates from 110 volt or 220 volt shore power or generator power When using shore power or generator power place this circuit breaker in the ON position to apply AC power to the refrigerator freezer Refer to the owner s manual for operating instructions RANGE The electric range can only be operated from AC shore...

Page 46: ...ial that leads to ground When protected by GFCI a shock may still be felt but the GFCI should cut if off quickly enough so a person in normal health should not have serious electrical injury infants and very small children may still be affected WARNING The GFCI WILL NOT protect against Line to Line shocks like the kind received by touching metal inserted in the hot and neutral terminals of an outl...

Page 47: ...4 25 45 Sportfish Series Downloaded from Cruisers Owners Forum http www CruisersOwnersForum com ...

Page 48: ...4 26 45 Sportfish Series R4 E010D STARBOARD HULL HARNESS Downloaded from Cruisers Owners Forum http www CruisersOwnersForum com ...

Page 49: ...6A CO DET GND 1 2 211 STRING LT 2 2 211 1 STRING LT 2 3 211 2 STRING LT 3 3 212 STRG LT GND 1 2 212 1 STRG LT GND 2 3 212 2 STRG LT GND 3 3 213 AFT S SPKR 1 3 214 AFT S SPKR 1 3 215 AFT P SPKR 1 3 216 AFT P SPKR 1 3 217 FWD S SPKR 1 1 218 FWD S SPKR 1 1 219 CNTR SPKR 1 1 220 CNTR SPKR 1 1 221 FWD P SPKR 1 1 222 FWD P SPKR 1 1 103 C P LT 2W LOWER M3 2 PARTS LIST WIRE CONDUCTOR NO DESCRIPTION FROM T...

Page 50: ...4 28 45 Sportfish Series R4 E011D PORT HULL HARNESS Downloaded from Cruisers Owners Forum http www CruisersOwnersForum com ...

Page 51: ...R HI 3 4 119 FSR S SPKR HI 3 4 120 FSR S SPKR HI 3 4 92 DIN OH LT GND 1 7 175 GAL CAB OH LT 2 6 175A GAL CAB OH LT 6 6 176 GAL CAB LT GND 6 6 176A GAL CAB LT GND 6 6 94A CAB STEP LT 7 7 95 CAB STEP LT GND 1 7 103G HALL OH LT GND 5 5 175B GAL CAB LT 6 6 176B CAB LT GND 6 6 103H HLWAY LT GND 5 5 105C GSR OH LT 5 5 105D GSR OH LT 5 5 PARTS LIST WIRE CONDUCTOR NO DESCRIPTION FROM TO 81 GAL 2W SW C1 1 ...

Page 52: ...4 30 45 Sportfish Series R4 E012D AFT ENGINE ROOM HARNESS Downloaded from Cruisers Owners Forum http www CruisersOwnersForum com ...

Page 53: ... LT GND 2 5 147 HALON DISPLAY BRN 3 L5 148 HALON DISPLAY WHT 3 L6 149 HALON DISPLAY BLK 3 L7 151 C P 2W UPPER M4 L8 152 C P 2W UPPER M5 L9 173 DC PNL GND 2 7 182 C P LTS STEP 4 6 182A C P LT S 6 6 183 C P LT GND 2 6 183A C P LT GND 6 6 184 CIRC FAN S 4 2 185 CIRC FAN GND 2 2 186 CIRC FAN P 4 1 187 CIRC FAN GND 2 1 38C BLWR SW FEED 7 L10 188 BATT PARALLEL SW L11 BP 1 189 BATT PARALLEL GND 2 BP 2 19...

Page 54: ...4 32 45 Sportfish Series R4 E013D FORWARD LINER HARNESS Downloaded from Cruisers Owners Forum http www CruisersOwnersForum com ...

Page 55: ...4 FWD HD UNIT 24V A9 1 15 FWD HD UNIT GND 1 1 16 THRSTR STBD A10 4 17 THRSTR PORT A11 4 18 THRSTR 24V A12 4 19 THRSTR GND A13 4 20 FWD BLG PUMP A14 3 21 FWD AUTO B P A15 3 22 FWD B P GND 1 3 23 FWD HI WTR ALRM B1 3 24 MACERATOR PUMP B3 4 PARTS LIST WIRE CONDUCTOR NO DESCRIPTION FROM TO 25 MAC PUMP GND 1 4 26 F WTR PUMP B2 3 27 F WTR PUMP GND 1 3 203 AFT HD UNIT 1 5 204 AFT HD GND 1 5 205 AFT HD WT...

Page 56: ...4 34 45 Sportfish Series R4 E014D BRIDGE HARNESS Downloaded from Cruisers Owners Forum http www CruisersOwnersForum com ...

Page 57: ...RN L5 3 148 HALON DISPLAY WHT L6 3 149 HALON DISPLAY BLK L7 3 151 C P LT 2W SW L8 BB8 152 C P LT 2W SW L9 BB9 154 STERN LT BB1 Z1 156 HORN CC2 5 157 HORN GND 5 5 158 BRIDGE LT BB7 1 158A BRIDGE LT 1 2 158B BRIDGE LT 2 2 158C BRIDGE LT 2 2 159 BRDG LT GND 5 1 159A BRDG LT GND 1 2 159B BRDG LT GND 2 2 159C BRDG LT GND 2 2 160 AFT S SPKR S3 1 161 AFT S SPKR S7 1 162 AFT P SPKR S2 2 PARTS LIST WIRE CO...

Page 58: ...4 36 45 Sportfish Series R4 E015D ENGINE ROOM COVER HARNESS Downloaded from Cruisers Owners Forum http www CruisersOwnersForum com ...

Page 59: ... NO DESCRIPTION FROM TO 1 ENG RM LTS Y 1 1 1A ENG RM LTS 1 2 1B ENG RM LTS 2 3 1C ENG RM LTS 3 4 2 ENG RM LT GND Y 2 1 2A ENG RM LT GND 1 2 2B ENG RM LT GND 2 3 2C ENG RM LT GND 3 4 Downloaded from Cruisers Owners Forum http www CruisersOwnersForum com ...

Page 60: ...ENG RM LT SW 24V 57 92 1 STBD BATT COND 176 GEN BATT COND PORT BATT COND 11 FQS 175 174 174 B S GEN BATT COND 10 SPRING 10 SPRING GSR LT SW 24V FWD HD LT SW 24V AFT HD LT SW 24V MSR LT SW 24V SAL DIN LT SW 24V 87 144 124 125 8 36 10 SPRING 10 SPRING 86 141 137 TWR LT SW 24V C P LT SW 24V SHOWER SUMP BOX BRDG LT SW 24V MACERATOR PUMP GAL LT SW 24V 10 SPRING 10 SPRING 10 SPRING 10 SPRING 24 123 179 ...

Page 61: ... 3 77 P FSHG REEL G7 3 79 S FSHG REEL G8 3 86 GSR HL SW 24V I1 1 87 FSR SW 24V I2 1 88 HORN SW 24V I3 3 89 WIND SW 24V I4 1 92 FWD B P SW 24V I5 3 93 MID B P SW 24V I6 3 94 AFT B P SW 24V I7 3 95 FWD LT SW 24V I8 1 96 BRDG LT SW 24V I9 1 98 NAV LT SW 24V J2 1 99 TRIM SW 24V J3 3 PARTS LIST WIRE CONDUCTOR NO DESCRIPTION FROM TO 100 BRDG STEREO 12V J4 3 101 REFRIGERATOR J5 1 123 GAL LT SW 24V N1 1 1...

Page 62: ...4 40 45 Sportfish Series R4 E017D ENGINE DIST HARNESS Downloaded from Cruisers Owners Forum http www CruisersOwnersForum com ...

Page 63: ...A S IGN T6 U26 15 S START U29 1 15A S START 1 X3 18 S SLO VSL U38 X1 23 P IGN X5 T5 23A P IGN T5 R26 24 P START R29 1 24A P START 1 X6 27 P STOP R36 T1 27A P STOP T1 X7 28 P SLO VSL R38 X8 PARTS LIST WIRE CONDUCTOR NO DESCRIPTION FROM TO 31 P HLN GND 2 T4 32 S HLN GND 2 T3 501 DATA ENG R6 U6 502 DATA ENG R7 U7 SHLD DATA SHLD R16 S503 P DATA R17 S504 P DATA R18 SHLD DATA SHLD U16 S505 S DATA U17 S5...

Page 64: ...4 42 45 Sportfish Series R4 E018D ENGINE DIST F B HARNESS Downloaded from Cruisers Owners Forum http www CruisersOwnersForum com ...

Page 65: ...OR NO DESCRIPTION FROM TO 19A S GND 2 GG5 19B S GND GG5 EE12 23C P IGN X5 3 23D P IGN 3 FF10 24B P START X6 3 27B P STOP SEC X7 2 28 P SLO VSL X8 GG7 29 P GND 4 2 29A P GND 2 GG1 29B P GND GG1 FF12 30 S DIS JMPR EE1 EE3 31 P DIS JMPR FF2 FF3 PARTS LIST WIRE CONDUCTOR NO DESCRIPTION FROM TO 5 S BAT W1 2 11 S STOP X2 2 14 S IGN X4 2 15 S START X3 2 19C S GND 4 2 6 P BAT W2 2 27 P STOP X7 2 23 P IGN ...

Page 66: ...YLE 1230 1231 WIRE SHALL ALSO BE UL AND CSA APPROVED NUMBERED PER LEGEND DESCRIPTION NO SUBSTITUTION FOR INDICATES AREAS COVERED WITH CONVOLUTED TUBING 156 36 72 HLN IGN GENY STOP MQS IGN TERM 18 HLN BOX STOP TERM 16 HLN BOX 10 SPRGS 10 9 12 8 1 2 3 4 7 6 5 GII GI 5 6 7 8 1 2 3 4 AT AC DC PANEL AT GENERATOR 9 10 1 2 J7 J6 J6 AND J7 LOCATED INSIDE GEN ELEC BOX WEDGELOCK W8S PLUG HSG DT06 08SA SOC 1...

Page 67: ...T 12V GI 1 GII 1 2 STOP GI 2 GII 2 3 START GI 3 GII 3 4 BATT 12V GI 4 GII 4 5 STATUS IND GI 5 GII 5 6 GAUGES 12V GI 6 GII 6 7 OIL SENDER GI 7 GII 7 8 TEMP SENDER GI 8 GII 8 9 HLN BOX IGN 1 2 10 HLN GEN STOP 1 2 Downloaded from Cruisers Owners Forum http www CruisersOwnersForum com ...

Page 68: ... HALL OH LTS CAB STP LTS JUMPER HD VENT JUMPER 8 135 140 9 10 134 135 ENG RM B W CTSY LTS JUMPER OH LTS OH LTS V1063000 5 EA V1022600 2 EA V1062600 2 EA V1062600 2 EA V1063000 1 EA V1062600 2 EA V1063000 1 EA V1062600 2 EA V1062600 2 EA HALL OH LTS 99 98 JUMPER 100 CLOSET LT 145 144 140A 134A GAL DIN FWD 107 108 106 112 113 111 124 123 82 84 81 OH 2W 83 GAL OH OH 2W DIN OH DIN OH OH 2W OH 2W GAL O...

Page 69: ...4 47 45 Sportfish Series R4 E025D DASH PANEL Downloaded from Cruisers Owners Forum http www CruisersOwnersForum com ...

Page 70: ... ONLY 10 10 10 10 NORMAL 40A 20A 10A 10A 10A 10A CIRC EXH REAR VIEW FAN WIRING NORMAL CIRCULATING FANS ONLY SOL HARNESS ENG ZR000100 HARNESS ENG RM AFT ZR000200 R4 E002B TO CIRC FAN TO CIRC FAN TO EXH FAN TO EXH FAN LINE ENG RM FANS SW HELM TO FIREBOY BOX 6 3 9 7 1 5 24VDC PWR BLOCK S BATT SW P BATT SW 24V HOUSE BATT SW 12V HOUSE BATT SW TO DC PNL AND FLY BRIDGE BLWR SOL 24VDC 12VDC PNL BRDG SOLEN...

Page 71: ...IRCUIT 1 CIRCUIT 2 CIRCUIT 3 INPUT CIRCUITS 1 2 3 BROWN WHITE BLACK HALON PIN BOX GND JUMPER HARNESS GENSET ONAN STANDARD e QD ZR001000 e QD WIRING ONLY STANDARD WIRING ONLY SPLICE WIRE 9 WITH WIRE TO PIN 6 GENSET IGN SPLICE WIRE 10 WITH WIRE TO PIN 2 GENSET STOP NOTE 1 NOTE 2 AT GII PLUG AT GENSET 27B 30B 22D 6D 11B 16B FROM HARNESS HLN BOX Z0009200 P STOP P GND PORT IGN STBD IGN S STOP S GND 147...

Page 72: ...MALE QUICK SLIDES NO TAPE 1 4 MALE QUICK SLIDE GENERAL NOTES AND SPECIFICATIONS 5 6 3 4 NOTES ALL 16 AWG WIRE TO SWITCH INSTRUMENT 1 4 FEMALE QUICK SLIDES 12 2 1 4 TYP 8 REFERENCE MQS MQS MQS MQS MQS SHRINK TUBE ASSEMBLY 16 16 PINK PINK AFT FUEL FWD FUEL CRIMPS ONLY NO SOLDER 5 6 16 16 16 GND PUR PUR BLK PORT IGN STBD IGN 2 3 4 1AMP 1AMP MQS LABEL WIRE NUMBERS 16 BLU DIMMER 1 L FUEL LEVEL SELECT T...

Page 73: ...05 C WIRE SHALL ALSO BE UL AND CSA APPROVED WIRE SIZE COLOR OR TERMINATION NUMBERED PER LEGEND DESCRIPTION NO SUBSTITUTION FOR ALL WIRE SHALL BE TYPE AWM STYLE 1230 1231 1275 OR 1345 WITH A MINIMUM RATING OF 600V ALLOWABLE GENERAL NOTES AND SPECIFICATIONS 1 4 MALE QUICK SLIDE 4 TRIM TABS 1 4 MALE QUICK SLIDES LABEL WIRE NUMBERS 12 2 1 4 MALE QUICK SLIDE 1 4 TYP 24 TRIM TABS 24 FEMALE QUICK SLIDE B...

Page 74: ...LE SPADES ARE 250 UNLESS ALLOWABLE 4 5 1 7 6 6 3 5 2 8 1 3 2 4 S SYNC S SLOW VESSEL S BATT 12VGND P SYNC P BATT 12VGND P SLOW VESSEL FEMALE QUICK SLIDE BACK LIGHTING MODE SLOW SLOW VESSEL VESSEL WIRE INSERT VIEW DEUTSCH PLUG NO LAMPS IN THESE SWITCHES 24VDC CAT SWITCHES P S SYNC SLOW VESSEL DP DT ON OFF ON DP ST ON OFF 3 4 5 6 BLK WHT BLK WHT RED WHT GRN WHT P SYNC 1 S SYNC 1 S SLO VES P SLO VES 1...

Page 75: ...4 53 45 Sportfish Series R4 E008D ENGINE ROOM BREAKER PANEL Downloaded from Cruisers Owners Forum http www CruisersOwnersForum com ...

Page 76: ...4 54 45 Sportfish Series R4 E005B BATTERY ACCESSORY CABLE LAYOUT Downloaded from Cruisers Owners Forum http www CruisersOwnersForum com ...

Page 77: ...as such as the rudders Propeller shaft brushes are installed at the factory These brushes are bonded to the copper bonding strip in the engine compart ment Zinc anodes on the propeller shaft are not necessary because of the propeller bonding brushes A zinc anode is also used to protect metal that is exposed to seawater The salt in sea water causes a galvanic action which decomposes metals A Ground...

Page 78: ... 5 6 7 11 9 11 12 18 8 13 10 15 14 3 19 16 17 33 43 38 37 39 36 42 40 1 4 2 29 30 32 22 21 24 23 20 25 26 27 28 31 34 43 35 R4 R014D 41 BONDING WIRE LAYOUT Downloaded from Cruisers Owners Forum http www CruisersOwnersForum com ...

Page 79: ... Jumper 21 Eng Rm Stbd Buss Eng Rm Port Buss Bar Jumper Bar Jumper 22 Eng Rm Stbd Buss Bar Stbd Shaft 23 Eng Rm Stbd Buss Bar Stbd Engine 24 Eng Rm Stbd Buss Bar Stbd Exhaust Elbow 25 Eng Rm Stbd Buss Bar Stbd Engine Seacock 26 Eng Rm Stbd Buss Bar Stbd Engine Seacock Strainer 27 Eng Rm Stbd Buss Bar Twin Disc Box 1 28 Eng Rm Stbd Buss Bar Twin Disc Box 2 PARTS LIST WIRE NO FROM TO 29 Eng Rm Stbd ...

Page 80: ...d while using the city water feature Any major leak or break in the system will allow abnormal bilge accumulation which in turn could cause sinking or swamping of batteries and engine Damage from swamping and or submergence are not cov ered by warranty As an alternative to your freshwater tank the freshwater system can be connected to city water at the receptacle on the star board mid cockpit Beca...

Page 81: ...ter Heater 20 Gallon 3 Washer Dryer Unit 4 Forward Head Faucet 5 Aft Head Faucet 6 Forward Shower Area 7 Aft Head Shower 8 Fresh Water Faucet Cockpit 9 Waterline Cold Blue 10 Waterline Hot Red 11 City Water Inlet 12 Accumulator Tank 13 Water Pump 14 Inline Water Filter 15 Water Tank 54 Gallon Port Downloaded from Cruisers Owners Forum http www CruisersOwnersForum com ...

Page 82: ...es SEE VIEW A SEE VIEW B 1 2 6 17 29 19 31 24 23 20 32 25 26 33 43 44 45 46 3 4 5 15 16 21 22 27 28 7 7 30 30 18 R4 R005D SHT5 A PLUMBING HARDWARE LAYOUT Downloaded from Cruisers Owners Forum http www CruisersOwnersForum com ...

Page 83: ...r 20 Gal 16 Plenum Box Port Forward 17 Plenum Box Starboard Forward 18 Port Water Tank 54 Gal 19 Starboard Water Tank 46 Gal 20 Waste Tank 60 Gal 21 Galley Sink 22 Galley Faucet w Spray 23 Aft Head Sink 24 Aft Head Faucet 25 Forward Head Sink 26 Forward Head Faucet 27 Fresh Water Pump 28 Forward A C Unit 29 Salon A C Unit 30 Washer Dryer Combo Unit 31 Aft Head Tecma Unit 32 Forward Head Tecma Unit...

Page 84: ... 6 Fresh Water Cockpit Faucet 7 City Water Receptacle 8 Aft Tecma Head Unit 9 Forward Tecma Head Unit 10 Forward Head Faucet 11 Aft Head Faucet 12 Galley Faucet w Spray 13 Head Solenoid 14 Water Fill Deck Plate 15 Waterline Cold Blue 1 2 16 Waterline Hot Red 1 2 17 Water Tank Vent Hose 5 8 18 Starboard Water Tank Fill Hose 1 1 2 19 Water Tank Connecting Hose 1 1 2 NOTE Purple optional equipment Do...

Page 85: ... to Washer Dryer 1 2 6 Cold Water Hose to Water Heater 1 2 7 Cold Water Hose to Water Pump 1 2 8 Hot Water Hose to Heads 1 2 9 Cold Water Hose to Heads 1 2 10 Cold Water Hose to Aft Toilet 1 2 11 Starboard Water Tank Vent Hose 5 8 12 Water Tank Fill Hose 1 1 2 13 Water Tanks Connecting Hose 1 1 2 14 Salon A C Unit Feed Hose 5 8 15 Forward Bilge Pump Hose 1 1 8 16 Cold Water Hose to Forward Toilet ...

Page 86: ... 2 3 6 4 3 4 7 LINER PLUMBING 1 1 1 2 Elbow 2 1 1 2 to 1 1 8 Reducer 3 1 1 8 Tee 4 1 1 8 Elbow 5 Drain Hose Aft Shower 6 Drain Hose Aft Shower 7 Drain Hose Forward Shower Downloaded from Cruisers Owners Forum http www CruisersOwnersForum com ...

Page 87: ...1 Freezer Box Drain Hose 2 Kill Box Drain Channel Drain Hose 3 Access Hatch Drain Channel Hose 4 Wetbar Sink Drain Hose 5 Access Hatch Elbow 100 6 Kill Box Hatch Fittings 7 Aft Access Drain Tee 1 1 2 Downloaded from Cruisers Owners Forum http www CruisersOwnersForum com ...

Page 88: ... GPH 3 Bilge Pump Float Switch 4 Sink Drain Hose Aft Head 3 4 5 Sink Drain Hose Forward Head 3 4 6 Shower Drain Hose 1 1 8 7 A C Condensation Hose Forward 5 8 8 Shower Sump Drain Hose 1 1 8 9 Bilge Pump Drain Hose 1 1 2 10 1 1 2 to 1 1 8 Adapter Downloaded from Cruisers Owners Forum http www CruisersOwnersForum com ...

Page 89: ...hdown Pump 12 Livewell Pump 13 Port Killbox Macerator 14 Livewell Macerator Pump 15 Starboard Killbox Macerator 16 Generator Raw Water Seacock 17 Generator Raw Water Strainer 18 Slush Box Raw Water Hose 3 4 19 Livewell Fill Hose 3 4 20 Port Killbox Pumpout Hose 1 21 Port Vent Box Drain Hose 3 4 22 Emergency Bilge Pumpout Hose 1 1 2 23 Engine Room Bilge Pumpout Hose 1 1 8 24 Livewell Macerator Hose...

Page 90: ...Pump 13 Shower Sump Pump 14 Hose Adapter 1 1 2 x 1 1 8 15 Forward Bilge Pump Hose 1 1 2 16 Galley Sink Drain Hose 3 4 17 Washer Dryer Drain Hose 3 4 18 Forward A C Unit Drain Hose 5 8 19 Forward A C Unit Raw Water Hose 5 8 20 Shower Sump Pump Drain Hose 1 1 8 21 Forward A C Condensation Drain Hose 5 8 22 Salon A C Condensation Drain Hose 5 8 23 Salon A C Unit Drain Hose 5 8 24 Salon A C Unit Raw W...

Page 91: ... formulated to prevent odor permeation and to resist chemical actions It is strongly recommended that you regularly add chemi cal to your tank by flushing it through the head The chemical helps to control odor and break down the waste Follow the man ufacturer s instructions on the chemical before using CAUTION Do not flush into a full holding tank Attempting to flush the head when the tank is full...

Page 92: ...te overboard discharge the Y valve lever must be in the overboard posi tion and the waste water outlet seacock must be open Close the outlet water sea cock when not in use MACERATOR PUMP A Y valve is installed between the pumpout plate and the macerator discharge seacock The macerator pump is located between the Y valve and the macerator discharge sea cock In this configuration all waste is flushe...

Page 93: ...rboard bunk 2 Move the Y valve lever to the over board position The Y valve is located below the aft stateroom starboard bunk CAUTION Do not run the pump dry Running the pump when there is no waste to pump out of the holding tank will shorten the life of the pump 3 Activate the macerator pump Close the circuit marked MACERATOR from the DC panel A full tank can be emptied in approximately three min...

Page 94: ...ator Pump 4 Forward Head Tecma Unit 5 Aft Head Tecma Unit 6 Waste Deck Plate 7 Macerator Pumpout Hose 1 1 2 8 Waste Pumpout Hose 1 1 2 9 Waste Tank Vent Hose 5 8 10 Aft Head Unit Waste Hose 1 1 2 11 Forward Head Unit Waste Hose 1 1 2 NOTE Purple optional equipment Downloaded from Cruisers Owners Forum http www CruisersOwnersForum com ...

Page 95: ...ilge pumps The bilge is vent ed through the hull and bilge blowers are used to speed up the evacuation of fumes from the engine compartment Pumps Two pumps located in the engine compart ment under the generator are used to remove the bilge water There is a bilge pump located forward of the engine room under the lower level entry stairs The aft bilge pump is located under the cockpit sole in the tr...

Page 96: ...ed to auxiliary system and has a charge The MANUAL BILGE PUMP switches will bypass the auto feature allowing the option of con trolling the pumps manually Returning the MANUAL BILGE PUMP switches to OFF position will return bilge pumps to automatic operation Blowers WARNING Fuel vapors can explode Before starting engines check engine compartment for the presence of fuel vapors Operate the blowers ...

Page 97: ... 5 Safety Precautions for Engine Exhaust 5 6 OPERATING INSTRUCTIONS 5 8 Pre Start Checklist 5 8 Starting Diesel Engines 5 8 Stopping Diesel Engines 5 9 Fueling 5 9 Suggested Maneuvering Techniques 5 10 Dropping and Weighing Anchor 5 13 Towing the Boat 5 14 5 1 45 Sportfish Series Downloaded from Cruisers Owners Forum http www CruisersOwnersForum com ...

Page 98: ...d onboard Make a practice of letting someone know your travel plans and route leave a float plan with someone Check local weather reports before cast ing off Watch the weather Be on the lookout for strong winds and electrical storms Do not overload or improperly load your boat Require good boat shoes be worn by all passengers to avoid slipping Passengers should be instructed how to use all safety ...

Page 99: ...__ HP __________________ No of Engines ______________________ Fuel Capacity ______________________ Radio Yes _____ No _____ Type _________________ Freq ____________________ Trip Expectations Departure Time ___________________ Leaving From______________ Destination ________________ Est Time of Arrival ____________________________ Expect to Return By _________________________________________________...

Page 100: ... the public Call toll free Courseline 1 800 336 2628 to find out what courses are offered in your area The minimum standards of safety as required by the U S Coast Guard for your boat are listed below You MUST equip your boat to meet or exceed these requirements At least one 1 Coast Guard approved Type I II or III personal flotation device life jacket for each person aboard If you are more than 20...

Page 101: ...SPHERE Spherical shape CAN Cylindrical shape When entering port or going upstream the PORT left side of the channel is marked with GREEN ODD numbered can buoys The STARBOARD right side of the channel is marked with RED EVEN numbered nun or spar buoys The middle of the channel is marked with RED and WHITE vertically striped spherical or can buoys always pass close to the buoys Can buoys will have a...

Page 102: ...ge or death Incoherence drowsiness loss of consciousness headaches nausea and vomiting are some symptoms of exposure to carbon monoxide If you think exhaust fumes are entering your boat correct the problem immediately Observe the following safety precautions Be alert for the odor of exhaust fumes A natural vacuum created while underway in certain wind and sea conditions may allow exhaust to be dra...

Page 103: ...vide adequate ventila tion Deck hatches can be opened at slow speed or while dead in the water but must be closed at or above planing speeds to prevent damage and possible personal injury Blockage of boat exhausts by obstruction Exhausts traveling along obstruction Operating at slow speed or while dead in the water KC 0465 KC 0464 KC 0463 Operating with high bow angle Exhausts from other vessels i...

Page 104: ...eering control throttle and shift control linkage Look for hydraulic leaks Make sure all connecting hardware is tight Check battery charge Check fuel supply IMPORTANT DO NOT rely on the accuracy of gauges Readings are only approxi mate and should always be com pared to the hours of use multiplied by the known fuel consumption GPH Check all electrical components such as the horn lights and bilge pu...

Page 105: ...er and exhaust leaks Stopping Diesel Engines 1 Move throttle control levers to neutral position 2 Move throttle control levers forward until engine RPM is no more than 1400 RPM Operate engines for 5 minutes at this speed to cool engines 3 After cooling engines move throttle con trol levers back to neutral position 4 Push fuel engine shutdown buttons until engine rotation stops 5 Turn key switches ...

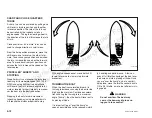
Page 106: ...cognize the Outside Forces Check the wind direction and velocity as well as the water currents Use the external forces to your advantage when maneuvering don t fight them Proceed Slowly Give yourself time to think react and maneuver Have the Crew Standing By Hands ready with fenders boat hook and lines can assist greatly as you approach a dock GRADUAL TURNS AT LOW SPEED WARNING High speed full ran...

Page 107: ...com pensate for wind and water currents allows you to maintain a relatively still position in the water Keep the bow pointed into the wind or current if possible by using the gradual turning procedure above Slow and equal speeds on both props will allow you to maintain position with minor throttle adjust ments for any correction Compensate for slight wind and water current by individually adjustin...

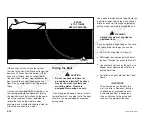
Page 108: ...or ward or reverse for short intervals to maneu ver the boat into the desired position Stopping the boat s forward movement checking headway using propeller bursts will reduce the distance required to stop With engine speeds equal move both shift levers to reverse to slow or stop forward movement TRIMMING THE BOAT When the boat is accelerated forward its trim angle increases causing the bow to rid...

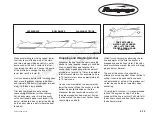
Page 109: ...example you are in 10 feet of water so use approximately 60 to 70 feet scope Have a crew member on the bow carefully lower the anchor When the anchor is on the bottom keep slight tension on the line Maneuver the boat backwards slowly until the proper scope has been fed out Fasten the line around the bow cleat Anchor flukes should dig in and hold Watch for anchor drag by observing shore line landma...

Page 110: ... to tow another craft use great care The boat structure can be damaged by excessive pulling strain Use a double braided nylon rope Some syn thetic fiber ropes stretch too much Make a bridle for each craft towing and towed by putting a rope completely around the hull WARNING Always stay clear of any tight or stretched lines If you run aground depending on the situa tion there are a few things you c...

Page 111: ...ECKS AND SERVICES 6 2 Before Every Use 6 3 Every 50 Hours 6 5 Every 100 Hours 6 7 Monthly 6 7 Quarterly 6 8 Annually 6 9 Additional Pre Launch Checklist 6 10 6 1 45 Sportfish Series Downloaded from Cruisers Owners Forum http www CruisersOwnersForum com ...

Page 112: ...haust system for leaks 3 Check seacocks for leaks 4 Check propeller shaft logs for water entry 5 Check fuel system lines and connections for leaks 6 Check battery charge Every 50 Hours 1 Clean seawater strainers 2 Clean freshwater filter 3 Inspect rudder tie bar 4 Check rudder shaft logs for leaks 5 Inspect propellers for damage Every 100 Hours 1 Inspect freshwater system for leaks 2 Clean bilge M...

Page 113: ...re 2 Check hose connections from engines and generator for leakage 3 If leakage is apparent tighten hose clamps If leakage persists replace hoses and clamps See your Ramapge Yachts dealer for parts and service Air conditioning seawater strainer locat ed under the starboard bunk Cockpit washdown strainer located under the bait well 2 Inspect all hose connections to and from the strainers for leakag...

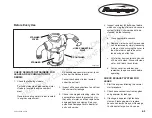
Page 114: ...iate service CHECK PROPELLER SHAFT LOG FOR WATER ENTRY 1 Operate boat at cruising speed 2 Inspect propeller shaft at shaft log This is a dripless shaft log so no water entry is permitted CAUTION Rampage Yachts will not warrant damage incurred due to an improperly adjusted or neglected shaft log Excessive water entry could result in the submergence of the engine compartment 3 If water entry is appa...

Page 115: ...you have checked all the batter ies turn the test switch to the OFF position Every 50 Hours CLEAN SEAWATER STRAINERS Refer to Check Strainers in Before Every Use CLEAN FRESHWATER FILTER IMPORTANT Freshwater system must be com pletely drained before attempting to service filter 1 Grab filter housing at bottom and unscrew from cover 2 Remove screen from housing and flush with clean water Use a brush...

Page 116: ...K FOR LOOSENESS CHECK FOR LOOSENESS CHECK FOR LOOSENESS CYLINDER CONNECTING ARM CONNECTING ARM SET SCREW HYDRAULIC LINES SET SCREW CHECK FOR LOOSENESS TIE BAR COTTER PIN COTTER PIN CSR173 41A LINKAGE Downloaded from Cruisers Owners Forum http www CruisersOwnersForum com ...

Page 117: ...at freshwater reser voir filter pump and pressure accumula tor There should be no signs of leakage If leaks are apparent drain system and replace defective hoses tubes and clamps See your Rampage Yachts deal er for parts and service 4 Inspect connections at water heater There should be no signs of leakage If leaks are apparent drain system and replace defective hoses tubes and clamps See your Ramp...

Page 118: ...tlets Have a qualified elec trician make the necessary repairs CHECK ZINCS CAUTION Failure to maintain the zinc anodes on your boat will result in electrolytic corrosion to all sub merged metal 1 Check factory installed zinc anode located on transom for excessive corro sion Replace as needed 2 Check dealer installed zinc anodes for excessive corrosion Your dealer will point out their locations at ...

Page 119: ...lowing seacocks Port and starboard engine cooling water seacocks located in the engine compart ment Generator cooling water seacock located in the engine compartment Baitwell pump seacock located aft of the port engine RUDDER BEARING AND SEAL RUDDER ARM MARK SHAFT HERE MARK SHAFT HERE CSR173 60 TIE ROD SHAFT Remove plug from fill tube and use a funnel with a tube to add lubricating oil Fill only u...

Page 120: ...s Inspect outer jacket of control cables Cracks or swelling indicate corrosion and could mean that the cable should be replaced Inspect bottom paint for deterioration prep and paint any bare areas If you are using ablative bottom paint make sure to lightly scuff bottom 24 hours before launching to reactivate the paint ENGINES AND FUEL SYSTEMS Inspect fuel lines including fill and vent hoses for so...

Page 121: ...MISCELLANEOUS Check expiration dates on flares and fire extinguishers Inspect bilge pump and float switch to make sure it s working properly Inspect dock and anchor lines for chafing Update or replace old charts waterway guides Make sure your boating license and or registration is up to date Review your boat insurance policy and update coverage if needed Make sure you have properly sized and weara...

Page 122: ...6 12 45 Sportfish Series Downloaded from Cruisers Owners Forum http www CruisersOwnersForum com ...

Page 123: ...Lay Up STORAGE FOR EXTENDED LAY UP 7 2 Lifting and Storing Your Boat 7 2 Transporting 7 3 Winterization 7 3 Fitting Out After Storage 7 6 7 1 45 Sportfish Series Downloaded from Cruisers Owners Forum http www CruisersOwnersForum com ...

Page 124: ...e stern to keep water from running into engine manifold Water can cause corrosion or damage to the engine CAUTION When your boat is out of the water it is important to support the hull correctly to avoid any hull damage The shipping storage cradle will provide the proper support at the recommended posi tions The load at the cradle support areas is less than 10 pounds per square inch Make sure the ...

Page 125: ...tanks for expansion a Fuel tanks should be filled with treat ed fuel to prevent condensation Use the following products per instruc tions on container Diesel use a biocide such as BIOBOR and conditioner such as RAYCOR RX 100 b Run engines for ten minutes to make sure treated fuel is present in all lines and parts of the engines 5 Engines a Flush engines with clean fresh water b Refer to the engine...

Page 126: ...n the shower drain until the pump dis charges the antifreeze overboard c Pour non toxic antifreeze in all sink drains until the anti freeze is dis charged overboard d Turn battery master switch to the OFF position 13 Freshwater System a Place FR WATER PUMP switch in the OFF position b Remove the freshwater supply by opening the hot and cold faucets in the galley for 10 minute intervals 7 4 45 Spor...

Page 127: ...wash system 16 Batteries a Be sure the master battery switch is in the OFF position Remove batter ies from the boat and store in a non freezing area b Put batteries on a wooden pallet or bench c Keep batteries on a trickle charge Check and maintain electrolyte levels regularly 7 5 45 Sportfish Series 17 Interior Preparations a Remove items that will hold moisture and cause mildew such as life jack...

Page 128: ...tall batteries and connect battery cables Apply a small amount of grease or petroleum jelly to cover the posts and cable clamps d Turn master battery switch to the ON position 7 Install drain plugs in bottom of all muf flers Inspect exhaust system from engine to hull outlet Make sure hoses mufflers fittings and clamps are water and exhaust tight 8 Connect all hoses that were disconnect ed for wint...

Page 129: ... GENERAL MAINTENANCE 8 2 Power Train 8 2 DC Electrical System 8 3 Freshwater System 8 4 Bilge 8 4 Hull 8 4 General Care and Cleaning 8 5 8 1 45 Sportfish Series Downloaded from Cruisers Owners Forum http www CruisersOwnersForum com ...

Page 130: ...t can cause vibrations loss of power and damage to crankshaft bearings Check coupling align ment using the following procedure 1 Remove the coupling bolts and slide the coupling apart only slightly 2 With a feeler gauge measure the gap between the coupling halves at four places 90 apart The difference in the readings must not exceed 0 003 inches 3 Using the adjustable engine mounts adjust engine u...

Page 131: ...t 4 Loosen the hardware to remove rudder arm from the rudder shaft Lower the rudder from the boat 5 Insert red collar to protect O ring 6 Install a new rudder and hold it in place while collar is installed To ease installa tion spray shaft with lubricant 7 Install rudder arm Adjust vertical posi tion of rudder with markings you made on shaft 8 Tighten rudder arm hardware 9 Inspect and lubricate ti...

Page 132: ...g Start with 320 grit first sanding lightly until the scratch starts to disappear Use 400 grit until the scratch is gone Finish sanding with 600 grit and buff the area with rubbing compound Rub hard at first and then lighten up to polish the area FIBERGLASS REPAIR Fiberglass refers to fiberglass reinforced plastic construction of the hull deck and cabin fabrications beneath the thin gelcoat skin F...

Page 133: ... its life A daily rins ing with clear water to remove any salt residue is suggested A light wipe down with WD 40 or LPS sprayed on a soft rag after each washdown will enhance its appear ance Inspect all screws clamps and fittings Tighten any loose hardware when neces sary EXTERIOR AND SEAT VINYL Regular washing with mild soap and warm water or vinyl upholstery cleaner is sufficient to keep the cus...

Page 134: ...8 6 45 Sportfish Series Downloaded from Cruisers Owners Forum http www CruisersOwnersForum com ...

Page 135: ...9 3 Refrigerator Freezer 9 3 Bait Station 9 3 Bridge Light Layout 9 4 Light and Switch Layout 9 5 A C Ducting Layout 9 6 Stove 9 7 Trim Tabs 9 7 Windlass System 9 7 Function of Clutch 9 8 Lowering the Anchor Under Power 9 8 Raising the Anchor Under Power 9 8 TV and Dockside Receptacle 9 8 TV and Telephone Layout 9 9 9 1 45 Sportfish Series Downloaded from Cruisers Owners Forum http www CruisersOwn...

Page 136: ... located near the cabin entry door above the icemaker There is also a control box on the TV cabinet in the forward stateroom CAUTION Do not block return air grille Keep air filters clean Airflow restriction will occur causing inefficient oper ation and unnecessary strain on the system Raw water is drawn from the seacock through a strainer and to the pump The pump supplies the unit with a continuou...

Page 137: ...led by a toggle switch on the dash panel The COCKPIT LIGHTS circuit breaker on the DC master panel must be in the ON position to supply power to the light switch Covers Bimini Top The bimini top covers the bridge area Separate covers are provided to pro tect the dash wet bar and seating from inclement weather Refer to Section 8 paragraph General Care and Cleaning for care and cleaning of covers Ca...

Page 138: ...5 Sportfish Series R4 R026B 2 2 1 3 1 1 2 2 BRIDGE LIGHT LAYOUT 1 Cockpit Lights Bridge Overhang 2 Courtesy Lights 3 White Transom Light Downloaded from Cruisers Owners Forum http www CruisersOwnersForum com ...

Page 139: ...me 1 Mod Cover 1 Mod 11 Switch 1 way Frame Double Cover 3 Mod 12 Box 4 Mod Single Outlets Switch GF1 Frame 4 Mod Cover 4 Mod 13 White Dual Receptacle Box Dual Non Metallic Cover Plate 14 Switch 2 way Frame 2 Mod 15 Switch 1 way Switch 2 way Cover 3 Mod Frame 3 Mod 16 Weather Proof Receptacle Cover Switch 1 way White 17 Switch 1 way Switch 2 way Frame 3 Mod Cover 3 Mod 18 Outlet Dual USA Box 3 Mod ...

Page 140: ... C Duct Hose to Plenum 7 3 A C Duct to Aft Plenum 5 4 A C Duct FSR 4 5 A C Duct Galley 4 6 A C Duct ASR 4 7 ASR Plenum 8 Galley Plenum 9 Salon Plenum 10 A C Duct Hose Salon 6 11 A C Duct Forward Head 4 12 A C Duct Aft Head 4 13 4 Black Round Vent 14 20 x 5 Cherry Vent Downloaded from Cruisers Owners Forum http www CruisersOwnersForum com ...

Page 141: ...em The system provides the means of control ling the Winch via a reversing solenoid which is actuated by self centering UP DOWN toggle type remote control switch or foot switches The system is readied for use by pushing the circuit breaker isolator button ON The power indicator light on the Remote Control panel will glow when ON The winch can now be operated by the UP DOWN switch on the Remote Con...

Page 142: ...g the footswitch if fitted 3 Hold press the switch down to pay out sufficient rope chain rode to set the anchor Raising the Anchor Under Power Proceed as follows 1 Check that the clutch is firmly tightened by inserting the handle provided and rotating the handle clockwise approxi mately one turn 2 Start the boat s motor s and run at sufficient RPM to activate the charge system 3 With the circuit b...

Page 143: ...W A 1 VIEW A TV AND TELEPHONE LAYOUT 1 Coaxial Splitter 2 Coaxial Splice 3 Coaxial Cable 4 22 GA Telephone Wire 5 Coaxial Connector 45 Sportfish Series 9 9 Downloaded from Cruisers Owners Forum http www CruisersOwnersForum com ...

Page 144: ...9 10 45 Sportfish Series Downloaded from Cruisers Owners Forum http www CruisersOwnersForum com ...

Page 145: ...Section 10 Troubleshooting TROUBLESHOOTlNG 10 2 Engine and Power Train 10 2 Electrical 10 5 Plumbing 10 6 10 1 45 Sportfish Series Downloaded from Cruisers Owners Forum http www CruisersOwnersForum com ...

Page 146: ...in NOTE For further troubleshooting informa tion other than given here refer to the engine owner s manual in the Skipper s Kit PROBLEM POSSIBLE CAUSE SOLUTION Engine will not start Fuel valves are closed or fuel Check fuel valves or fill tank tank is empty Contaminated fuel Check fuel for contaminants or water If fuel is contaminated drain tank and lines flush with clean fuel and replace fuel filt...

Page 147: ...ush with clean fuel and replace fuel filters See Rampage Yachts Dealer for service Engine overheats Engine cooling water seacock Open seacock or remove obstruction closed or water pick up is blocked Leaking or pinched water lines Repair or replace water lines See Rampage Yachts Dealer for service Transmission shift hard Corroded or pinched linkage Replace or lubricate linkage as necessary See Ramp...

Page 148: ... for service Worn strut engine or transmis Bearings replaced by authorized dealer as necessary sion bearings Engine to shaft couplings out of Have couplings checked by an authorized dealer round or off center Poor performance Boat is overloaded or weight is Reduce overload or distribute load evenly Trimming the badly distributed boat will also help Material wrapped around the Run prop in reverse o...

Page 149: ...or broken wire connection Connect or repair wire as necessary Install plug in outlet Lights do not come on or are Circuit breaker in the tripped or If breaker is tripped correct the problem and reset otherwise dim OFF position turn circuit breaker ON Weak or discharged battery Charge battery Loose or broken wire connection Connect or repair wire as necessary Light bulb burned out Replace bulb Gene...

Page 150: ...s automatic shut off is Have washdown pump checked by authorized dealer defective No water at showers or sinks Freshwater tank is empty Fill freshwater tank when faucets are turned on FR WATER PUMP circuit If breaker is tripped correct the problem and reset breaker tripped Pump is defective Have pump serviced by authorized dealer Low water pressure at all Water system has lost its charge Check for...

Page 151: ... switch serviced by authorized dealer defective Head will not flush HEAD PUMP circuit breaker in If breaker is tripped correct the problem and reset otherwise the tripped or OFF position turn circuit breaker ON Low battery charge Charge the batteries Flush water seacock not open Open seacock Inlet pedal valve not working Have head serviced by authorized dealer Head will not empty Y valve not open ...

Page 152: ...10 8 45 Sportfish Series Downloaded from Cruisers Owners Forum http www CruisersOwnersForum com ...

Page 153: ...e and service and shall not apply to the following 1 Boats subjected to negligence abuse misuse or accident 2 Boats subjected to improper operation trailering maintenance or storage or use for purposes other than those for which the boat was designed 3 Defects or dam ages caused by a force or impact which exceeds design specifi cations including but not limited to exposure to harmful solvents and ...

Page 154: ...Downloaded from Cruisers Owners Forum http www CruisersOwnersForum com ...

Reviews: