DISASSEMBLY
DISASSEMBLY
15
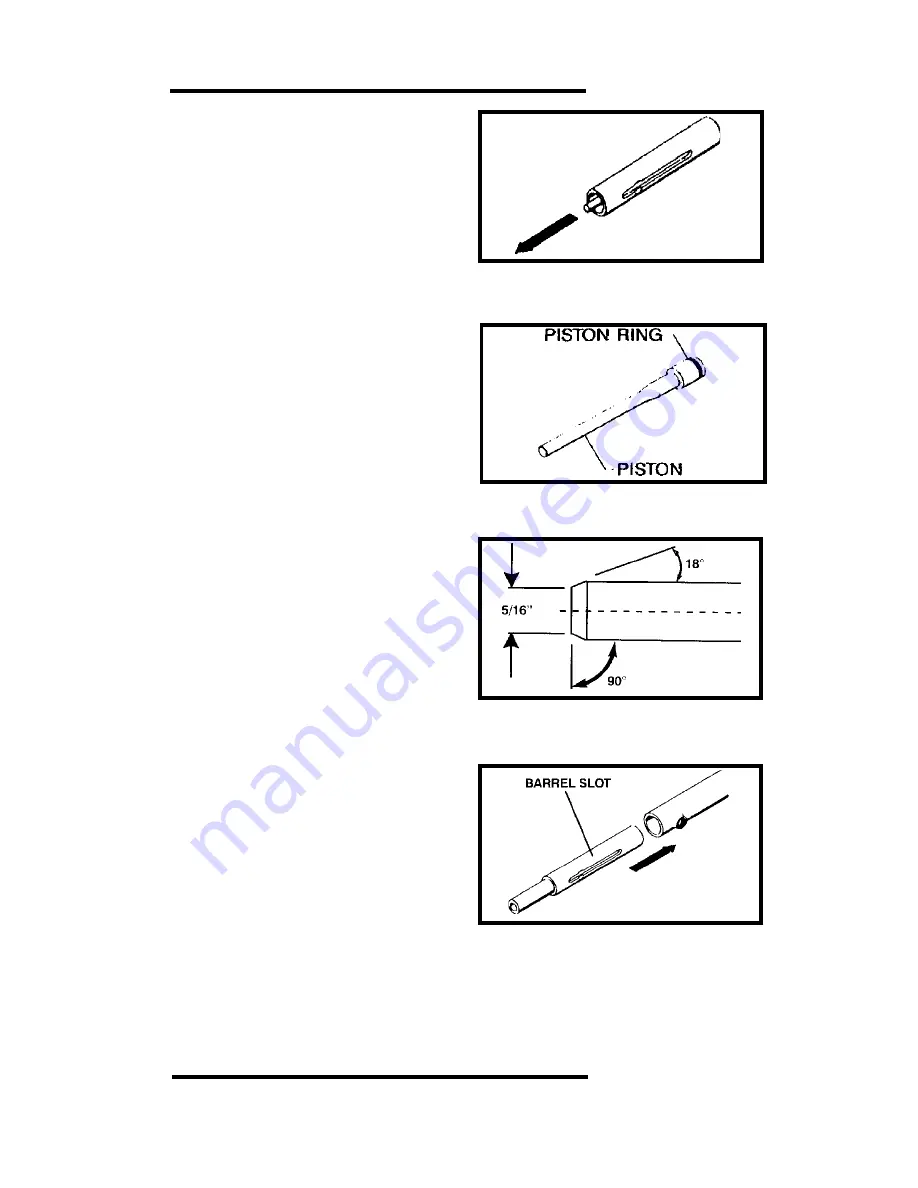
PULL THE PISTON ASSEMBLY
OUT OF THE BARREL
6.
Pull the piston assembly out of the
barrel. Check the piston for tip end
damage and that it is not bent.
To repair the tip end of the piston,
refer to the instructions below.
7.
Check the piston ring for excessive
wear, breakage or deformation that
would allow it to be less that a tight fit
in the barrel. If the piston assembly is
a loose fit in the barrel, replace it.
8.
Inspect all parts for wear or damage
and clean or replace as required.
Use detergent oil and cleaning brush.
Wipe parts dry before reassembly.
WEAR SAFETY GOGGLES WHEN
CLEANING TOOL PARTS.
9.
Check the piston tip fpr mushroom-
ing or other deformities, and grind
flat. The tip of the piston must be 90°
to the shank and grinding should only
be done by qualified personnel. The
overall minimum length of the piston
must not be less than 5 3/8”. When
less than this length, the piston must
be replaced to avoid tool damage.
10. Reassemble the tool in the reverse
order of disassembly. Align the
barrel slot with the pawl opening in
the receiver and slide the barrel
assembly back into the receiver.
ALWAYS PERFORM THE DAILY
FUNCTION TEST BEFORE
USING THE TOOL AFTER
CLEANING OR SERVICING.
INSPECT THE PISTON FOR WEAR
AND DAMAGE
GRIND THE PISTON TIP FLAT
AND BEVEL THE EDGE AT 18°
ALIGN THE BARREL SLOT WITH
THE PAWL AND SLIDE THE
BARREL INTO THE RECEIVER


