5
LOWER SUSPENSION ARM ASSEMBLY
Bushing & Sleeve Installation
1.
≤
Lubricate the outside diameter of two red
urethane bushings, from kit 8597, with a
silicone spray or a mild solution of soap and
water.
2.
≤
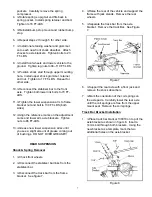
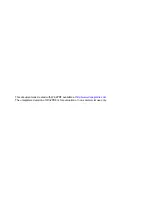
Press the bushings (Do Not Hammer) into
one end of a new lower suspension arm. See
figure 1.
Figure 1
3.
≤
Lubricate the outside diameter of a sleeve,
from kit 8597, and the inside diameter of the
installed urethane bushings.
4.
≤
Press the sleeve into the bushings.
NOTE: If necessary, use a bench vise or C-
clamp to press the bushings and sleeves into
the suspension arm. Do not use a hammer.
5.
≤
Pre-grease arm assembly with a grease
gun. Make sure not to blow the bushings out
of the assembly. Stop when grease appears
at the end of the bushing grooves.
6.
≤
Repeat steps 1 through 5 for the remaining
suspension arm ends, bushings, and sleeves.
FRONT SUSPENSION
Shock & Spring Removal
1.
≤
Park vehicle on a level surface, set the
parking brake and chock rear wheels.
2.
≤
From inside the engine compartment,
remove the upper stud nut, retainer and
grommet from both front shock absorbers.
3.
≤
Raise the front of the vehicle and support
the frame with jack stands.
4.
≤
Remove the front wheels.
5.
≤
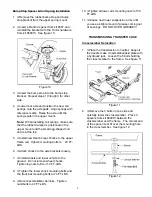
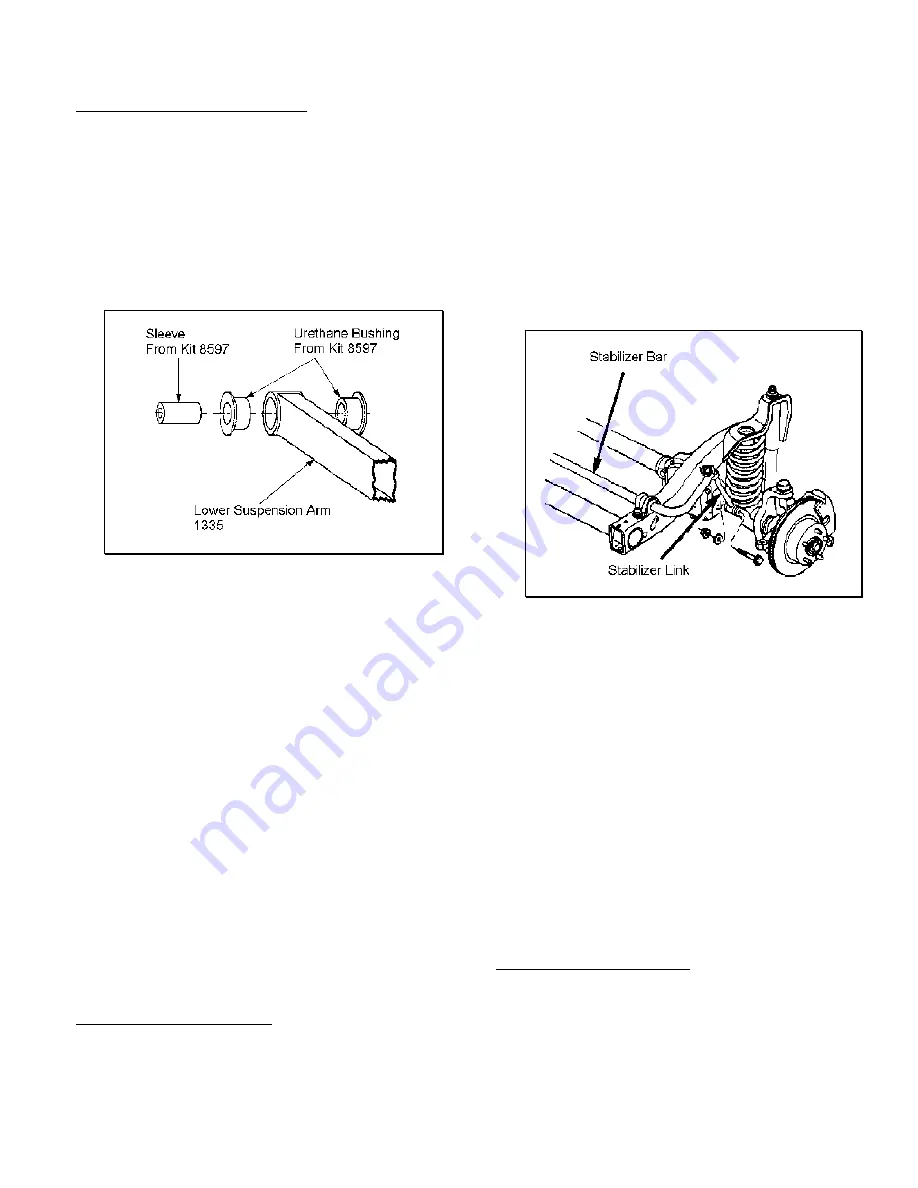
Position a hydraulic jack under the front axle
for support. Remove the stabilizer link lower
nut and bolt from both sides of the front axle.
See Figure. 2
Figure 2
6.
≤
Remove the shock absorber lower nuts and
bolts from the axle bracket. Remove both
shocks and discard. DO NOT REUSE
ORIGINAL SHOCK ABSORBERS.
7.
≤
Lower axle and remove hydraulic jack.
8.
≤
Remove the rubber bump stops and bump
stop mounts.
9.
≤
Remove the coil spring retainer bolts and
retainers.
10.
≤
Push down on the axle and remove each
coil spring.
Lower Arm Replacement
1.
≤
Support the front axle with a hydraulic jack.
2.
≤
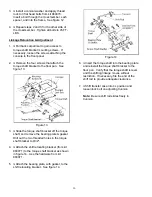
Paint or scribe alignment marks on the
adjustment cams and axle brackets for
installation reference. See Figure 3.


