background image

54

7.3. Starting up

Model S

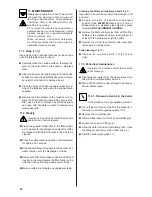
 Turn on the water supply tap 2 Fig.6.

 Turn  the  main  switch  1;  the  pump  is  activated, 

filling the boiler.

 When the level has been reached the pump stops,  

then activate switch 2 to begin heating the water 

in the boiler then turn each one until water begins 

to flow from them.

● 

 Wait for the machine to reach its working pressure, 

and to reach the correct thermal balance.

Model E

 Turn on the water supply tap 2 Fig.6.

 Turn on main switch 1 and resistance switch 2.

  The pump for boiler filling will activate (red led on 

level indicator 9).

 Only after reaching the level (green led on level 

indicator 9) the resistances for water heating in 

the boiler are powered,then activate every single 

group until water comes out.

 During  the  heating  phase  the  leds  of  the  keys 

switch on in sequence from left to right until the 

working pressure is reached.

  Only  when  the  rated  pressure  is  reached  it  is 

possible to adjust the doses.

Warning!

 This sequence will be repeated at 

every switching on.

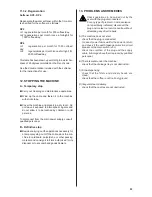
7.2. Control instruments 

 (Fig.7)

  Gauge

 with mobile needle on a fixed dial with a 

double scale.

 Visual control of the pump (lower manometer ) and 

of the boiler pressure (upper manometer) (mod. 

E-S).


Minimum and maximum water

 level indicator .

 Visual  control  of  water  level  in  boiler  (green 

Led).

10 Cup-heater switch

 (optional).

  Two-position switch with led. 

  By turning on the switch (led on), the cup heating 

resistance is power supplied.

8. USE

The machine has a top shelf on which the cups are 

kept and heated, ready for use.

This is very important to obtain good coffee as the 

pre-warmed cup stops the coffee from growing cold 

too quickly.

8.1. Preparing coffee

 Unclamp the filter-holder from the dispensing unit 

and knock any grouts out into the drawer espe

-

cially provided for this purpose, taking care not to 

damage the rim of the filter.

 Use  the  filter  for  1  or  2  coffees,  according  to 

need.

 Fill the filter with the measure of coffee, level it off 

and press it down gently with the presser.

 Remove any ground coffee that has stuck to the 

rim of the filter while pressing.

If ground coffee is left on the rim of the filter, a 

leaktight seal is not ensured, with consequent 

leaking of water and coffee grounds.

 Lock the filter-holder into the dispensing unit firmly 

to obtain a leaktight seal.

 Place the cups under the spouts and start pouring 

using  control  3  or  button  panel  4  according  to 

model (Fig.7).

 When the coffee has been poured, leave the filter-

holder attached to the dispensing unit until the next 

coffee is required.

When pouring, beware of the hot parts of the 

machine,  especially  the  coffee  dispensing 

units, the steam and hot water spouts.  Do not 

put your hands for any reason under the units 

and the spouts when they are operating

.

The grinding of the coffee beans is of fundamental 

importance to the making of good coffee, and the 

granular  texture  of  the  resulting  grounds  should 

be such that it takes 25-30 seconds to produce the 

beverage.  if the coffee is ground too coardsely the 

coffee will be pale in colour and weak in flavour, with 

only a very small amount of white cream, and if the 

grounds are too fine, the coffee will be dark with no 

cream.  Good coffee can only be made if the beans 

are freshly and uniformly ground (only possible when 

the blades of the coffee grinder are sharp) and are 

then measured out into the correct quantities (rou-

ghly 6 grams per measure). For a correct use, set 

the boiler at 1 bar.

The  importance  of  freshly  ground  coffee  beans  is 

due to the fact that once ground, they rapidly lose 

their aromatic qualities, and fats present in the beans 

go rancid.

Summary of Contents for EPOCA E

Page 1: ...nutenzione Emploi et entretien Gebrauch und Instandhaltung Use and maintenance Uso y manutención Uso e manutenção Macchina per caffè Machine à café Kaffeemaschinen Coffee machine Máquina para café Máquina para café ...

Page 2: ...Erklärungen verständlich sind und dass Sie auch in Zukunft zu unseren Kunden zählen dürfen Mit freundlichen Grüssen Dear Customer First of all thank you choosing RANCILIO We are confident that the product you have purchased will come up to all your expectations just as all our other products are designed to do The product that you are about to use is the outcome of pain staking research and tests ...

Page 3: ...rentiated waste disposal in dedicated waste disposal areas Do not treat as simple urban waste For any information please contact the manufacturer at the address specified in the user manual The product complies with the requirements of the new directives introduced for the environmental safeguard and must be disposed of appropriately at the end of its life cycle Trattamento dei rifiuti delle appar...

Page 4: ......

Page 5: ... modificada sem a nossa expressa autorização al quale è riferita questa Dichiarazione secondo quanto prescritto dalle direttive specifiche à laquelle se réfère cette déclaration selon les prescriptions des directives spécifiques auf das sich diese Erklärung bezieht Entsprechend der Vorschriften der spezifischen Richtlinien to which this declaration relates is according to the provisions of the spe...

Page 6: ......

Page 7: ...encia lt Potência it Caldaia Chaudière Kessel Boiler Caldera Caldeira 0 18 1 8 Mpa bar 131 2 C Acqua Vapore Eau Vapeur Wasser Dampf Water Steam Agua Vapor Água Vapor 2 gr 11 Pressione Pression Druck Pressure Presión Pressão Temperatura Température Temperatur Temperature Temperatura Temperatura Fluido Fluide Flüssig Fluid Fluido Fluído Capacità Capacité Fähigkeit Capacity Potencia Potência Numero s...

Page 8: ... 2 1 6 3 1 5 2 9 8 4 Fig 3 2 1 6 3 1 5 2 9 8 4 mod S mod E ...

Page 9: ... H D C B A Fig 4 Fig 5 12 11 10 7 4 L o v a t o L 2 3 8 G 1 Ø30mm Fig 6 ...

Page 10: ...10 Fig 7 6 8 9 5 A B C D E 7 10 1 2 4 3 mod S mod E ...

Page 11: ...11 Fig 8 Fig 9 Fig 10 Fig 11 1 1 2 3 ...

Page 12: ...5 9 Adjustments and settings of the dose 55 9 1 For models DE 55 9 1 1 Adjusting the dose 55 10 Advanced functions electronic card e06 56 10 1 Heater pressure regulation from push button panel 56 10 2 Auto test components 56 10 3 Diagnostic programming 57 11 Maintenance 58 11 1 Daily 58 11 2 Weekly 58 11 3 Periodical 58 11 3 1 Renewal of water 58 11 3 2 Softener regeneration 59 12 Stopping the mac...

Page 13: ...fore connecting the equipment Adaptors multiple sockets and or extensions must not be used In doubt request an accurate control of the plant by qualified personnel The electric plant must be provided with the following safety devices efficient earth connection section of conductors suitable for absorption capacity efficient earth leakage protection circuit breaker Install the machine on a water re...

Page 14: ...ronic control of coffee and hot water doses dispensed C N of coffee dispensing units D N of steam spouts E N of hot water spouts On request cup warmer 1 Steam tap 2 Steam spout 3 Hot water tap 4 Hot water spout 5 Coffee dispensing unit 6 Coffee dispensing button 7 Manual water supply tap 8 Level indicator 9 Gauge 10 Power on off switch and led 11 Switch and boiler resistance engagement light 12 Cu...

Page 15: ...ed for heating liquids or grinding any other kind of product that could damage and pollute it The manufacturer cannot be held responsible for damage to people or things caused by unsuitable erroneous or irrational use 5 TRANSPORT 5 1 Packaging The machine is delivered in a strong cardboard box with internal protection The packaging bears symbols which must be obser ved during handling and stocking...

Page 16: ...The contacts must have an opening of equal or over 3 mm and with dispersed current protection of 30 mA Remember that each machine must be fitted with its own safety elements WARNING Should the power supply cable be damaged it is to be replaced by the manufacturer or by its technical assistance service or by person with equivalent qualification in order to pre vent any risks 6 INSTALLATION The appl...

Page 17: ... the boiler 2 Boiler resistance switch Two position switch with led On activating the switch the led comes on and power is supplied to the resistance for the boiler water 3 Coffee dispenser switch mod S On pressing the button continuous coffee dispen sing begins and the led comes on On re pressing the switch the coffee delivery stops and the led goes out 4 Electronic coffee delivery button panel m...

Page 18: ...ing unit and knock any grouts out into the drawer espe cially provided for this purpose taking care not to damage the rim of the filter Use the filter for 1 or 2 coffees according to need Fill the filter with the measure of coffee level it off and press it down gently with the presser Remove any ground coffee that has stuck to the rim of the filter while pressing If ground coffee is left on the ri...

Page 19: ... described in point 8 3 9 ADJUSTMENT AND SETTING OF THE DOSE where available 9 1 Models E It is possible to adjust the dose of coffee dispensed E models 9 1 1 Adjusting the dose The coffee dose adjustments are made by acting on the group keyboads with machine at rated pres sure 1 Press the button E on any button panel and hold it down for 8 10 seconds until water stops flowing from the dispensing ...

Page 20: ...ectro valve hot water supply ON for 3 seconds 5 electro valve charge ON for 3 seconds 6 pump motor ON for 3 seconds 7 1st heater resistance element ON for 5 secon ds 8 2nd heater resistance element ON for 5 secon ds 9 3rd heater resistance element ON for 5 secon ds 10 ADVANCEDFUNCTIONSELECTRONIC CARD E06 10 1 Heater pressure regulation from push button panel With card E06 it is possible to regulat...

Page 21: ... care not to touch the parts under voltage Malfunctions are visualised on the display situated at the centre of the electronic card Possible failures in course are indicated on the electronic card display by means of numbers or let ters in case of more than one failure simultaneously the corresponding numbers letters are alternately displayed 1 Time out Heater filling level time limit for correct ...

Page 22: ...ing Do not clean the machine by using metal or abrasive devices such as steel wool metal brushes needles etc or general detergents alcohol solvents etc When necessary use special detergents for coffee machines that can be bought in specialized service centres 11 1 Daily Fig 9 Use a clean cloth or sponge that does not leave hairs or fluff preferably cotton or linen Carefully clean the outside surfa...

Page 23: ...es not start check that the plug is connected In case of power failure wait for the power to return and check if the earth leakage protection circuit breaker or the main switch is on check the condition of the plug and the supply cable if damaged have them replaced by qualified personnel B There is water under the machine check that the drainage tray is not obstructed C Slow dispensing check that ...

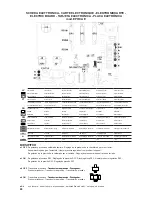
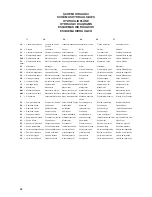
Page 24: ...er Earth connection Conexion de tierra Borne do terra P Pressostato Pressostat mecanique Mech druckwaechter Mechanic pressure Presostato mecanico Interrup Mec Pressão switch RC Resistenza caldaia Resistance chaudiere Kesselheizung Boiler Heating Resist Resist Caldera Resistência da caldeira RS Resistenza scaldatazze Resistance chauffe Tassen warmerheizung Cups Heating Resist Calienta tazas Resistê...

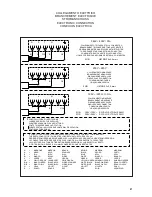
Page 25: ...illastanza di Parabiago Mi Italia Tel 39 0331 408200 Fax 39 0331 551437 www rancilio com info rancilio it L1 N L2 L3 M1 TR P RC SL N B GV N RO AR F N SL SR C N O N O 1 2 8 9 4 6 7 CA MC MC MP M AR B N GR M LC EC EG2 EG1 IG2 IG1 1 2 4 5 1 2 5 4 GV GV IS IR IG TR RS SE_1279_2007 26 09 07 EPOCA 2 SCHEMA ELETTRICO VERS S 2 gr 346 415 V 3N R REV DESCRIZIONE DATA FIRMA N CTI TS ...

Page 26: ...della Repubblica 40 20010 Villastanza di Parabiago Mi Italia Tel 39 0331 408200 Fax 39 0331 551437 www rancilio com info rancilio it SCHEMA ELETTRICO EPOCA 2 L1 N L2 L3 M1 TR RC IG IR TR 26 09 07 VERS E 2 gr 346 415 V 3N SE_1328_2007 FT1 J6 F1 T1A IS MP M EC LC EG2 EG1 SL CV2 TG2 CV1 TG1 J10 J11 J12 RS CPU J14 SP J1 J7 J5 J4 J13 J8 TS F2 T4A 1 1 ...

Page 27: ...OR GV MUST BE LONGER THAN THE OTHERS OF 9 cm DER ERD STROMLEITER MUSS LAENGER ALS 9 cm IN BEZUG AUF DEN RESTLICHEN STROMLEITER SEIN LE CONDUCTEUR DE TERRE DOIT ETRE PLUS LONG DE 9 cm PAR RAPPORT A LES AUTRES LA LONGITUD DE LA TOMA DE TIERRA TIEN ESSER SUPERIOR A 9 cm RESPECTO AL RESTO O FIO TERRA GV DEVE SER 9 cm MAIS COMPRIDO DO QUE OS RESTANTES M MARRONE MARRON BRAUN BROWN MARRON MARROM N NERO N...

Page 28: ...a da resistência Piena potenza Full power Puissance complète Volle Leistung Potencia total Plena potência 2 3 di potenza 2 3 power 2 3 de puissance 2 3 der Leistung 2 3 de potencia 2 3 de potência RS1 RS2 RS3 Alimentazione resistenze Resistance power supply Alimentation résistances Wasserstand im Heizkessel Alimentación resistencias Alimentação das resistências PV Led Pompa Pump led Led pompe LED ...

Page 29: ...weiter oben abgebildet ist 1 Connect cable as shown in the picture 2 Disconnect the light blue cables neutral from electric resistance and insulate them 3 Connect boiler electric resistance according to the diagram below 1 Conectar el cable de alimentación como se ilustra en la figura 2 Desconectar los cables azules neutros de la resi stencia eléctrica e aislarlos 3 Conectar la resistencia eléctri...

Page 30: ...mètre Manometer Manometer Manómetro Manômetro MA1 Manometro Pompa Manomètre pompe Manometer Pumpe Manometer pump Manómetro bomba Manômetro Bomba MA2 Manometro Caldaia Manomètre chaudière Manometer Kessel Manometer boiler Manómetro caldera Manômetro Caldeira P Pressostato Pressostat mecanique Mech druckwaechter Mechanic pressure Presostato mecanico Interrup Mec Pressão switch PV Pompa volumetrica p...

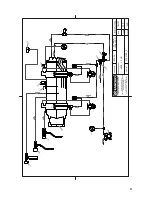
Page 31: ...TTO DENOMINAZIONE CODICE Formato U T A4 Viale della Repubblica 40 20010 Villastanza di Parabiago Mi Italia Tel 39 0331 408200 Fax 39 0331 551437 www rancilio com info rancilio it SCHEMA IDRAULICO EPOCA VERS E 2 GR 18 07 07 SI_EPOCA_E RA RV IL VS SC SC CL VA EC MA2 CV CV GR GR VR ES PV RL MA1 RV SP SL ...

Page 32: ...ROGETTO DENOMINAZIONE CODICE Formato U T A4 Viale della Repubblica 40 20010 Villastanza di Parabiago Mi Italia Tel 39 0331 408200 Fax 39 0331 551437 www rancilio com info rancilio it SCHEMA IDRAULICO EPOCA RA RV IL VS SC SC CL SL VA EC MA GR GR VR ES PV VERS S 2 GR 17 09 07 SI_EPOCA_S P RL MA1 RV ...

Page 33: ......

Page 34: ......

Page 35: ......

Page 36: ...ederzeit durchzuführen EN Reserved property Partial or total reproduction of this manual is forbidden without written authorisation of RANCILIO S P A RANCILIO reserves the right to effectuate in any given moment any modifications which are considered necessary ES Propriedad reservada Prohibida la reproducciòn total o parcial del presente manual sin la autorizaciòn escrita de la RANCILIO S P A RANC...

Reviews: