72
11. STOPPING THE MACHINE
A - Temporary stop
●
Carry out cleaning and maintenance operations.
●
Wind up the cable and fasten it to the machine
with sticky tape.
●
Cover the machine and place it in a dry room. Do
not leave it exposed to atmospheric agents and
do not allow it to be touched by children or unift
persons.
To disconnect from the main power supply, consult
qualified personnel.
B - Definitive stop
●
Besides carrying out the operations necessary for
a temporary stop, cut off the cable, pack the
machine in cardboard, polystyrene or other packing
material and consign it to firms authorized for its
disposal or to second-hand goods dealers.
12. PROBLEMS AND REMEDIES
Check operations to be carried out by the user
with the plug disconnected.
For any type of problem or inconvenience
not specifically indicated, disconnect the
plug and contact our service centre without
attempting any direct repairs.
A) The machine does not start:
-
check that the plug is connected;
-
In case of power failure wait for the power to return
and check if the earth leakage protection circuit
breaker or the main switch is on;
-
check the condition of the plug and the supply
cable; if damaged have them replaced by qualified
personnel.
B) There is water under the machine:
-
check that the drainage tray is not obstructed.
C) Slow dispensing:
-
check that the filters and delivery heads are clean;
- check that the coffee is not too finely ground.
D) Irregular steam delivery:
-
check that the nozzles are not obstructed.
●
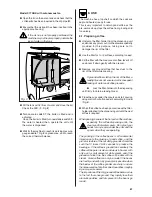
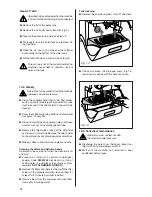
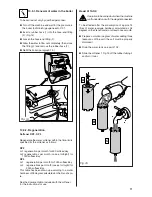
Pour the solution through the filter and the resin,
letting it flow down freely.
●
Wait about 5 minutes, then hold the softener under
a tap and rinse it with water. When the water coming
out of the softener is no longer salty, the resins are
regenerated and the softener is ready for use once
again.
●
Put the softener back on the rubber tube and
replace it horizontally on the bottom of the tank.
●
On completion of this operation, the machine can
be started up again by repeating the procedure
described in paragraph 7.3.
Summary of Contents for Epoca S
Page 1: ...epoca USE AND MAINTENANCE S CD DE version 2 0...
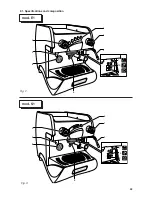
Page 5: ...2 1 Specifications and composition Fig 3 4...
Page 11: ...7 OPERATION 7 1 Controls Fig 8 Fig 8 10...
Page 17: ...epoca PARTS BREAKDOWN CD DE version 1 01...
Page 18: ......
Page 19: ......
Page 20: ......
Page 21: ......
Page 22: ......
Page 23: ......
Page 24: ......
Page 25: ......
Page 26: ......
Page 27: ......
Page 28: ......
Page 29: ......
Page 30: ......
Page 31: ......
Page 32: ...epoca DIAGRAMS S CD DE version 1 01...
Page 33: ......
Page 34: ......
Page 35: ......
Page 36: ......
Page 37: ......
Page 38: ......
Page 39: ......
Page 40: ......
Page 41: ......
Page 42: ......
Page 43: ......
Page 65: ...91 REV 00 J5 J6 J4 GR...
Page 66: ...92...
Page 67: ...93...
Page 70: ...96 EPOCA E1...
Page 71: ...97 PV EPOCA S1...
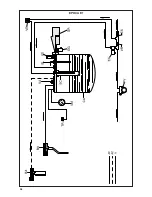
Page 72: ...98 EPOCA S1 TANK...

