background image

Instrument Tour

R&S

®

Spectrum Rider FPH

33

Getting Started 1321.0996.02 ─ 09

4.3.2


Measurement Result View

Special touchscreen gesture

You can swipe vertically up or down in the "Measurement result view" to
hide or unhide the measurement result view display.
For more information, see the "Touchscreen Gesture Element" in the R&S
Spectrum Rider user manual

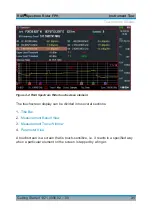
The "Measurement result view" is located below the "Title bar".

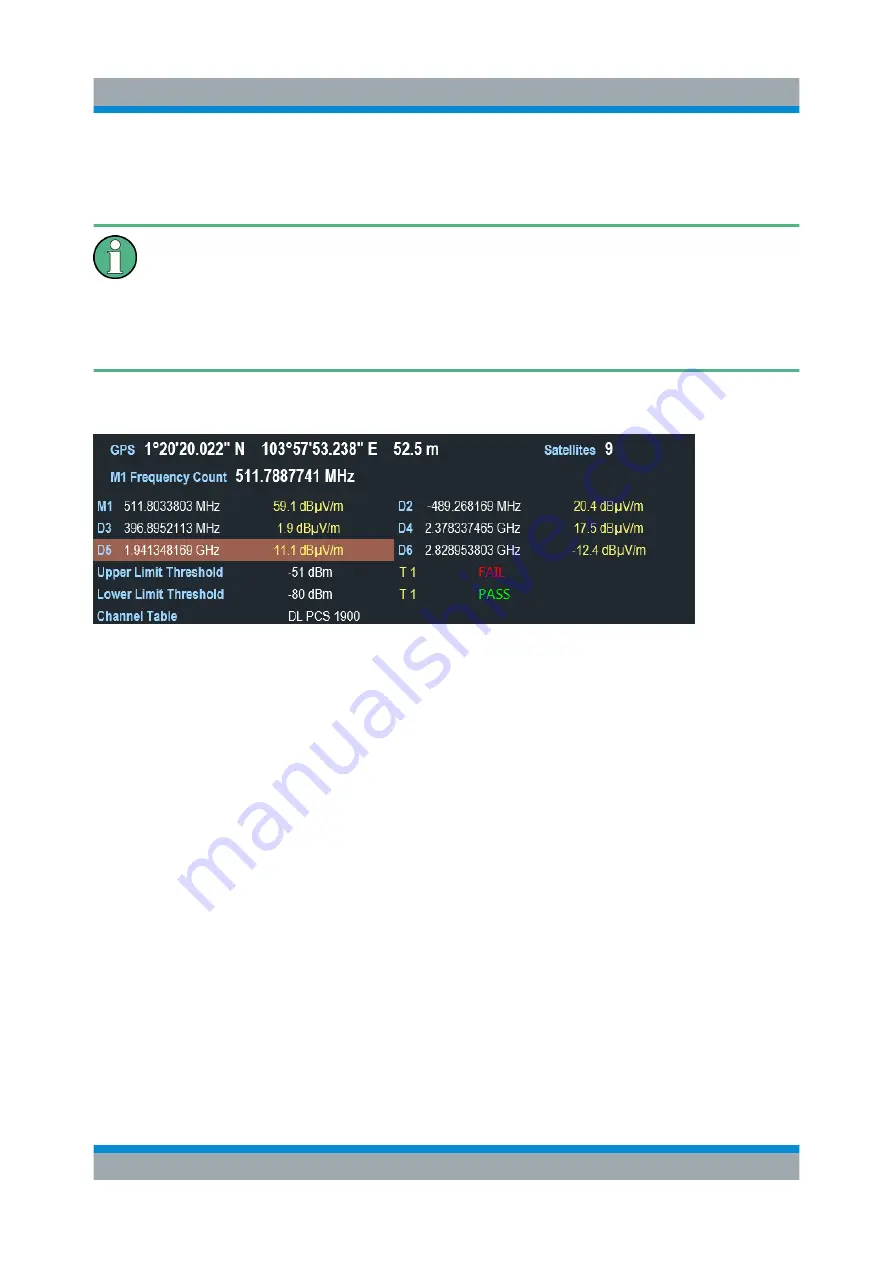
It displays measurement results of the followings:

GPS information

Marker values
– Including marker function such as marker noise measurement, frequency

counter and N dB down bandwidth measurement when activated.

Limit lines

Channel table

When the marker measurement is enabled and selected in the "Measurement
result view", an entry box for marker positioning is displayed. On the selected
marker, you can also see that the function measurement result is displayed in the
"Measurement result view", e.g. "Frequency Count".

The selected marker is highlighted in the "Measurement result view", it is also
reflected on the marker in the "Measurement trace window".

Touchscreen Display

Summary of Contents for 1321.1111.02

Page 1: ...R S Spectrum Rider FPH Handheld Spectrum Analyzer Getting Started Getting Started Version 09 1321099602 E9î2 ...

Page 2: ...manual correspond to firmware version 1 9 or higher 2020 Rohde Schwarz GmbH Co KG Mühldorfstr 15 81671 München Germany Phone 49 89 41 29 0 Email info rohde schwarz com Internet www rohde schwarz com Subject to change Data without tolerance limits is not binding R S is a registered trademark of Rohde Schwarz GmbH Co KG Trade names are trademarks of the owners 1321 0996 02 Version 09 R S Spectrum Ri...

Page 3: ...sic Safety Instructions and the product documentation in a safe place and pass them on to the subsequent users Riesgo de lesiones y daños en el instrumento El instrumento se debe usar de manera adecuada para prevenir descargas eléctricas incendios lesiones o daños materiales No abrir la carcasa del instrumento Lea y cumpla las Instrucciones de seguridad elementales suministradas con el instrumento...

Page 4: ...die Produktdokumentation gut auf und geben Sie diese an weitere Benutzer des Produkts weiter Risque de blessures et d endommagement de l appareil L appareil doit être utilisé conformément aux prescriptions afin d éviter les électrocutions incendies dommages corporels et matériels N ouvrez pas le boîtier de l appareil Lisez et respectez les consignes de sécurité fondamentales fournies avec l appare...

Page 5: ...ge the batteries See the device manual or data sheet for the exact designation of the charger If the batteries are improperly charged there is a risk of explosion which can cause serious personal injury 5 The charging temperature must be between 0 C and 45 C see manual for information on possible restrictions 6 Discharging may take place only at temperatures between 0 C and 50 C see manual for inf...

Page 6: ...de Rohde Schwarz Consulte en el manual o en las especificaciones técnicas del equipo la denominación exacta del cargador Si las baterías se cargan de forma incorrecta existe peligro de explosión lo que podría causar lesiones graves en personas 5 La temperatura de carga debe encontrarse entre 0 C y 45 C consulte el manual para posibles restricciones 6 La descarga solamente puede efectuarse entre 0 ...

Page 7: ...n werden Siehe Handbuch oder Datenblatt des Gerätes für die genaue Bezeichnung des Ladegerätes Wenn Batterien unsachgemäß geladen werden besteht Explosionsgefahr was zu schweren Verletzungen bei Personen führen kann 5 Die Ladetemperatur muss zwischen 0 C und 45 C betragen für mögliche Einschränkungen siehe Handbuch 6 Ein Entladen darf nur zwischen 0 C und 50 C erfolgen für mögliche Einschränkungen...

Page 8: ...sont indiquées dans le manuel ou la fiche technique de l appareil Une recharge incorrecte des batteries peut entraîner des explosions susceptibles de causer des blessures graves 5 Recharger impérativement à des températures comprises entre 0 C et 45 C restrictions éventuelles voir le manuel 6 Décharger impérativement à des températures comprises entre 0 C et 50 C restrictions éventuelles voir le m...

Page 9: ...upport center A team of highly qualified engineers provides support and works with you to find a solution to your query on any aspect of the operation programming or applications of Rohde Schwarz products Contact information Contact our customer support center at www rohde schwarz com support or follow this QR code QR code to the Rohde Schwarz support page ...

Page 10: ... Preparing for Use 11 3 1 Putting into Operation 11 3 1 1 Unpacking and Checking the Instrument 12 3 1 2 Accessory List 13 3 1 3 Setting up the R S Spectrum Rider 13 3 1 4 Using the AC Adapter 15 3 1 5 Battery Operation 16 3 1 6 Battery Maintenance 18 3 1 6 1 Handling 18 3 1 6 2 Storage 18 3 1 6 3 Transportation 19 3 1 6 4 End of Life 19 3 2 Switching the Instrument On and Off 19 3 3 Checking the ...

Page 11: ...lay 30 4 3 1 Title Bar 32 4 3 2 Measurement Result View 33 4 3 3 Measurement Trace Window 34 4 3 4 Parameter View 35 4 3 4 1 Configuration Overview 36 4 4 On screen Keyboard 39 4 5 Front Panel Keys 39 4 5 1 POWER Key 39 4 5 2 Screenshot Key 40 4 5 3 Softkey 40 4 5 4 System Keys 40 4 5 5 Function Keys 41 4 5 6 Keypad 42 4 5 7 Navigation Controls 43 4 6 Managing Options 44 4 6 1 Enabling Options 44 ...

Page 12: ...figuring Power Supply 63 4 7 9 Internal Alignment 65 4 7 10 Resetting the R S Spectrum Rider 67 4 8 Connecting the R S Spectrum Rider to a PC 68 4 8 1 LAN Connection 69 4 8 2 USB Connection 73 5 Trying Out the Instrument 75 5 1 Using the Spectrum Analyzer 75 5 1 1 Attenuating the Signal 75 5 1 2 Using the Preamplifier 76 5 1 3 Measuring CW Signals 77 5 1 4 Measuring Harmonics 81 5 2 Using a Power ...

Page 13: ...Contents R S Spectrum Rider FPH 6 Getting Started 1321 0996 02 09 ...

Page 14: ... error messages In addition to the R S Spectrum Rider user manual there is a separate user manual for the InstrumentView software package This manual contains a description of all features of the InstrumentView software package The online version html format of the R S Spectrum Rider provides the com plete contents for immediate display on the Internet Service manual Describes the performance test...

Page 15: ...com calcert Enter the device ID of your R S Spectrum Rider and download the certificate You can find the device ID either in the Setup menu or on the label on the rear panel Release notes and open source acknowledgment OSA The release notes list new features improvements and known issues of the cur rent firmware version and describe the firmware installation The open source acknowledgment document...

Page 16: ...nces to other parts of the documenta tion are enclosed by quotation marks 1 2 2 Conventions for Procedure Descriptions When describing how to operate the instrument several alternative methods may be available to perform the same task In this case the procedure using the touchscreen is described The alternative procedure using the keys on the instru ment or the on screen keyboard is only described...

Page 17: ... signal and spec trum analyzer developed to meet demanding customer requirements Offering touchscreen input the analyzer enhances user experience in making measure ments fast and easy This user manual contains a description of the functionality that the instrument provides The latest version is available for download at the product homepage http www rohde schwarz com product fph html ...

Page 18: ...trument casing Risk of instrument damage due to inappropriate operating conditions Specific operating conditions are required to ensure accurate measure ments and to avoid damage to the instrument Observe the information on appropriate operating conditions provided in the basic safety instructions and the instrument s data sheet Instrument damage caused by electrostatic discharge Electrostatic dis...

Page 19: ...on measurement results Electromagnetic interference EMI may affect the measurement results To suppress generated electromagnetic interference EMI Use suitable shielded cables of high quality For example use double shielded RF and LAN cables Always terminate open cable ends Note the EMC classification in the data sheet 3 1 1 Unpacking and Checking the Instrument Check the equipment for completeness...

Page 20: ...c charging Secure the instrument to prevent any movement and other mechanical effects during transportation 3 1 2 Accessory List The instrument comes with the following accessories Power supply cable and adapter set Li ion rechargeable battery USB2 0 cable A Mini Side strap Getting Started printed manual Document folder containing safety instructions KC and CE certificate Optional accessories and ...

Page 21: ...ut the support on the back of the R S Spectrum Rider Before you turn on the R S Spectrum Rider you should insert the lithium ion bat tery included in the delivery into the battery compartment located at the back of the R S Spectrum Rider Insert battery 1 Unscrew the two thumb screws located on the battery compartment 2 Open the cover 3 Insert the battery into the R S Spectrum Rider 4 Close the cov...

Page 22: ...the AC adapter to the DC port on the left side of the R S Spectrum Rider item 1 of Figure 3 1 Make sure to fully insert the AC adapter plug into the DC port Depending on the system you need firmly connect the appropriate power cable included in the delivery to the AC adapter item 2 of Figure 3 1 Finally connect the power cable plug to an AC power outlet Figure 3 1 AC adapter 1 AC adapter 2 Power c...

Page 23: ...dicated in the display screen is illustrated below Figure 3 2 Battery charging and discharging process Charging time is about three hours when the R S Spectrum Rider is in inactive mode i e R S Spectrum Rider is switched off If the instrument is in active mode i e R S Spectrum Rider is switched on the charging time is extended to about four hours because the charging current is reduced as the powe...

Page 24: ...ery into the external charger and sup ply it with power via the AC power adapter An amber LED on the charger indicates the charging process The LED turns to green when the battery is fully charged A red LED on the charger indicates that the battery is not charging or the charging failed Figure 3 3 External battery charger 1 Lithium ion battery R S HA Z306 2 External charger R S HA Z303 3 Power sup...

Page 25: ...hort circuiting between the terminals If you cannot discharge the battery it may be deep discharged Charge the battery for 0 5 hours and check again If you cannot charge the battery it may be overcharged Discharge the battery and check again If the battery has been short circuited charge it to reset the electronics If the battery still does not work contact the Rohde Schwarz customer support Do no...

Page 26: ... no metallic lithium 3 1 6 4 End of Life The capacity of the battery decreases after it has gone through numerous charge cycles and nearing its end of life When the battery is dead do not open the bat tery Do not dispose battery in fire 3 2 Switching the Instrument On and Off The instrument can be powered with an AC or DC battery operated or via car adapter input See Chapter 3 1 4 Using the AC Ada...

Page 27: ... battery charging is in process Amber LED Instrument is in switch off mode with AC supply and there is no battery in it Red LED There is an error in the battery charging LED OFF This is an indication that there is no AC or DC supply to the instrument The instrument is in a switch off mode 3 3 Checking the Supplied Options The instrument can be equipped with different hardware and installed options...

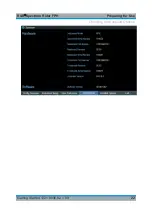
Page 28: ...Check the availability of the installed options as indicated in the delivery note 4 Check the availability of the hardware options as indicated in the delivery note 5 Press HW SW Info softkey A list with hardware and firmware information is displayed Checking the Supplied Options ...

Page 29: ...Preparing for Use R S Spectrum Rider FPH 22 Getting Started 1321 0996 02 09 Checking the Supplied Options ...

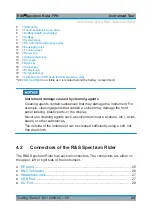
Page 30: ...r as well as the connectivity of the instrument to PC Overview Control 23 Connectors of the R S Spectrum Rider 24 Touchscreen Display 30 On screen Keyboard 39 Front Panel Keys 39 Managing Options 44 Configuring the R S Spectrum Rider 47 Connecting the R S Spectrum Rider to a PC 68 4 1 Overview Control Figure 4 1 Front panel of R S Spectrum Rider 1 RF input N connector or RPC 3 5 mm connector 2 BNC...
Page 31: ...nt damage caused by cleaning agents Cleaning agents contain substances that may damage the instrument For example cleaning agents that contain a solvent may damage the front panel labeling plastic parts or the display Never use cleaning agents such as solvents thinners acetone etc acids bases or other substances The outside of the instrument can be cleaned sufficiently using a soft lint free dust ...

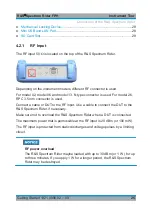
Page 32: ...nnector is used Connect a cable or DUT to the RF input Use a cable to connect the DUT to the R S Spectrum Rider if necessary Make sure not to overload the R S Spectrum Rider when a DUT is connected The maximum power that is permissible at the RF input is 20 dBm or 100 mW The RF input is protected from static discharges and voltage pulses by a limiting circuit RF power overload The R S Spectrum Rid...

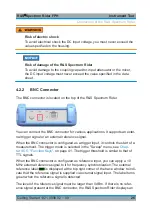
Page 33: ...gnal When the BNC connector is configured as a trigger input it controls the start of a measurement The trigger mode is selected in the Sweep menu see Chap ter 4 5 5 Function Keys on page 41 The trigger threshold is similar to that of TTL signals When the BNC connector is configured as reference input you can apply a 10 MHz external reference signal to it for frequency synchronization The external...

Page 34: ...ck The 3 5 mm connector for headphones is located on the top of the R S Spectrum Rider The internal impedance of the connector is approximately 10 Ω 4 2 4 USB Port The two USB ports are located on top of the R S Spectrum Rider You can use the USB interface to connect a memory stick and store data sets or screenshots The USB connector can also be used to control the operation of the power sensor an...

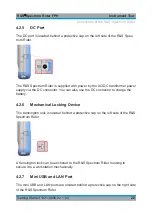
Page 35: ...onnector You can also use the DC connector to charge the battery 4 2 6 Mechanical Locking Device The Kensington lock is located behind a protective cap on the left side of the R S Spectrum Rider A Kensington lock can be anchored to the R S Spectrum Rider housing to secure it to a workstation mechanically 4 2 7 Mini USB and LAN Port The mini USB and LAN ports are located behind a protective cap on ...

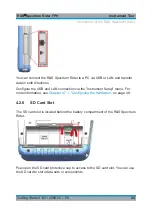
Page 36: ...B and LAN connection via the Instrument Setup menu For more information see Chapter 4 7 1 Configuring the Hardware on page 48 4 2 8 SD Card Slot The SD card slot is located behind the battery compartment of the R S Spectrum Rider Peel open the SD card protective cap to access to the SD card slot You can use the SD card to store data sets or screenshots Connectors of the R S Spectrum Rider ...

Page 37: ...rument Risk of touchscreen damage during operation The touchscreen may be damaged by inappropriate tools or excessive force Observe the following instructions when operating or cleaning the touch screen Never touch the screen with ball point pens or other pointed objects with sharp edges It is recommended that you operate the touchscreen by finger only As an alternative you may use a stylus pen wi...

Page 38: ... element The touchscreen display can be divided into several sections 1 Title Bar 2 Measurement Result View 3 Measurement Trace Window 4 Parameter View A touchscreen is a screen that is touch sensitive i e it reacts in a specified way when a particular element on the screen is tapped by a finger Touchscreen Display ...
Page 39: ...er position Draw a x to delete all markers Swipe up or down vertically in the Measurement Result View to hide or unhide the measurement result view display In the file manager dialog swipe horizontally to the left or right direction to preview screenshots In the wizard measurement mode swipe horizontally to the left direction to skip a wizard measurement 4 3 1 Title Bar The Title bar is located on...

Page 40: ...esults of the followings GPS information Marker values Including marker function such as marker noise measurement frequency counter and N dB down bandwidth measurement when activated Limit lines Channel table When the marker measurement is enabled and selected in the Measurement result view an entry box for marker positioning is displayed On the selected marker you can also see that the function m...

Page 41: ...79 4 3 3 Measurement Trace Window The Measurement trace window is the main user interface window in R S Spectrum Rider It displays the measurement traces where markers and limit lines are also displayed Device warning messages e g IF Ovl are displayed at the top right hand corner of the window Device Warning Message IF Ovl This message indicates that the downconverter of the intermedi ate frequenc...

Page 42: ...y label See Chapter 4 5 3 Softkey on page 40 It displays an entry box to configure the center frequency start or stop frequency for the spec trum measurement Trace Select Trace to display the trace menu with a list of settings Clear Write Average Min Hold Max Hold Detect Select Detect to display the trace detector menu with a list of settings Auto Peak Max Peak Min Peak Sample RMS Trig Select Trig...

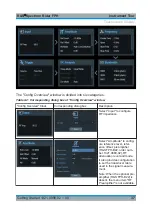
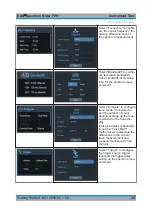
Page 43: ...WT to display an entry box to config ure the sweep time of the spectrum measure ment Config Overview Select Config Overview to display the config uration overview window for more configura tion options for the spectrum measurement See Chapter 4 3 4 1 Configuration Over view on page 36 4 3 4 1 Configuration Overview The Config Overview is a dedicated button located at the bottom of the Param eter V...

Page 44: ...ng dialog box Description Select Input to configure RF impedance Select Amplitude to config ure reference level refer ence offset preamplifier R S FPH B22 order num ber 1321 0680 02 RF attenuation level and mode It also provides configuration to set the transducer table used in the signal measure ment Note When the optional pre amplifier R S FPH B22 is absent the menu item RF Preamplifier is not a...

Page 45: ...r the spectrum mea surement Select Analysis to configure trace mode trace detector and the number of count used to average up the mea surement for the trace dis play It also provides configuration to set the Trace Math method used to calculate the differences in the current trace measurement and measurement saved in the memory Select Trigger to configure the trigger source trigger level and the tr...

Page 46: ...ce If the touchscreen interface is not activated the on screen keyboard is dis abled The on screen keyboard display can be switched on and off using the on screen keyboard icon highlighted at the top right hand corner 4 5 Front Panel Keys The following chapters illustrate the function of the front panel keys 4 5 1 POWER Key The POWER key is located on the lower left of the front panel It starts up...

Page 47: ... on the front panel are used to access the softkey label See Chapter 4 1 Overview Control on page 23 The softkey label is function specific depending on the key selected on the front panel of the instrument See Chapter 4 5 5 Function Keys on page 41 4 5 4 System Keys System keys provide settings affecting the general instrument settings result evaluation settings and save and recall functions For ...

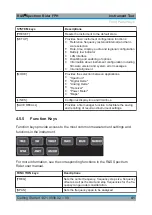
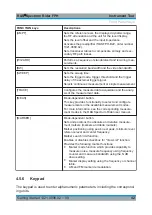
Page 48: ...es the selection between applications Spectrum Digital Demo Analog Demo Receiver Power Meter Maps LINES Configures display line and limit lines SAVE RECALL Provides a file manager function to facilitate the saving and recalling of result and instrument settings 4 5 5 Function Keys Function keys provide access to the most common measurement settings and functions in the instrument For more informat...

Page 49: ...aly sis of the measurement data MEAS Mode dependent button This key provides functionality to select and configure measurements in the available measurement modes For more information see the corresponding measure ment modes in the R S Spectrum Rider user manual MARKER Mode dependent button Sets and positions the absolute and relative measure ment markers markers and delta markers Marker positioni...

Page 50: ...act like an enter key function CANCEL key Closes all kinds of dialog boxes if the edit mode is not active Quits the edit mode if the edit mode is active In dialog boxes that contain a Cancel but ton it activates that button For Edit dialog boxes the following mechanism is used If data entry has been started it retains the original value and closes the dialog box If data entry has not been started ...

Page 51: ...ocused Acts as an enter key when pressed 4 6 Managing Options For special measurement tasks you can equip the R S Spectrum Rider with vari ous firmware options 4 6 1 Enabling Options To enable options you have to enter a key code The key code is based on the unique serial number of the R S Spectrum Rider 1 Press SETUP key 2 Select Installed Options softkey A list of all available options and the c...

Page 52: ...tatus of the option Installed This means that the option is installed and working Demo This means that the option is for demo purposes and it has an expiry date Removed option key This indicates that a portable license has been removed and is ready to be transferred to another R S Spectrum Rider 4 6 3 Managing Options with R S License Manager If you are using the R S Spectrum Rider in a local area...

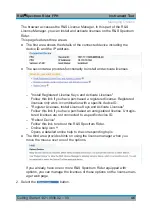
Page 53: ...sed a registered license Registered licenses only work in combination with a specific device ID Register Licenses Install License Keys and Activate Licenses Follow this link if you have purchased an unregistered license Unregis tered licenses are not connected to a specific device ID Reboot Device Follow this link to reboot the R S Spectrum Rider Online help icon Opens a detailed online help to th...

Page 54: ...use it on another Move Portable License Follow this link if you want to move a portable license Moving a porta ble license is possible without unregistering the license Online help icon Opens a detailed online help to the corresponding topic The second area provides hints on using the R S License Manager when you move the mouse over one of the options After you have followed one of the links follo...

Page 55: ...ignment 65 Resetting the R S Spectrum Rider 67 4 7 1 Configuring the Hardware The hardware settings provide settings that control internal and connected hard ware Using auto accessory detection If you are using any accessories while working with the R S Spectrum Rider the instrument is able to identify the connected hardware To enable this setting 1 In the Instrument Setup dialog box select the Au...

Page 56: ...ber 4067 5900 02 or the directional antenna R S HE400 order number 4104 6000 02 with the R S Spectrum Rider to locate potential interfering sour ces For a comprehensive description of the antennas and their functionality refer to the user manuals delivered with the product Both antennas are embedded with a GPS receiver and an electronic compass You can control the GPS receiver of the antennas as d...

Page 57: ...r HE400 Antenna menu item The R S Spectrum Rider enables the selected antenna Note The Auto Accessory Detection menu item in the Hardware section turns off when an antenna is selected Enabling the compass The antennas feature an electronic compass to determine directions precisely 1 In the Instrument Setup dialog box select the Compass item A drop down menu to enable or disable the compass opens C...

Page 58: ...le the display of compass information The R S Spectrum Rider displays the compass information at the top of the map display Assigning functions to the toggle switch The R S HL300 and HE400 has a toggle switch on its handle that you can assign to one of the following functions 1 In the Instrument Setup dialog box select the Assign Antenna Switch menu item A drop down menu to select the function of ...

Page 59: ...rum Rider The Antenna Service Menu contains functionality to calibrate the antenna 1 In the Instrument Setup dialog box select the Antenna Service Menu item to activate the antenna service menu The R S Spectrum Rider informs you that the antenna is disabled to deter mine the antenna information 2 Select YES softkey The R S Spectrum Rider tries to determine the antenna characteristics It shows the ...

Page 60: ...calibration For antenna calibration it is necessary to move the antenna according to the direction as instructed on the screen 4 When calibration completes the R S Spectrum Rider displays a Calibration Successful message The R S Spectrum Rider displays the calibration result Configuring the R S Spectrum Rider ...

Page 61: ...4 Getting Started 1321 0996 02 09 4 7 3 Using the GPS Receiver The R S Spectrum Rider can locate your exact position if you connect the GPS receiver R S HA Z340 order number 1321 1392 02 to the USB connector Configuring the R S Spectrum Rider ...

Page 62: ...eceiver can be conveniently attached to the knob screw as shown in Figure 4 3 The Instrument Setup dialog box provides all settings necessary to configure the GPS receiver Enabling the GPS receiver 1 In the Instrument Setup dialog box select the GPS item A drop down menu opens to turn the GPS receiver on or off 2 Turn the GPS receiver on or off as required When GPS item is turned on the R S Spectr...

Page 63: ...isplayed with a white bar When the GPS receiver is not connected or enabled a message GPS Not Con nected is displayed in the measurement result view The state of the satellite lock shown in the title bar is illustrated as follows indicates that the GPS receiver is enabled and that there is a fix connec tion with enough satellites for the GPS receiver to provide the coordinates indicates that the G...

Page 64: ...og box select the Set Date item 2 Enter the date you want with the numeric keys The sequence depends on the selected date format See Setting the date format on page 59 3 Confirm the entry with the rotary knob Setting the time 1 In the Instrument Setup dialog box select the Set Time item 2 Enter the time you want with the numeric keys 3 Confirm the entry with the rotary knob After you have entered ...

Page 65: ...d time accordingly without changing the system time 4 7 5 Selecting Regional Settings The regional setting allows you to select a different language and date format Setting the language The R S Spectrum Rider supports several languages for the user interface The following is a list of languages that the instrument supports English Spanish Japanese Russian French Italian Chinese Hungarian German Po...

Page 66: ...date format The R S Spectrum Rider provides two different formats to display the date 1 In the Instrument Setup dialog box select the Date Format item A drop down menu opens to select the date format 2 Select the required date format from the drop down menu 4 7 6 Configuring the Display The display setting configures the display characteristics and the touch interface Configuring the R S Spectrum ...

Page 67: ...display The intensity of the keyboard backlight is adjustable with a time delay setting to turn off the backlight The keyboard backlight remains on until the time specified by the Keyboard Backlight Delay or a subsequent key is pressed Adjusting the display backlight 1 In the Instrument Setup dialog box select the Display Backlight item 2 Enter the backlight intensity you want with the numeric key...

Page 68: ...backlight intensity is a percentage from 0 to 100 with 100 being the brightest 3 Confirm the entry with the rotary knob Adjusting the keyboard backlight delay 1 In the Instrument Setup dialog box select the Display Backlight item 2 Enter the time you want to turn off the keyboard backlight with the numeric keys The time delay has a range of 1s to 10s 3 Confirm the entry with the rotary knob Activa...

Page 69: ... that the R S Spectrum Rider produces when you press a key or select a softkey 1 In the Instrument Setup dialog box select the Key Click Volume item 2 Enter the volume you want with the numeric keys The key click volume is a percentage from 0 to 100 with 100 being the loudest 3 Confirm the entry with the rotary knob Setting the system beeper volume The system beeper volume sets the volume of the s...

Page 70: ...ts inputs you can configure the alert audible 1 In the Instrument Setup dialog box select the Beep on Power Overload item 2 Select Beep on Power Overload to On When this beeper turns on the R S Spectrum Rider makes a sound every time it detects an overload 4 7 8 Configuring Power Supply The Current Power Source shows the source that the R S Spectrum Rider is powered by When you are using the batte...

Page 71: ... Deactivating audio alert for battery low level state The R S Spectrum Rider also allows you to turn on an audio signal that indicates that the battery has reached its low level state 1 In the Instrument Setup dialog box select the Battery Low Level Beep item 2 Select either Repetitive or Once to turn on the audio signal If you have selected Once the R S Spectrum Rider beeps once if the bat tery r...

Page 72: ... internal frequency clock and reference level adjustment Operating mode The frequency clock and reference level alignment can only be performed in Spectrum mode If wrong operating mode is detected a warning mes sage is displayed before alignment is performed For more information on the operating mode of the R S Spectrum Rider see Chapter 4 5 4 System Keys on page 40 1 In the Instrument Setup dialo...

Page 73: ...ignal for frequency clock alignment Figure 4 5 Input signal for reference level alignment 4 Connect an input signal of 1 1 GHz 10dBm at the RF IN port for frequency alignment or 100 MHz 20 dBm at the RF IN port for reference level align ment 5 Select Continue to start the internal alignment on the instrument The R S Spectrum Rider overwrites existing adjustment data and performs the internal align...

Page 74: ...a previous measurement unintentionally still being active Press the PRESET key Resetting the R S Spectrum Rider A Reset to Factory Settings resets the R S Spectrum Rider to the factory defaults During a reset the R S Spectrum Rider restores the original configuration It also deletes all customized datasets limit lines standards channel tables transducer tables etc Instead it will reinstall all the...

Page 75: ...nt results create and edit the different datasets necessary for the instru ment The NET Framework 2 0 or higher is required to run the software properly You can set up a connection between the R S Spectrum Rider and R S Instru mentView either via its LAN port or its mini USB port You have to install the R S InstrumentView software on the PC before you are able to establish a connection Download th...

Page 76: ...een the PC and R S Spectrum Rider the DHCP Dynamic Host Configuration Protocol of the R S Spectrum Rider has to be turned off which is the default state 1 In the Instrument Settings dialog box select the DHCP item A drop down menu opens to select the DHCP state 2 Select DHCP to On or Off as required Setting an IP address and subnet mask To establish a connection the PC and R S Spectrum Rider have ...

Page 77: ...ou can define the IP address When both devices are in the same subnet the first three digits of the IP address are usually the same See example below Example IP address for PC 192 168 1 10 IP address for R S Spectrum Rider 192 168 1 20 IP address 1 Identify the IP address of your PC i e in the Microsoft Windows TCP IP Properties 2 In the Instrument Settings dialog box select the IP Address item Co...

Page 78: ...e rotary knob 4 Enter the IP address of the PC with the numeric keys Configuring the R S InstrumentView software package 1 Start the R S InstrumentView software 2 Select the LAN tab in the screen layout 3 Select the Add button to create a new network connection Connecting the R S Spectrum Rider to a PC ...

Page 79: ...from the DHCP server or manually assign a fixed address With manual allocation a fixed IP address and subnet mask must be assigned to the R S Spectrum Rider as described in Chapter 4 8 1 LAN Connection on page 69 After setting up the R S Spectrum Rider configure the R S Instru mentView software with the assigned IP address as described in Configuring the R S InstrumentView software package on page...

Page 80: ...ion see Chapter 4 8 1 LAN Connection on page 69 4 8 2 USB Connection Alternatively you can connect the R S Spectrum Rider to the PC with a USB cable The mini USB interface is located behind a protective cap on the right side of the R S Spectrum Rider When you connect the R S Spectrum Rider to a computer for the first time Win dows tries to install the new hardware automatically The required driver...

Page 81: ...t Tour R S Spectrum Rider FPH 74 Getting Started 1321 0996 02 09 4 Select the Scan button to identify the R S Spectrum Rider 5 Confirm selection with the Connect button Connecting the R S Spectrum Rider to a PC ...

Page 82: ...ation at the RF input depends on the current reference level The R S Spectrum Rider provides two ways of automatic attenuation For the highest possible sensitivity it provides the Auto Low Noise attenuation mode For the lowest possible intermodulation it provides the Auto Low Distor tion mode The main difference between the two modes is that the attenuation level is 5 dB to 10 dB higher in case of...

Page 83: ...l in the input fields Directly with the number keys Using rotary knob While you can enter any number you want with the number keys using the rotary knob is coupled to a certain step size in most cases If you use the rotary knob to change the attenuation i e the step size is 5 dB 7 Enter the attenuation you need The R S Spectrum Rider shows the current attenuation level in the Parame ter View 5 1 2...

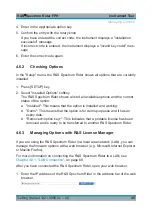
Page 84: ...on 1 Press AMPT key 2 Select Att Amp Imp softkey 3 Enable or disable the Preamp checkbox to turn on or off the preamplifier of the R S Spectrum Rider The magnitude of amplification depends on the reference level This coupling to the reference level makes sure that the dynamic range is at an optimum 5 1 3 Measuring CW Signals A basic task for spectrum analyzers is to measure the level and frequency...

Page 85: ...l frequency span At 500 MHz the generator signal is displayed as a vertical line To analyze the generator signal at 500 MHz in more detail reduce the frequency span 2 Select the Center softkey at the Parameter view The R S Spectrum Rider opens an entry box to define the center frequency 3 Enter a center frequency of 500 MHz The signal is now in the center of the display 4 Select the Span softkey a...

Page 86: ...ctrum Rider opens an entry box to enter the reference level 2 Enter a reference level of 25 dBm The R S Spectrum Rider reduces the reference level by 5 dB The maximum trace value is close to the maximum scale value of the measure ment diagram The increase in the displayed noise floor is minimal The differ ence between the signal maximum and the displayed noise i e the dynamic range has however bee...

Page 87: ...nt points frequency points The marker is always positioned on one of these measurement points The R S Spectrum Rider calculates the marker frequency from the frequency of the measurement point the center frequency and the frequency span that have been set The mea surement point resolution and consequently the accuracy of the marker fre quency readout therefore depend on the frequency span that has...

Page 88: ...nce frequency which is far more exact than the pixel oriented marker readout 5 1 4 Measuring Harmonics A spectrum analyzer is ideal to measure harmonic levels or harmonic ratios because it can resolve different signals in the frequency domain With marker functions you can speed up the measurement tasks A signal generator e g R S SMBV provides the signal source Test setup Connect the RF output of t...

Page 89: ...onic ratio decrease the span 2 Press FREQ key 3 Select the Start softkey at the Measurement footer bar The R S Spectrum Rider opens an entry box to enter the start frequency 4 Enter a start frequency of 50 MHz 5 Confirm the entry with one of the unit keys 6 Select the Stop softkey at the Measurement footer bar The R S Spectrum Rider opens an entry box to enter the stop frequency 7 Enter a stop fre...

Page 90: ...he New Marker softkey at the Measurement footer bar The R S Spectrum Rider activates a delta marker and places it on the next trace maximum This corresponds to the second harmonic The harmonic ratio is the vertical distance of the marker and the delta marker The R S Spectrum Rider displays this value in the Measurement result view 5 2 Using a Power Sensor R S Spectrum Rider option R S FPH K9 order...

Page 91: ...re information see Chapter 4 2 4 USB Port on page 27 5 2 1 Measuring the Power with a Power Sensor For more information about the characteristics of the supported power sensors refers to their datasheet Risk of damaging the power sensor Because of high input power The continuous power applied to the power sensor s input must not exceed 400 mW 26 dBm Use an attenuator for measurements on high power...

Page 92: ...ter a few seconds the R S Spectrum Rider shows the mea sured power If no power sensor has been connected or is not connected appropriately the R S Spectrum Rider shows nothing If there are communication problems between the R S Spectrum Rider and the power sensor the R S Spectrum Rider displays an error message that indicates a possible cause For more information on the error messages see the Powe...

Page 93: ...al sources 3 Select Continue softkey to start zeroing The R S Spectrum Rider starts the zeroing process 4 Wait for the zeroing process to finish After zeroing the R S Spectrum Rider displays the message Power sensor zero done and again shows the power sensor softkey menu 5 Connect the DUT to the power sensor The R S Spectrum Rider shows the measured power level in dBm For more information on the p...

Page 94: ...y with one of the unit keys The R S Spectrum Rider transfers the new frequency to the power sensor which then corrects the measured power readings 5 2 2 Measuring Power and Return Loss With the directional power sensors R S FSH Z14 and R S FSH Z44 you can measure the power in both directions When you connect the directional power sensor between the source and the load the R S Spectrum Rider measur...

Page 95: ...e power sensor from being destroyed Danger of skin burns and damage to the instrument Never exceed the permissible continuous power See diagram on the rear of the sensor for the permissible continuous power Turn off the RF power to connect the sensor Screw the RF connectors tightly Test setup Connect the power sensor cable to the USB port of R S Spectrum Rider If the power sensor is having the bin...

Page 96: ...fter a few seconds it also shows the forward power and return loss currently measured at the load Zeroing the power sensor Before performing the power measurement you should zeroing the power sensor After zeroing is done the R S Spectrum Rider displays the message Power sensor zero done and again shows the power sensor softkey menu Connect the R S FSH Z14 or R S FSH Z44 between the source and the ...

Page 97: ...ument the USB flash drive takes precedent over SD card as a storage device If both storage devices are not connected the internal memory of the instru ment is used for storage The R S Spectrum Rider can store measurement results and settings in the internal memory removable micro SD card or on a USB flash drive via the USB interface Results and settings are always stored together allowing them to ...

Page 98: ...ports and one micro SD card slot For more information on saving measurement results and settings see Saving Datasets in the R S Spectrum Rider user manual For more information on recalling measurement results and settings see Restor ing Datasets in the R S Spectrum Rider user manual Saving and Recalling Results and Settings ...

Page 99: ...te 8 Connectors 24 Controls 23 Conventions 8 D Data sheet 8 Date time 57 Date format 58 DC port 28 Directional power sensor Zeroing 87 Display settings 59 Documentation overview 7 E Electrostatic discharge 11 ESD 11 External reference 26 External trigger 26 F Frequency 77 Front panel keys 39 Function keys 41 G Getting started 7 GPS receiver 54 H Hardware settings 48 Harmonics 81 Headphone jack 27 ...

Page 100: ... 25 S Safety instructions 7 Screenshot key 40 SD card slot 29 Signal attenuation 75 Softkey key 40 Spectrum analyzer 75 Supplied options 20 Switching on and off the instrument 19 System keys 40 T Touchscreen 30 Configuration overview 36 Measurement result view 33 34 Parameter view 35 Title bar 32 Touchscreen gesture 30 U Unpacking and checking the instrument 12 USB connection with R S Spectrum Rid...

Reviews: