General Instrument Setup
R&S
®
FSVA3000/ R&S
®
FSV3000
579
User Manual 1178.8520.02 ─ 01
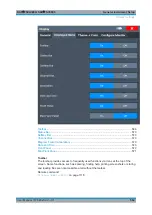
2. Select the "Theme + Color" tab.
3. In the "Screen Colors" area, do one of the following:
● Select a predefined set of colors for screen display.
● Select "User Defined Colors" to configure the color set yourself.
4. In the "Print Colors" area, do one of the following:
● Select a predefined set of colors for printing screenshots.
● Select "User Defined Colors" to configure the color set yourself.
5. Activate the "Show Print Colors on Display" option to see a preview of the print col-
ors.
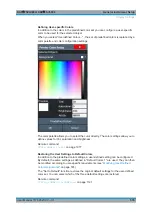
To configure a user-defined color set
1. In the "Theme + Color" tab of the "Display" dialog box, select "User Defined Colors"
either for the screen or the print colors.
2. Select "Modify User Defined Colors" .
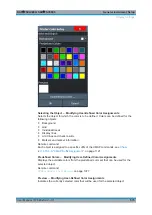
The "Screen Color Setup" dialog box is opened.
3. From the "Selected Object:" list, select the object to which you want to assign a
color.
4. Do one of the following:
● Select a color from the "Predefined Colors" .
● Select the "Userdefined Colors ..." button to define a different color.
The "Preview" area indicates the currently selected color.
5. To assign a user-specific color to the selected object, do one of the following:
● Select the color from the palette.
● Enter values for the "Tint:" , "Saturation:" , and "Brightness:" .
Note:
In the continuous color spectrum ( "Tint:" ), 0
% represents red and
100
% represents blue.
● Enter an "ARGB:" value in hexadecimal format.
6. Select the next object to which you want to assign a color from the "Selected
Object:" list.
7. Repeat these steps until you have assigned a color to all objects you want to con-
figure.
8. Select "OK" to close the dialog box.
The colors are applied to the assigned objects.
12.2.3
How to Work with the Soft Front Panels
Basic operation with the soft front panels is identical to normal operation, except for the
following aspects:
Display Settings

