Manual-7
©Rane Corporation 10802 47th Ave. W., Mukilteo WA 98275-5098 TEL (425)355-6000 FAX (425)347-7757 WEB http://www.rane.com
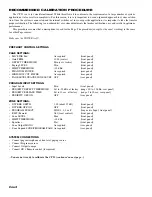
CALIBRATION
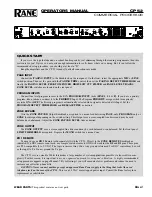
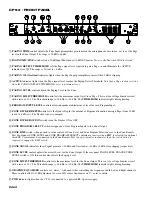
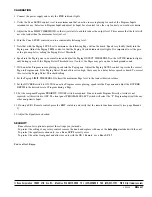
1. Connect the power supply and verify the PWR indicator lights.
2. Verify the Zone LEVEL control is set to maximum and that an active source is playing for each of the Program Inputs
intended for use. Select each Program Input and adjust its Input Level control to be the very loudest you would ever desire.
3. Adjust the Zone LIMIT THRESHOLD so that it just starts to audibly reduce the output level. This ensures that the level will
never be louder than the maximum level just set.
4. Turn the Zone LEVEL control down to a comfortable listening level.
5. Note that with the Paging LEVEL set to minimum, the following Page will not be heard. Speak very loudly (bark) into the
Paging mic. Adjust the Paging TRIM control so that the Paging Overload indicator just lights. It is important to set the gain
of the pre-amp
before
setting the Paging Detect Threshold.
6. Speak into the Paging mic in a normal voice and adjust the Paging DETECT THRESHOLD so the ACTIVE indicator lights
only during speech. If the Paging Detect Threshold is set too low, the Pager may gate on due to background sound.
7. With an active Program source playing, speak into the Paging mic. Adjust the Paging LEVEL control to provide the correct
Page-to-Program mix. If the Paging Detect Threshold is set too high, there may be a delay before speech is heard. To correct
this, lower the Paging Detect Threshold setting.
8. Set the Paging LIMIT THRESHOLD to limit the maximum Page level to the loudest desired volume.
9. Set the DUCKER switch to ON. With an active Program source playing, speak into the Page mic and adjust the DUCKER
DEPTH to the desired level of Program during a Page.
10. Set the rear panel Program PRIORITY ON/OFF switch as required. If an automatic Program Priority override is not
required, set this switch to OFF. The front panel PROGRAM SELECT switch will select the “P” Program Input just like any
other non-priority Input.
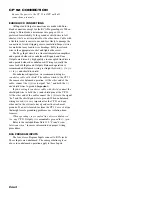
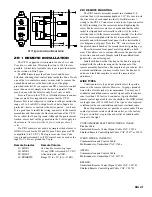
11. If using a ZR 1 Remote control, press the RMT switch
in
and verify that the remote functions correctly (see page Manual-
5).
12. Adjust the Equalizer as desired.
SECURITY
Rane offers a few options to protect the settings you just made.
To protect the setting of any rotary control, remove the knob and replace with one of the
hole plugs
included with the unit.
To protect the equalizer section only, use a Rane
SCP 1
security cover.
To protect the entire front panel and allow use only with the ZR 1 Remote, use a Rane
SC 1.7
.
You’re all set. Enjoy.
103134

