OPERATING / SERVICE MANUAL
FPE 13
PARAMETRIC EQUALIZER
QUICK START
No one likes to read manuals. Everyone likes to plug in and turn on. That’s usually OK, and
with a very few exceptions, damage is unlikely to result from such procedures with the FPE 13.
If you are using the FPE 13 in an insert loop of a mixer, hook-up is extremely easy. Simply
connect them together using a single stereo cable (¼" TRS) between the mixer’s insert loop and
the FPE 13’s
PATCH I/O
jack. This jack is wired for the tip=send, ring=return convention used
by mixer manufacturers.
Anyone familiar with other parametric equalizers will find this one very similar. One word
of caution: the
FREQ
range
switches can drastically change the center frequency of a given
filter. A range of 10Hz to 20kHz may be achieved with the proper operation of the switches and
the
FREQ sweep
control. If full boost is applied with a filter
LEVEL
control and a change is
made in the setting of the
FREQ range
switch, disastrous results may occur.
BE CAREFUL
.
To operate the filters, set the range switch for the desired mulitple frequency band, set the
BW
(bandwidth) control for the desired bandwidth and then boost or cut the desired amount
using the filter
LEVEL
control.
Never connect anything except
AN
APPROVED
R
ANE
POWER
SUPPLY
TO
THE
THING
THAT
LOOKS
LIKE
A
TELEPHONE
JACK
ON
THE
REAR
OF
THE
FPE 13.
This is an AC input and requires special
attention if you do not have an operational power supply
exactly
like the one that was originally
packed with your unit. See the full explanation of the power supply requirements elsewhere in
this manual.
SYSTEM CONNECTION
When connecting the FPE 13 to other components in your
system for the first time,
leave the power supply for last
. This
will give you a chance to make mistakes and correct them
before any damage is done to your fragile speakers, ears and
nerves.
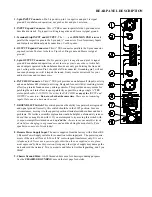
INPUTS
on the FPE 13 are balanced. This means that
standard 3-pin (XLR) connectors on the ends of any good
quality cable will work well between your other signal
processing and amplification gear. As with all Rane products,
pin 2 is used for “hot” or “+” signal polarity, pin 3 is “return”
or “–” and pin 1 is signal ground. If unbalanced operation is
required, wire your connector so that pins 1 and 3 are shorted
together and drive your unbalanced signal into pin 2. Then
use the combination of 1 and 3 for signal ground/return. You
may use either pin 1 or case for shield ground. (See Rane
Note 110 for further information on this subject).
OUTPUTS.
The FPE 13’s Outputs are balanced as well.
Again, pin 2 is hot and pin 3 is not. Pin 1 is signal ground.
True balanced operation requires only the use of pins 2 and 3
for signal and either case ground (chassis) or pin 1 signal
ground for shielding. If unbalanced output is your preference,
use pin 2 as signal and pin 1 as return. Use case ground for
shield. Again, have a look at Rane Note 110 for more detail.
EXPANDING
the Inputs and
Outputs has been accommodated
with ¼" jacks whose tip is connected
to pin 2 of the 3-pin connectors, ring
is connected to pin 3 and sleeve is
connected to pin 1. These ¼" jacks
may be used for primary Inputs and
Outputs should you wish to do so.
These connectors may also be used
for daisychaining the Inputs so more
than one processor can be driven from a single source, but
only
one
is an Input; they do not sum. The second Output
connector may be used to drive a second processor or
amplifier without special cabling.
PATCH I/O
to channel inserts on most mixers has been
made very simple. Connecting a shielded stereo tip-ring-
sleeve (TRS) cable between the FPE 13’s PATCH I/O and a
TRS insert on your console implements this feature.
SIGNAL LEVELS
applied to the FPE 13 may cover a
broad dynamic range. This device has been optimized to
operate perfectly with all signal processing and amplification
gear. The only signal level problems encountered will be with
very low level sources, such as microphones. Do not directly
connect mic levels into the FPE 13. Use a mic preamp first.


