Cue Points
Use cue points in Scratch Live to mark
and trigger different parts of your tracks.
The cue point markers are saved with the
file in the track’s ID3 tag. This means they
will be present each time you load the
track.
Setting Cue Points
You can set up to five cue points for each
track. Click on the
+
button to place a
cue point, or use the keyboard shortcuts
below. A cue point will be set at the
current playhead position of the track and
can occupy any of the 5 slots.
Use the keyboard shortcuts: ctrl-
comma (for left) and ctrl-period (for right)
to place cue points in chronological order.
Alternatively, use ctrl-1 through 0 to set a
specific cue point, i.e., to set a cue point
on the Left Deck in slot 2, press ctrl-2.
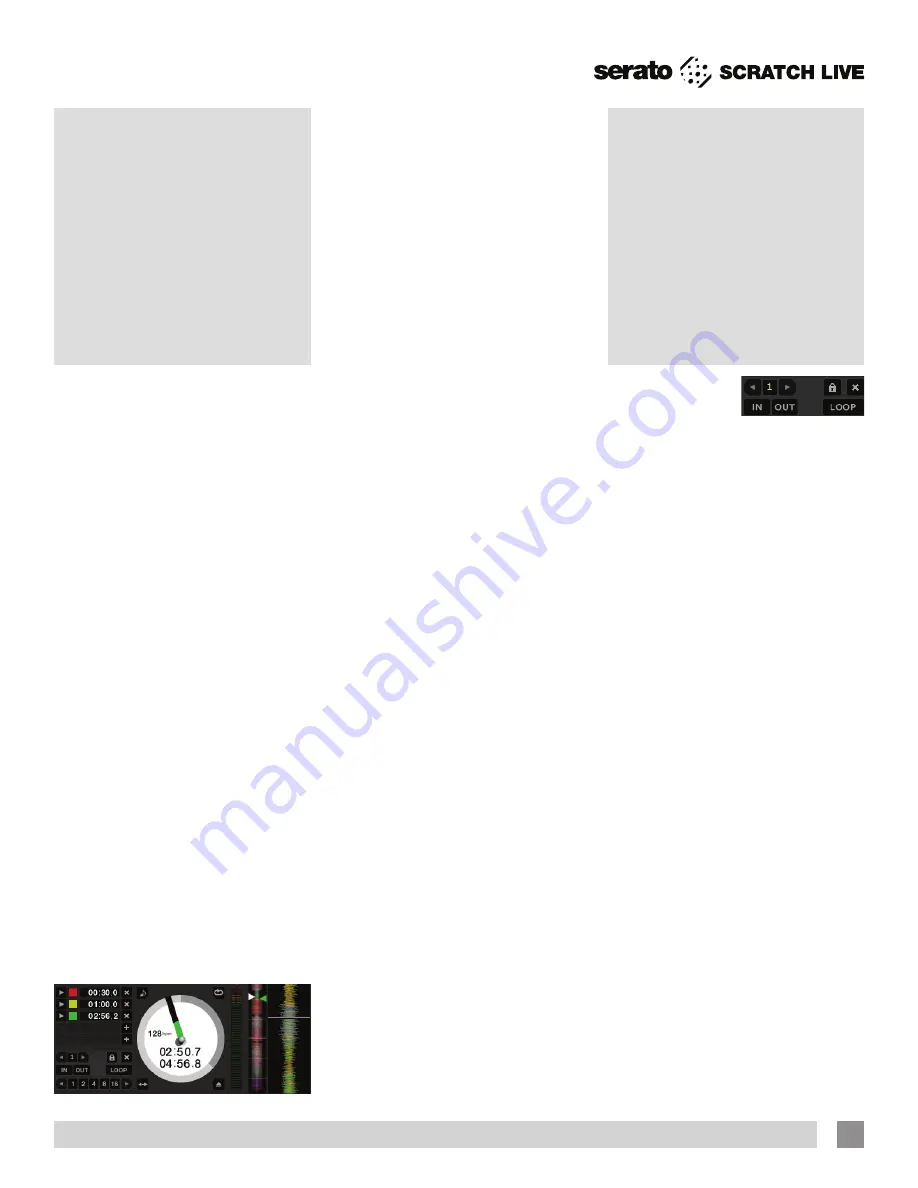
Notice the stripe on the Virtual Deck
jumps to the 12 o’clock position and
changes color when you set a cue point
– you are at the cue point when the stripe
is one solid color and at the 12 o’clock
position. As the track plays on beyond the
position of the cue point, the colored bar
shortens by a fifth for each rotation.
Likewise, as you approach the cue point,
the color will grow by a fifth each rotation.
For example, the picture below shows the
track just before the end of the 5th
rotation before the cue point.
TIP: Zoom in on the waveform using the
– and + keys and ‘scrub’ to the desired
position for greater accuracy when
setting cue points.
Enable Hot Cues
To turn on hot cues, check
Enable Hot
Cues
in the Playback tab on the Setup
screen. When Hot Cues are enabled, you
can set cue points simply by pressing the
number keys 1 through 0 (no ctrl modifier
required). Note that you can only add cues
this way if the cue point slots are empty.
See “Enable Hot Cues” on page 37.
Triggering Cue Points
Click the
arrow to the left of each cue
point to jump to it (REL and INT modes
only). You can also jump to cue points
using shortcuts: 1 through 5 for the cue
points on the Left Deck, and 6 through 0
for the Right Deck cue points.
Editing Cue Points
To remove a cue point, use the
x
button
on the right side of the cue point panel.
You can also overwrite cue points by
using the shortcut keys ctrl-1 through 0.
Customizing Cue Points
To change the color of a cue point, click
on the colored square and choose a new
color from the drop down menu.
To name your cue point, double click
on the “time” field. You can now edit and
name this cue point to whatever you like.
You can also drag and drop cue points
to change their order in the list. If you wish
to have the cue points sorted by time,
check
Sort cues chronologically
in the
Playback tab on the Setup screen. If you
load the same track onto both Decks, you
will be able to add or modify cue points
from either Deck.
When you jump to a cue point in INT
mode while paused, the track will play
from the cue point for as long as the key
or mouse button is pressed, after which
the playhead returns to the cue point. If
this is done using the keyboard while the
track is playing in either INT or REL mode,
the cue point will be repeatedly triggered,
producing a stuttering effect.
Looping
You can save up to
9 loops per track.
These loops are
saved in the file, and will be present when
you reload the track. To make a loop, set
the in-point by clicking the
IN
button, and
the out-point by clicking the
OUT
button.
To turn the loop on or off, click the
LOOP
button. If you want the playhead to jump
to the start of the loop when you enable
the loop, hold the control key and press
the
LOOP
button.
To adjust the in-point of the loop, click
the
IN
button. You can use the arrow keys:
left arrow to move the in-point towards
the start of the track, right arrow to move
the in-point towards the end of the track.
Hold down the shift key while pressing the
arrow key to make coarse adjustments.
Click the
IN
button again to save the in-
point. The same applies to adjusting the
out-point.
You can also use the control vinyl (or
CD) to adjust the in- and out-point. Click
the
IN
button, then move the control vinyl.
Moving the vinyl will adjust the in-point.
Once you are happy with the new in-point,
click the
IN
button again to save, and
release the control vinyl.
The control vinyl will go back to
controlling playback once the record
is back up to normal speed. Using the
control vinyl to adjust loop end points is
optional — to turn this feature off, disable
Adjust loops with vinyl
under the Vinyl
Control tab in the Setup screen.
There are 9 available loop slots per
track. If a loop is set in a given slot, the
background (behind the loop number)
RANE SIXTY-ONE MIXER FOR SERATO SCRATCH LIVE • OPERATOR’S MANUAL 2.4.4
23


