Before using for the first time . . .
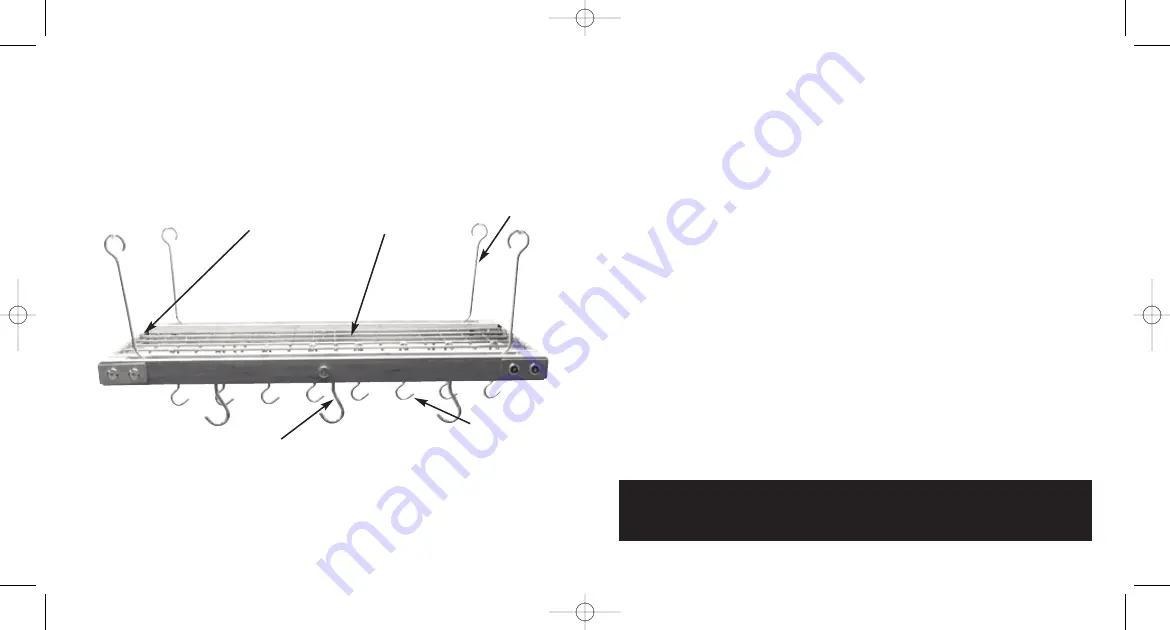
Remove all parts from packaging. Layout all parts and compare to the picture below to
ensure that you have all parts needed to install your Range Kleen Pot Rack. Should any part
be missing, please contact Customer Service at 419.331.8000. (Hours: Monday through
Friday, 8:00am-5:00pm EST)
Assembly (cont.)
3. Measure the distance between each pot rack hanging point and transfer your markings
to the ceiling, making sure that the markings fall in ceiling joist areas. We strongly
recommend that if you have any questions, you contact a professional to install your
new pot rack. Ceiling Eye Hooks MUST be inserted in ceiling joists. Do not use
sheetrock hangers.
4. Using a drill, drill the four holes in the ceiling where you have marked. Always use a drill
bit that is smaller than the diameter of your ceiling hooks. Make sure that you have drilled
into ceiling joists and not just sheetrock. Twist ceiling eye hooks into the four drilled holes.
5. Hang long Rack Hooks from the ceiling eye hooks.
6. Getting a partner to help you finish the installation, each hold opposite ends of the pot
rack. Together, attach the rack hooks provided to the pot rack. Double check to make
sure all 4 corners are attached properly before releasing the pot rack.
7. Easily level the pot rack by twisting the eye screws by half turns to lengthen or shorten
the side that needs adjustment.
8. Attach Pot Hooks to the grid to display and store your cookware and utensils. Drop the
Slide Pot Hooks through long slots on either side between the wooden rail to use to hang
pots and utensils.
9. To Clean - wipe off pot rack parts with a damp cloth and dry thoroughly.
1
2
Parts List:
(See Photo 1 Below.
)
Ceiling Eye Hook
(4 Pieces)
(Not Pictured)
Rack Hook
(4 Pieces)
Pot Hook
(8 Pieces)
Rectangle Rack
(1 Piece)
Grid Shelf
(1 Piece)
Assembly
1. Always protect the area directly below where you are going to hang your rectangle pot
rack by laying a drop cloth or tarp over the area.
2. Square up the rack directly under the area where you are going to attach to the ceiling.
NOTE: MAXIMUM LOAD LEVEL IS 30 POUNDS. DO NOT ATTEMPT TO PLACE MORE
THAN 30 POUNDS ON THE POT RACK. THIS COULD RESULT IN PERSONAL INJURY
AS WELL AS PROPERTY DAMAGE.
Photo 1
Slide Pot Hook
(6 Pieces)
Rect Pot Rack:Layout 1 4/23/10 1:52 PM Page 2


