background image

19

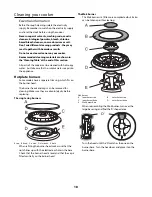
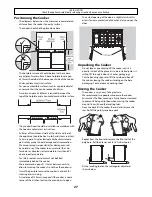
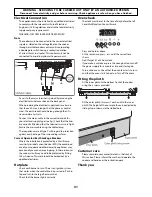
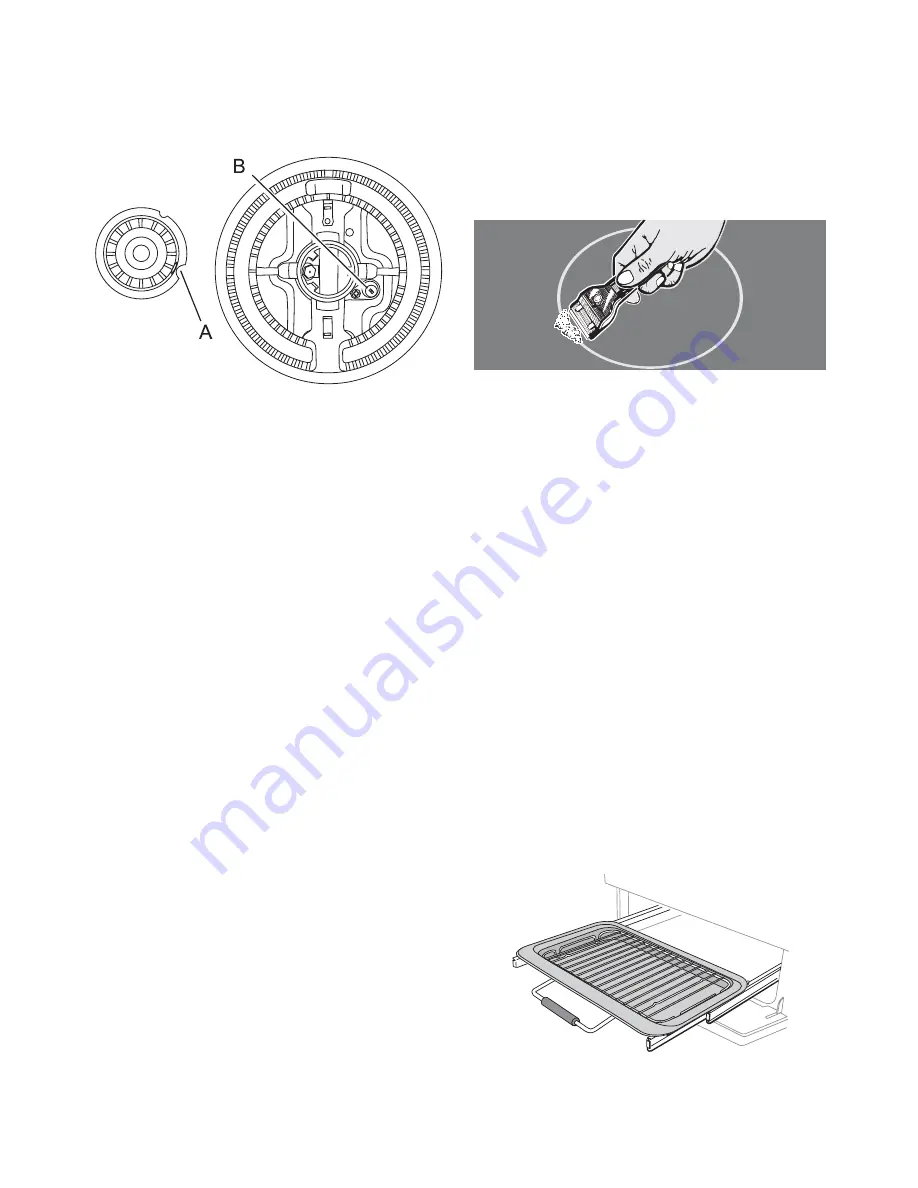
To fi t the small inner burner, fi nd the larger electrode 
notch in the burner rim. Line this up with the white 
ignition electrode and place the inner burner on the 
large base ring.


electrode notch   

ignition electrode

Now fi t the two burner caps, making sure that they 
are sitting down properly.

Ceramic Hob

It’s very easy to clean the Hob with a recommended 
cleaner. 

CAUTION

 — Do not use abrasive cleaners or pads, 

oven aerosols or pads or stain removers on the 
surface.

Daily care

First of all, be sure that the  heat indicator light is off  
and the cooking surface is cool. Apply a small dab, 
about the size of a 10p piece, of ceramic cooking 
cleaning cream in the centre of the area to be 
cleaned. Dampen a clean paper towel and work the 
cleaning cream on the cooking surface as if you were 
cleaning a window. As a fi nal step, wipe the cooking 
surface with a clean, dry paper towel. 

Cleaning for spills 

For spills and boil-overs that occur while cooking, 
turn the unit off  and wipe the area surrounding the 
hot zone with a clean paper towel. If a spill (other 
than a sugary substance) is on the hot zone, do not 
clean until the unit is completely cooled down and 
follow the instructions below (“Cleaning for burned-
on spills”). If you accidentally melt anything on the 
cooking or if you spill foods with a high sugar content 
(preserves, tomato sauce, etc.), REMOVE the spill 
IMMEDIATELY with a razor scraper, while the hob is 
still hot. IMPORTANT: Use an oven glove to protect 
your hand from potential burns. Scrape the major spill 
or melted material from the cooking zone and push 
into a cold area. Then, turn the unit “OFF” and allow to 
cool before cleaning further. After the cooking surface 
cools down and the heat indicator lights go off , use 
the daily care procedure as outlined above. 

Cleaning for burned-on spills 

Be sure that the heat indicator lights are off  and the 
hob is cool. Remove excess burned-on substance 
with a single-edged razor scraper. Hold the scraper at 
approximately a 30° angle to the surface and scrape 
off  the burned-on matter as you would scrape paint 
off  of a window. 

IMPORTANT: Take care when using a sharp scraper. 

When you have removed as much as possible with 
the scraper, clean using the daily care procedure as 
described above. 

To remove metal rub-off 

Sliding pans on the hob - especially aluminium or 
copper pans can leave marks on the surface. These 
marks often appear like scratches, but can be easily 
removed using the procedure described above for 
cleaning spills. If the rub-off  marks are especially 
stubborn, use the cleaning cream together with the 
razor scraper, using the technique described above. 
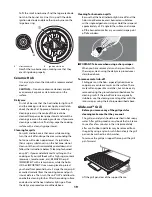
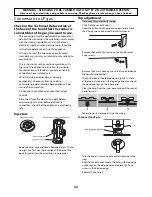
Glide-out™ Grill

Before you remove any of the grill parts for 
cleaning make sure that they are cool.

The grill pan and grid should be washed in hot soapy 
water. After grilling meats or any foods that soil, leave 
to soak for a few minutes in the sink immediately 
after use. Stubborn particles may be removed from 
the grid by using a nylon brush. Alternatively the grill 
pan can be washed in a dish washer.

To remove the grill pan support frame, pull the grill 
pan forward.

Lift the grill pan clear of the support frame.


Summary of Contents for Classic 110 Deluxe Duel Fuel

Page 1: ...Classic Deluxe 110 Dual Fuel Users Guide Installation Service Instructions U108810 03...

Page 2: ...have not used a dual fuel cooker before where we describe some basic guidelines on how to use your cooker safely Gas and Electricity on Make sure that the gas supply is turned on and that the cooker...

Page 3: ...tions Page 12 Oven shelves Page 14 The Handyrack Page 14 Oven light Page 15 Storage Page 15 Multi function Oven cooking guide Page 16 Oven Cooking chart Conventional and full Fan oven functions Page 1...

Page 4: ...hey will reduce burner performance and could damage the pan supports Avoid using unstable and misshapen pans that may tilt easily and pans with a very small base diameter e g milk pans single egg poac...

Page 5: ...ok burner only When you t the cradle check that the Wok is properly located on the front and rear ngers and that it is supported properly on a pan support Make sure the cradle is stable and that the W...

Page 6: ...hob panel This also helps prevent scratches and deposits such as lime specks Always use pans that are the same size as or slightly larger than the area marked on the hob top Using a smaller pan wastes...

Page 7: ...ddle ts onto two locating pins Check that it is securely located It is designed for cooking food on directly Don t use pans of any kind on it The griddle surface is non stick and metal cooking utensil...

Page 8: ...whole grill turn the knob clockwise To heat the right hand half turn it anticlockwise The neon indicator light by the grill control will come on For best results preheat for 2 minutes with the grill...

Page 9: ...ment and element de ector when placing or removing items from the oven For more detail on this oven see the section Multi function oven The fan in the right hand oven circulates hot air continuously w...

Page 10: ...al cooking To start and stop the oven automatically Before you set the clock you must have two numbers clearly in mind The cook period which is the period of time you want the oven to cook The stop ti...

Page 11: ...ing them with aluminium foil or speeded up slightly by cooking smaller quantities or placing in larger containers Very perishable foods such as pork or sh should be avoided if a long delay period is p...

Page 12: ...ly but the Rapid Response feature speeds this process up enabling you to commence cooking sooner To use the Rapid Response feature simply turn the function control knob to R and set the temperature yo...

Page 13: ...g the cooking time as the heat at the top of the oven is greater than at the base when using this function This is a fast intensive form of cooking keep an eye on the food cooking until you have becom...

Page 14: ...vel and push it fully back The Handyrack The maximum weight that can be held by the Handyrack is 5 5kg 12lb It should only be used with the supplied meat tin which is designed to t the Handyrack Any o...

Page 15: ...you change the bulb See the Troubleshooting section for details on how to change an oven light bulb Storage The bottom drawer is for storing oven trays and other cooking utensils It can get very warm...

Page 16: ...at least one runner space between them Place baking trays individual cake tins or baking dishes centrally on the oven shelf For best results pre heat the oven until the oven indicator light goes out C...

Page 17: ...ins per 500g 20 25mins 200 C 2 3 190 C 15 20mins per 500g 15 20mins Turkey 160 C 2 150 C 20 25mins per 500g 20 25mins 200 C 2 190 C 15 20mins per 500g 15 20mins Stu ed Poultry Cook at 200 C or at 200...

Page 18: ...ance Hotplate burners Some models have a separate trim ring which ts on the burner head The burner heads and caps can be removed for cleaning Make sure they are absolutely dry before replacing The sin...

Page 19: ...hand from potential burns Scrape the major spill or melted material from the cooking zone and push into a cold area Then turn the unit OFF and allow to cool before cleaning further After the cooking s...

Page 20: ...surface Hot soapy water soft cloth Splashback Rear Grille Enamel or Stainless Steel Hot soapy water soft cloth Cream cleaner with care if necessary Control panel Paint Enamel or Stainless Steel Warm...

Page 21: ...ter Wipe with a clean dampened cloth then polish with a dry cloth The oven doors should only be cleaned with a soft cloth wrung out in clean hot soapy water Ovens The ovens have removable panels that...

Page 22: ...0mA device This work should be carried out by a quali ed electrician Power failure In the event of a failure in the electrical supply the hotplate may be lit using a match Food is cooking too slowly t...

Page 23: ...s the clock illuminated General Safety Instructions In the UK The hotplate must be installed by a CORGI registered engineer The installation must be in accordance with the installation instructions an...

Page 24: ...f brought in contact with a hot surface unit and may cause severe burns Take great care when heating fats and oils as they will ignite if they get too hot Use a deep fat thermometer whenever possible...

Page 25: ...Use regulations 1998 The relevant Building IEE regulations Provision of Ventilation This appliance is not connected to a combustion products evacuation device Particular attention shall be given to th...

Page 26: ...relevant standards MULTIMETER for electrical checks You will also need the following tools 1 Electric drill 2 Masonry drill bit only required if tting the cooker on a stone or concrete oor 3 Rawlplug...

Page 27: ...mperature For safety reasons curtains must not be tted immediately behind the cooker We recommend a gap of 1110mm between units to allow for moving the cooker Do not box the cooker in it must be possi...

Page 28: ...spirit level on a shelf in one of the ovens to check for level Place the cooker in its intended position taking care not to twist it within the gap between the kitchen units as damage may occur to the...

Page 29: ...ied by with the cooker should be tted when the cooker is connected to a exible gas supply When tting a stability bracket read these instructions together with the lea et supplied with the bracket 1 Pl...

Page 30: ...nwards The connector is located just below the hotplate level at the rear of the cooker For Natural Gas the exible hose must be in accordance with B S 669 For LP Gas it should be capable of 50mbar pre...

Page 31: ...ction against over heating of the surrounding surfaces Current Operated Earth Leakage Breakers Where the installation is protected by a 30 milliamp sensitivity residual current device RCD the combined...

Page 32: ...etion Do not use re conditioned or unauthorised gas controls Disconnect from the electricity supply before commencing servicing Before electrical re connection check that the appliance is electrically...

Page 33: ...appliance is gas sound The gas pressure can be measured at one of the left hand hotplate burner jets Lift o a burner head Fit the pressure gauge to the jet Turn on the hotplate burner and turn on and...

Page 34: ...COMPONENTS TURN OFF THE GAS SUPPLY Check the appliance is gas sound after completion of service When checking for gas leaks do not use washing up liquid this can corrode Use a product speci cally man...

Page 35: ...Ignition Switch Change the gas tap as detailed in Section 9 6 To Remove Clock Disconnect from electricity supply Remove the Control Panel See 1 Pull o the timer control button s Remove the timer moun...

Page 36: ...priate burner and t the new one Reassemble in reverse order Check burner operation is satisfactory RH Wok burner Disconnect the burner feed pipes at the burner Fit the new one and reassemble in revers...

Page 37: ...ve screws securing the electric cover to the back sheet and remove cover Disconnect the 3 terminals connected to the fan noting their position Remove oven inner back see 20 Hold the fan blade and remo...

Page 38: ...hob Reassemble in reverse order Check operation of the ceramic hob 25 To Replace a Hob Element Remove the hotplate see 2 The elements are now accessible Reassemble in reverse order Check operation of...

Page 39: ...Connections Gas Electric Rp 1 2 at rear right hand side 220 240V 50Hz Ratings Natural Gas L P Gas Hotplate Injector Injector Right hand Wok burner 3 65kW internal 80 3 5kW 255g h internal 54 external...

Page 40: ...op element outer pair B5 Multi function oven browning element inner pair B6 Multi function oven fan element B7 Multi function oven fan C1 Hob energy regulator C2 C3 Hob elements D Clock E Earth F1 Rig...

Page 41: ...41...

Page 42: ...42...

Page 43: ...43...

Page 44: ...040506...

Reviews: