


36
WARNING SERVICING TO BE CARRIED OUT ONLY BY AN AUTHORISED PERSON
Disconnect from electricity and gas before servicing. Check appliance is safe when you have finished.
9. To
Change
Hotplate
Taps
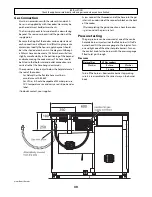
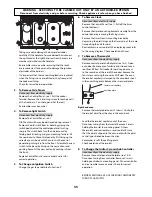
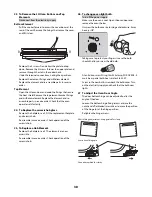
Disconnect from the electricity supply.
Remove the control panel and hotplate (see 1 & 2).
Undo compression fi tting at the rear of the tap. Remove
the fi xings that secure the tap to the gas rail. Disconnect
the ignition switch wiring.
Remove the tap. Remove and discard the gasket seal.
Fit new gasket seal to replacement tap. Re-assemble in
reverse order. Check the appliance is gas sound. Check
hotplate ignition.
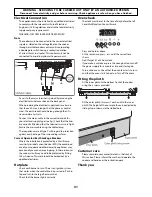
10. To Change Hotplate Burner Injector
Remove burner cap and head. Remove old jet. Fit new
injector. Reassemble in reverse order. Check appliance is
gas sound.
11. To Change Hotplate Burner Electrode
Lift off pan supports, remove burner cap. Remove the
screw holding the electrode. Pull electrode vertically
up suffi
ciently to grip the lead between thumb and
forefi nger. Pull off the electrode, but keep hold of the
lead. Fit new electrode to the lead. Fix electrode in
burner with screw. Replace burner cap. Check the burner
ignition. Replace pan supports.
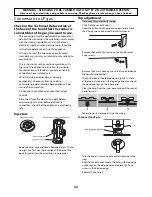
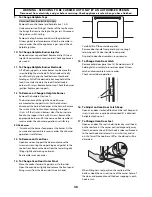
12 To Remove or Change a Hotplate Burner.
Remove the hotplate tray (see 2).
The burners except the right hand wok burner
are mounted on support struts. For these burners,
disconnect the burner feed pipes at the burner. Remove
the screws at the front and rear holding the support
stru ts. Lift the strut and burners clear. The burners are
fi xed to the support struts with 2 screws. Remove the
appropriate burner and fi t the new one. Reassemble in
reverse order. Check burner operation is satisfactory.
RH Wok burner
Disconnect the burner feed pipes at the burner. Fit the
new one and reassemble in reverse order. Check burner
operation is satisfactory.
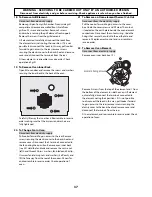
13. To Remove an Oven Door
Open oven door. Support the door and remove the
two screws securing the upper hinge and gasket to the
cooker front. Remove the door from the lower hinge by
lifting slightly and moving outwards.
Reassemble in reverse order.
14. To Change Oven Door Outer Panel
Move the cooker forward to gain access to the sides.
Open the oven door slightly and remove the front panel
fi xing screws from the door sides (two each side).
Carefully lift off the outer door panel.
Remove door handle from panel by unscrewing 2
retaining nuts. Fit door handle to new panel
Fit panel to door. Reassemble in reverse order.
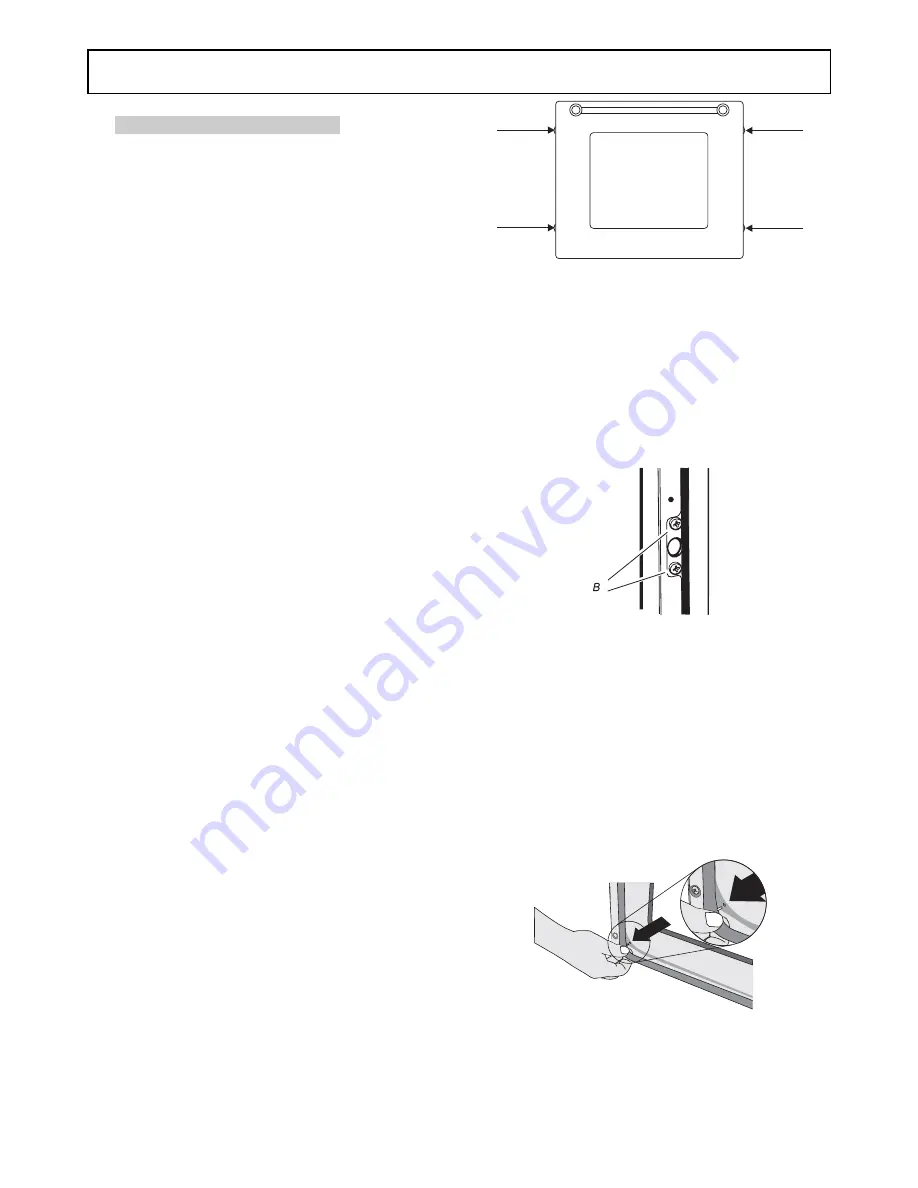
15. To Change Oven Door Latch
Remove outer door panel (see 14). Remove screws ‘B’
holding latch assembly to inner door panel. Fit new
catch and reassemble in reverse order.
Check correct door operation.
16. To Adjust an Oven Door Catch Keep
Open oven door, slacken off locknut at base of keep, and
screw in or out as required until required fi t is obtained.
Retighten locking nut.
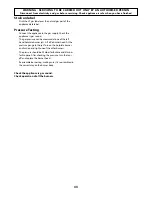
17. To Change Oven Door Seal
Open oven door. The seal is held in place by small hooks
on the rear face. At the corner pull seal diagonally away
from the door centre until that hook is released. Proceed
to the next hook and release it in a similar way, and so
on. Use force if the hooks are stiff , as the old seal will be
discarded.
When fi tting new seal, position the seal join at the
bottom. Hook the new seal in one of the corner holes of
the door, and proceed round the door snapping in each
hook in turn.
Summary of Contents for Classic 110 Deluxe Duel Fuel
Page 1: ...Classic Deluxe 110 Dual Fuel Users Guide Installation Service Instructions U108810 03...
Page 41: ...41...
Page 42: ...42...
Page 43: ...43...
Page 44: ...040506...


